Review LCT AS-VAL AEG et comparatif AS-VAL NPO

25/04/2014
As usual, PURPLE is for English speaking readers, and BLACK is pour les lecteurs francophones !
Bouh qu’il est lent le Dingo ! Effectivement, j’ai reçu la réplique il y a une semaine après seulement 2 jours de transit depuis la boutique WGC, mais que voulez-vous, si j’ai pris le temps de faire un unboxing à l’arrache, puis les tests de tirs, j’ai un peu trainé sur la review.
Mais vieux motard que jamais, elle est là, elle arrive et j’ai encore tout démonté pour vous faire voir ce que cette nouvelle production LCT, fantasme de nombreux joueurs, a dans le ventre ! C’est parti !
Meh, that Dingo is soooo slooowww ! Yes I am, it is true that I received the replica one week ago, but if I managed to save time to shoot an unboxing video (with ENG subs) and shooting tests, I took my time when came the time to write the review.
But better latte than manoeuver (I know, this is a terrible one !) this is it, and once again I stripped the gun to the guts to show you what this latest LCT product hides. Let’s roll !
Chuuut, j’peux pas trop vous en dire, c’est un fusil d’assassin ce truc ! Tout ce qu’il faut savoir (enfin, pas trop poussé hein) sur le modèle RS c’est ICI.
Well, wiki will be more thorough than me 😉

Pas de fioritures, un autocollant des nouveautés de la marque (bien que seul le VAL soit disponible pour le moment…), à savoir le VSS, le SR-3 et el SR-3M, de quoi en faire saliver plus d’un !
La boite est en carton assez robuste et à l’intérieur de la mousse compacte calle tous les éléments comme il faut.
No embellishment here, a sticker introducing the new products of the brand : VSS, SR-3 and SR-3M, yummy !
The carboard bow is sturdy. Inside, everything is well kept in compact foam.


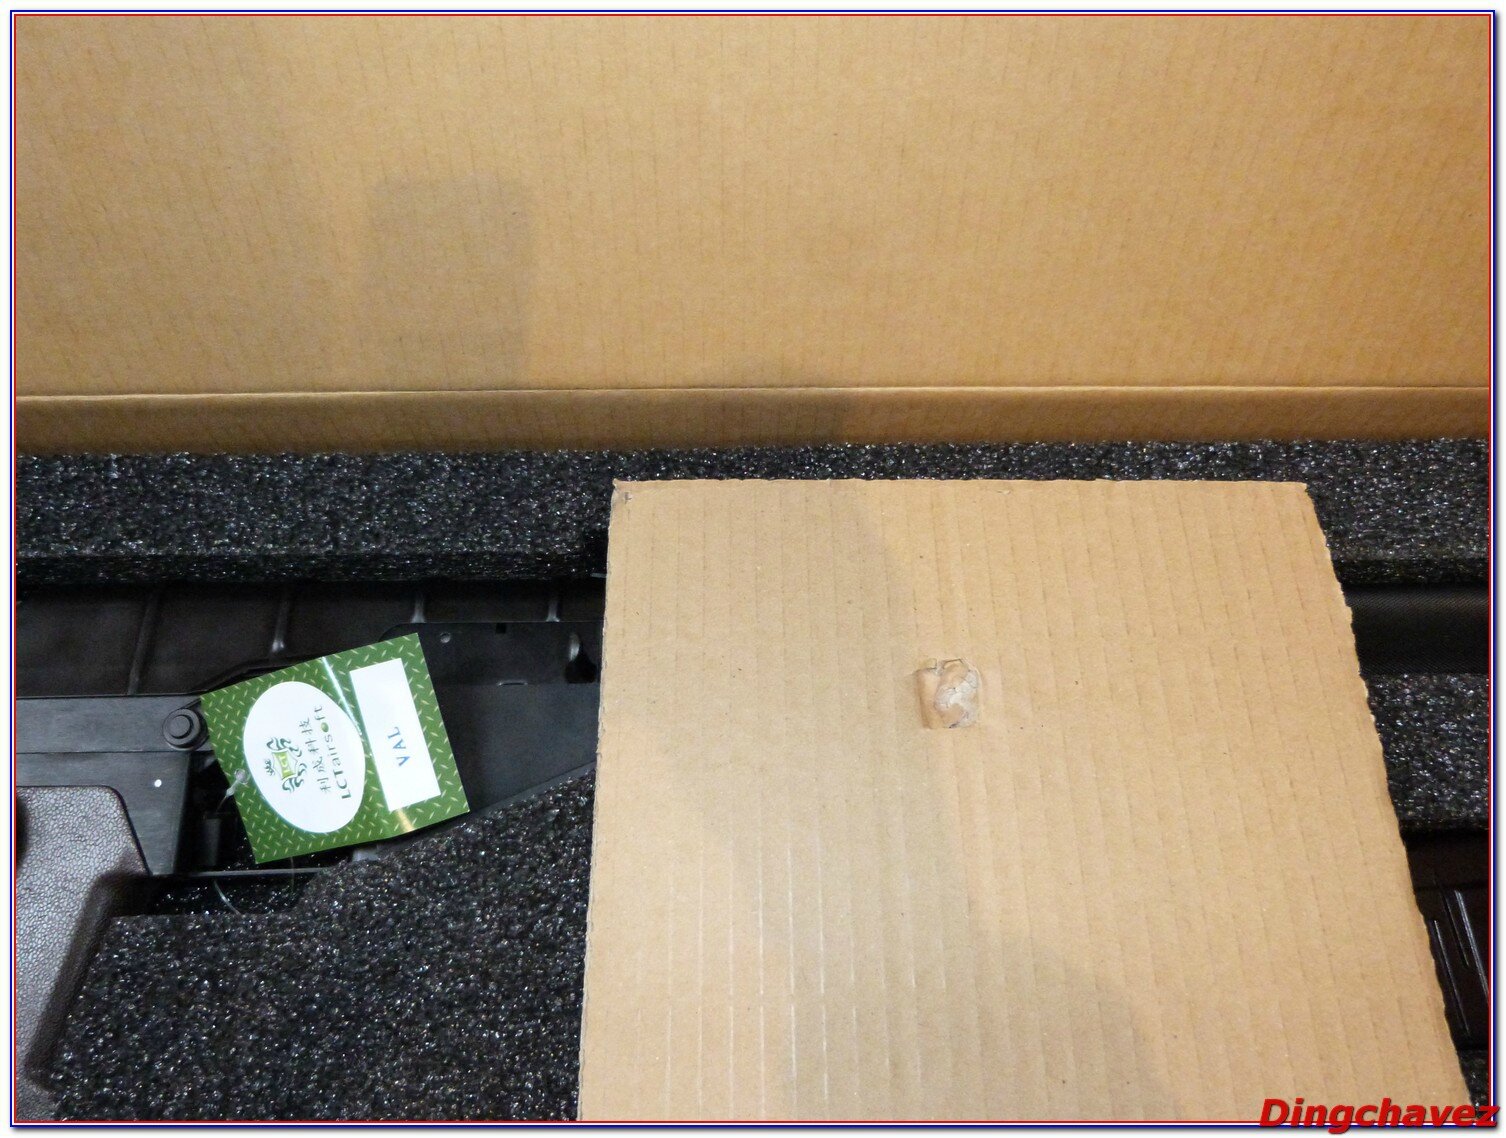
Le levier d’armement est protégé par un morceau de carton épais.
The charging lever is protected with thick cardboard.
 La boite contient :
-La réplique, en acier et ABS; Elle pèse 3,4 kilos et mesure entre 63,5 et 87,5 cm.
-Un chargeur de 50 coups.
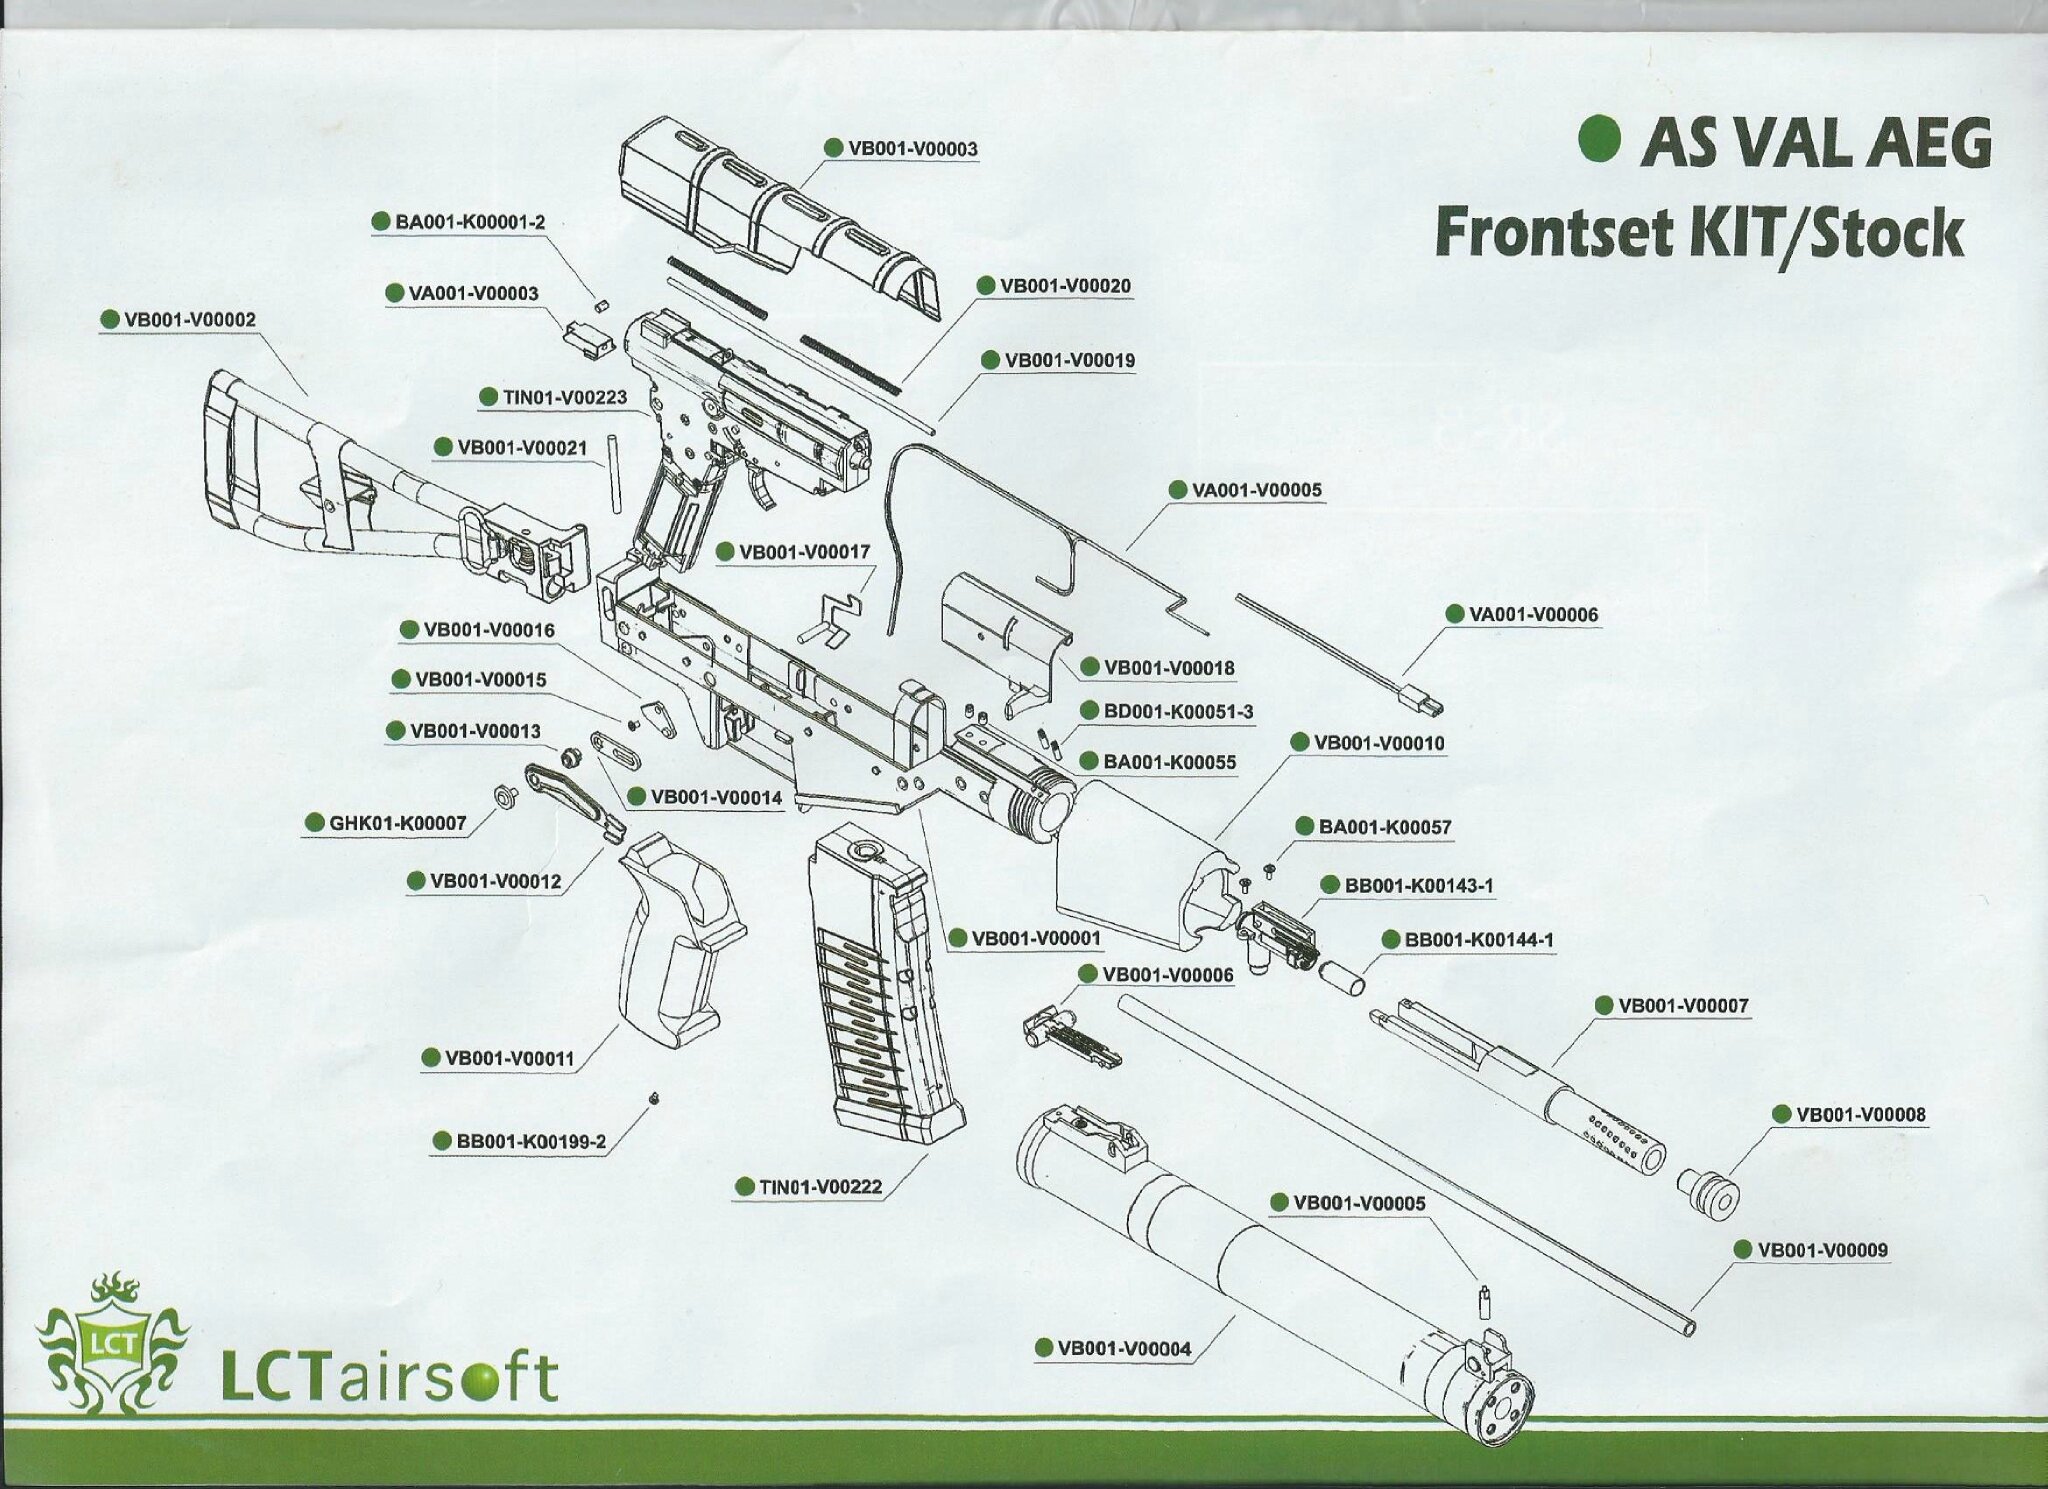
-Un dépliant faisant office de guide de démontage, d’éclaté et de poster présentant les nouveautés LCT.
So what’s in the box ?
-The gun, made of steel and ABS. It weights 3.4 kilos and is between 63.5 and 87.5 cm long.
-A 50BB mid cap magazine.
-A users manual/part list/poster.


C’est froid, c’est relativement lourd pour sa taille, acier oblige, mais la manipulation est aisée, pas de déséquilibre flagrant. Le plastique composant la poignée et le garde-main a une texture agréable. Seule une légère trace de moulage fait un peu trop plastoc, mais c’est un avis personnel…
It’s cold, it’s heavy for its size (thank you mister steel !) but handling is easy, there is no balance issue. Personal advice though : the molding marks on the pastic grip and handguard are a little bit too… plastic-like…

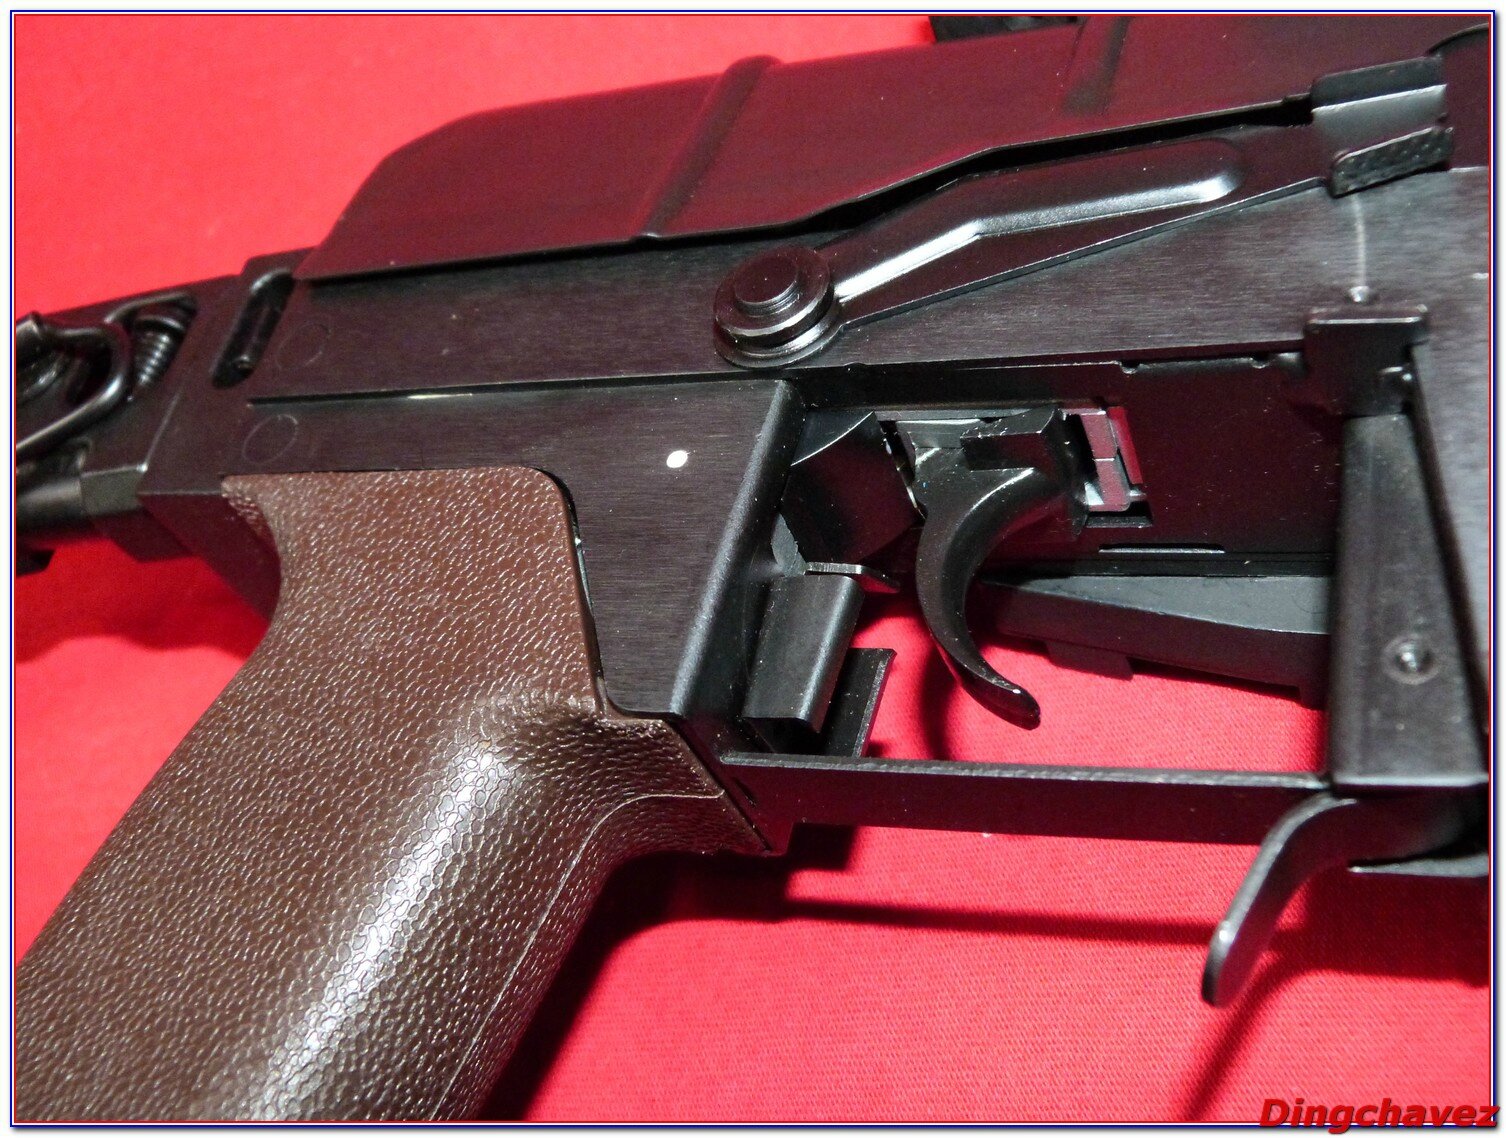
Le sélecteur de tir est situé derrière la queue de détente. Seul le marquage situé sur le corps permet d’en déchiffrer le fonctionnement. Ici le semi.
The fire selector is behind the trigger. Only a mark on the body help decypher how it works.
Here is semi.

Et là l’automatique.
And here is automatic mode.

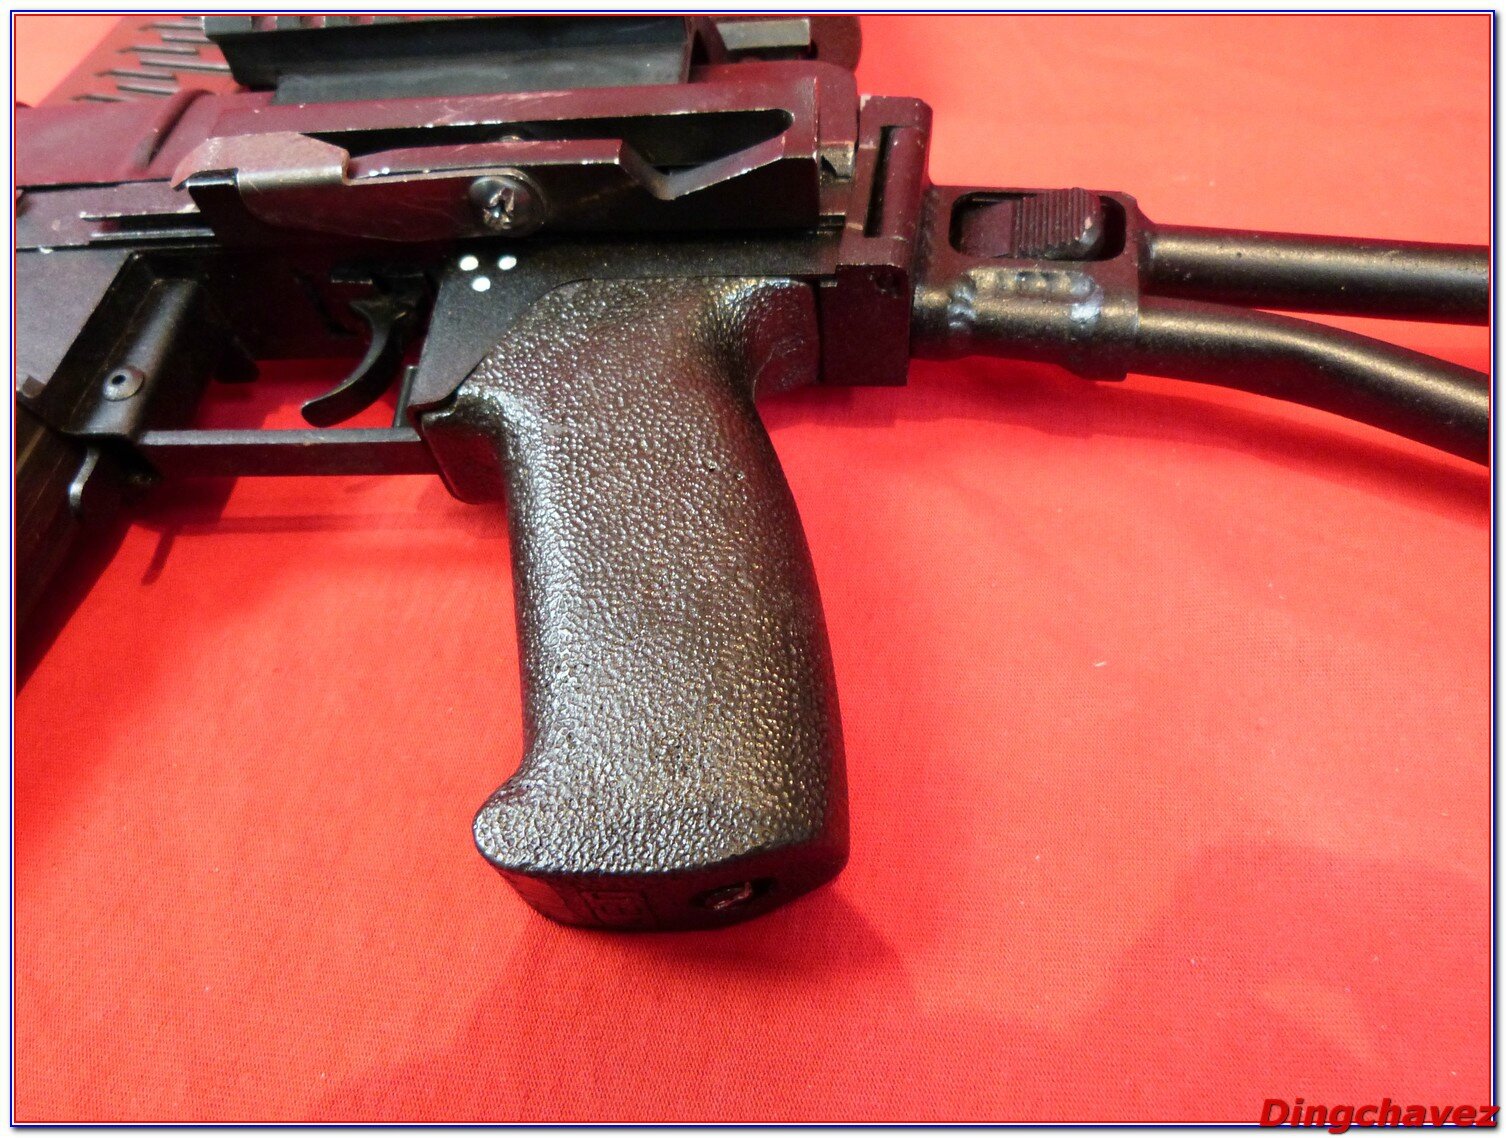
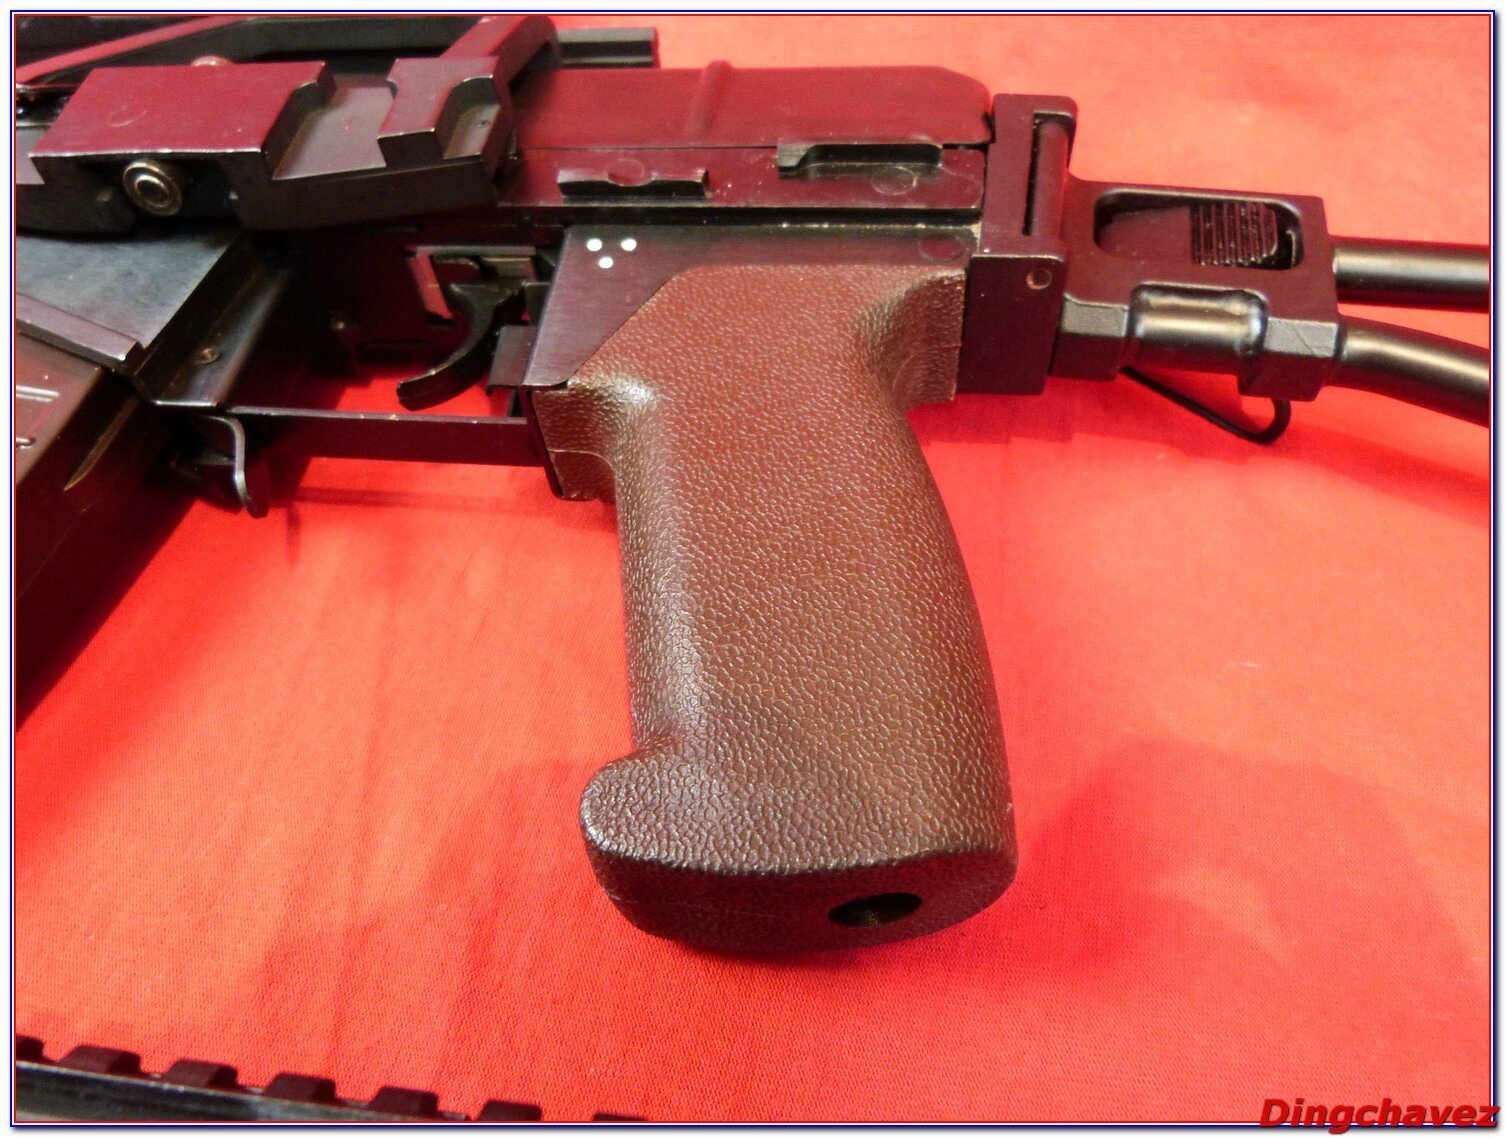
La poignée pistolet couleur marron/prune selon comment on la regarde. Elle est confortable et pas trop épaisse.
The maroon/plum (depending on your angle of vision) pistol grip. It is not too thick and quite comfortable.
 Le garde-main est fait du même plastique, notez l’emplacement pour attacher une sangle à l’avant du GM.
The handguard is also made of plastic. Notice the sling ring at the front.
 Le loquet de verrouillage de chargeur est également spécifique à la réplique.
The mag catch is also specific to this gun.

Le levier de sûreté, attention, contrairement aux AKs, il ne permet pas de passer du semi au full.
The safety lever. Be aware that it won’t allow semi/full setting.

La fausse culasse. Derrière se cache le bloc hop-up. Mystérieusement LCT n’a pas pensé que l’ergonomie de la réplique rendait difficile le réglage sans démonter le capot.
The dummy bolt. Behind it, the hop-up unit. This is a mystery to me, but how didn’t LCT think that the gun design prevent an easy hop-up setting.
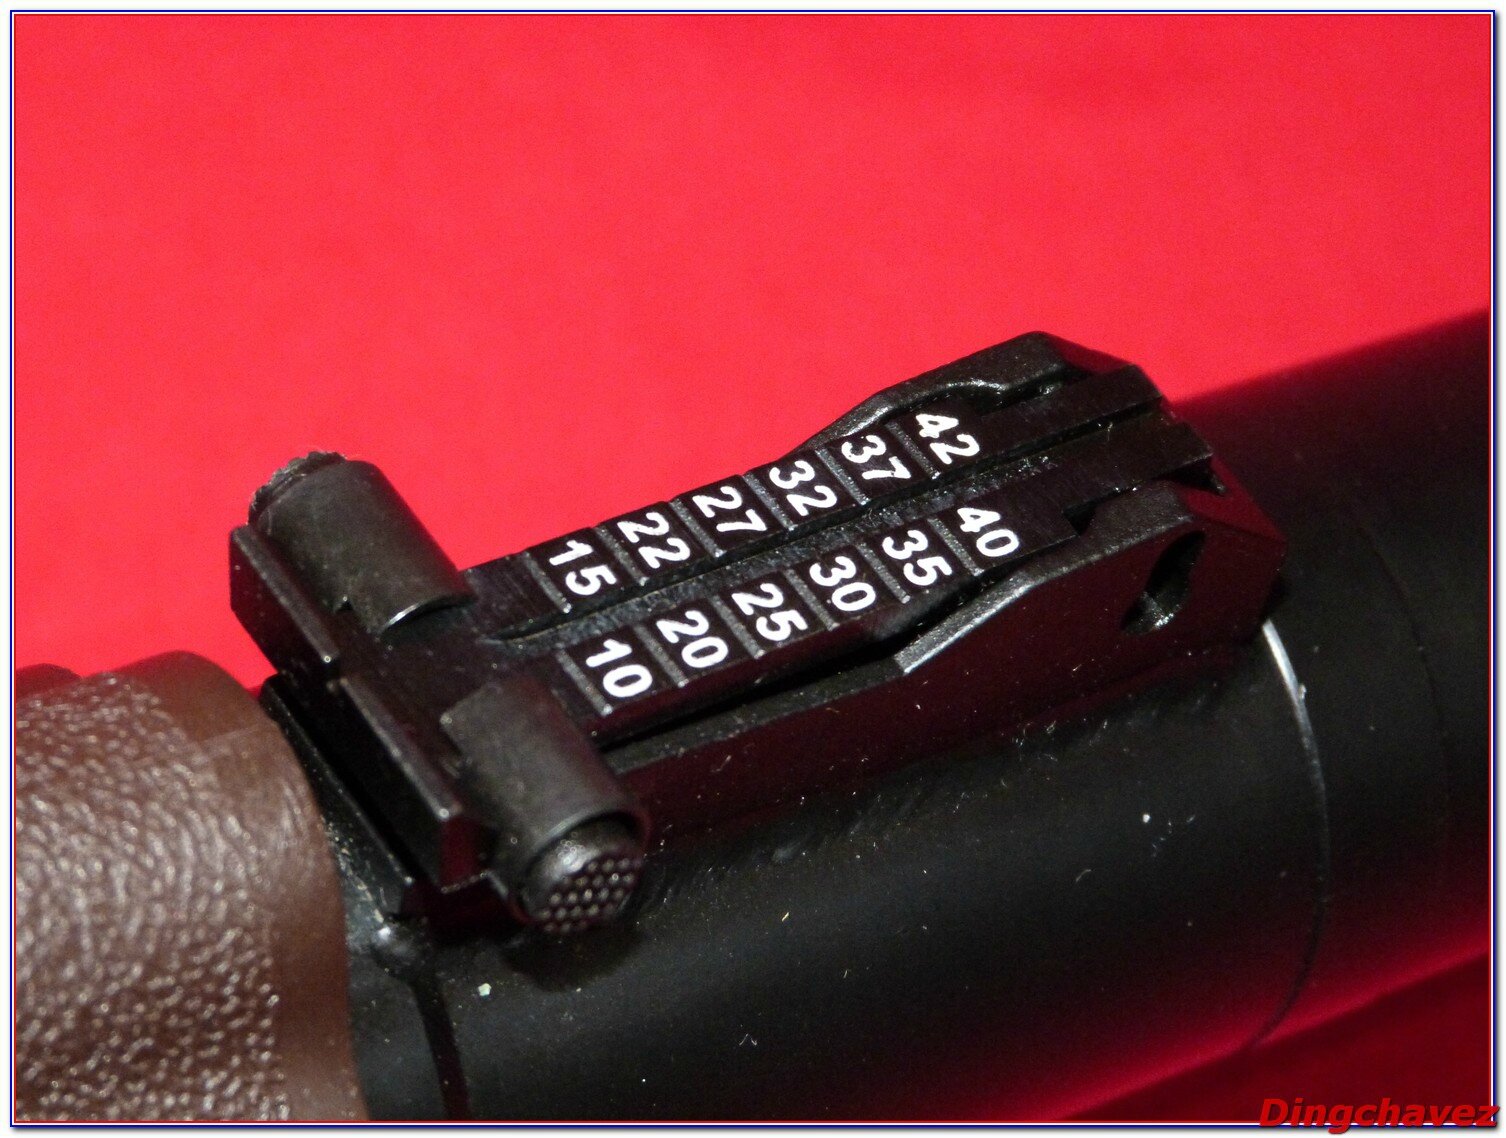
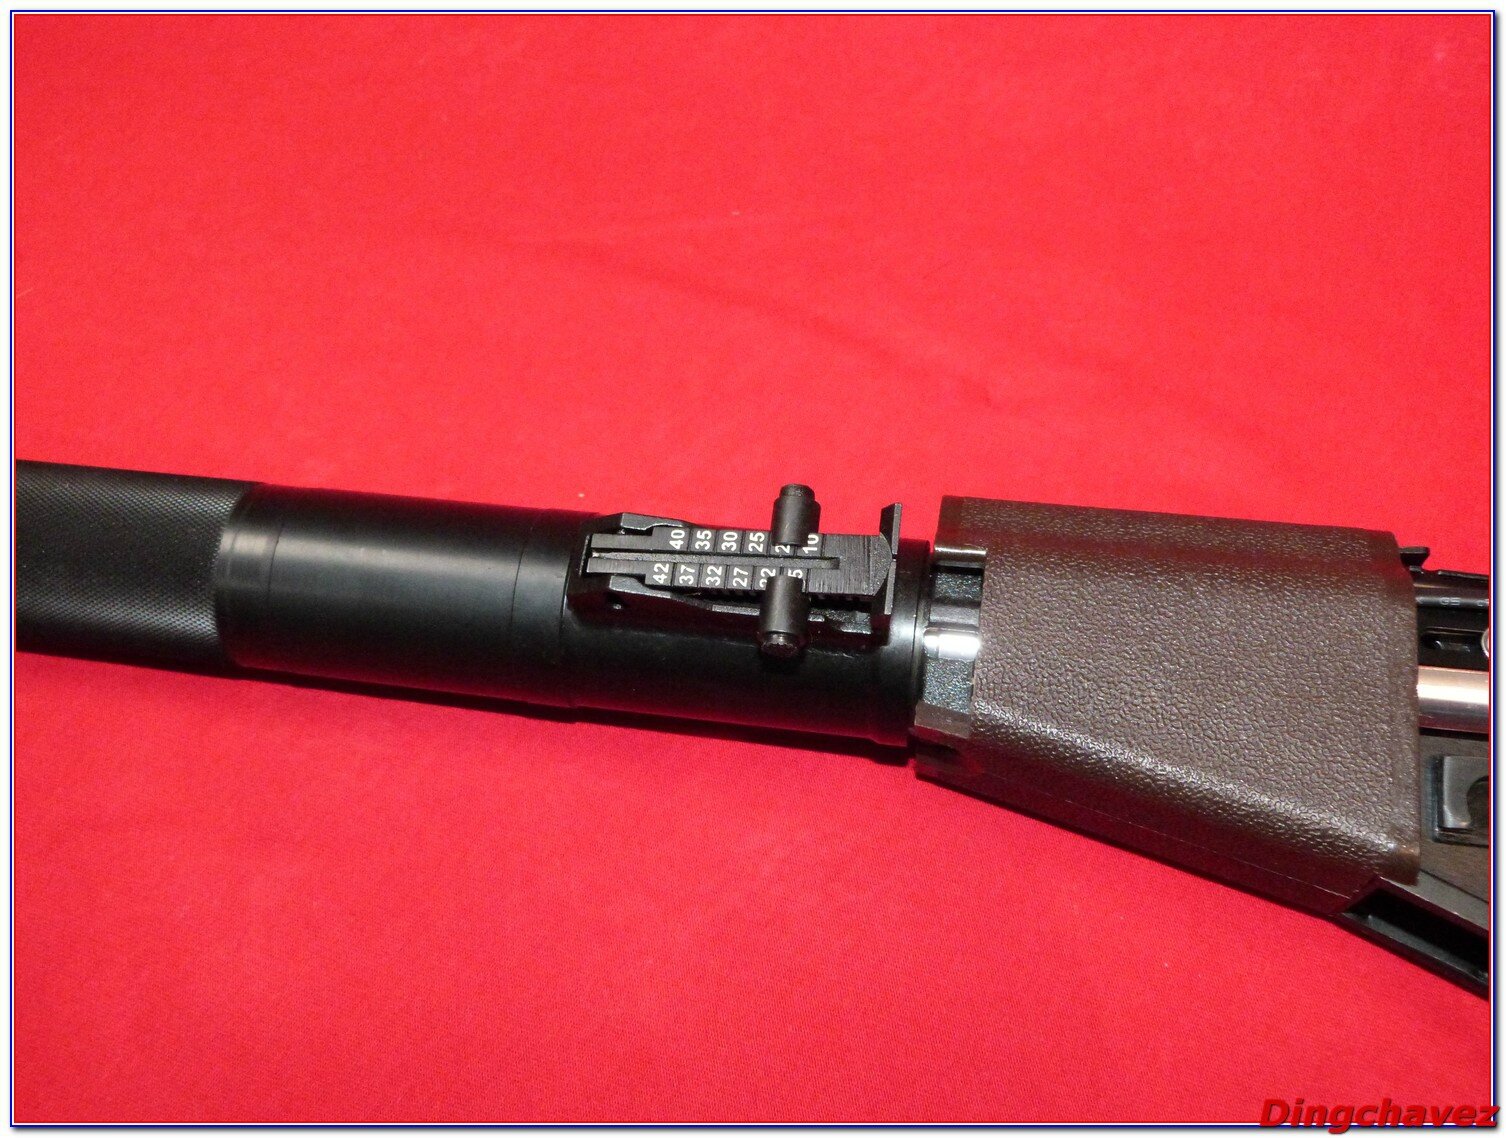
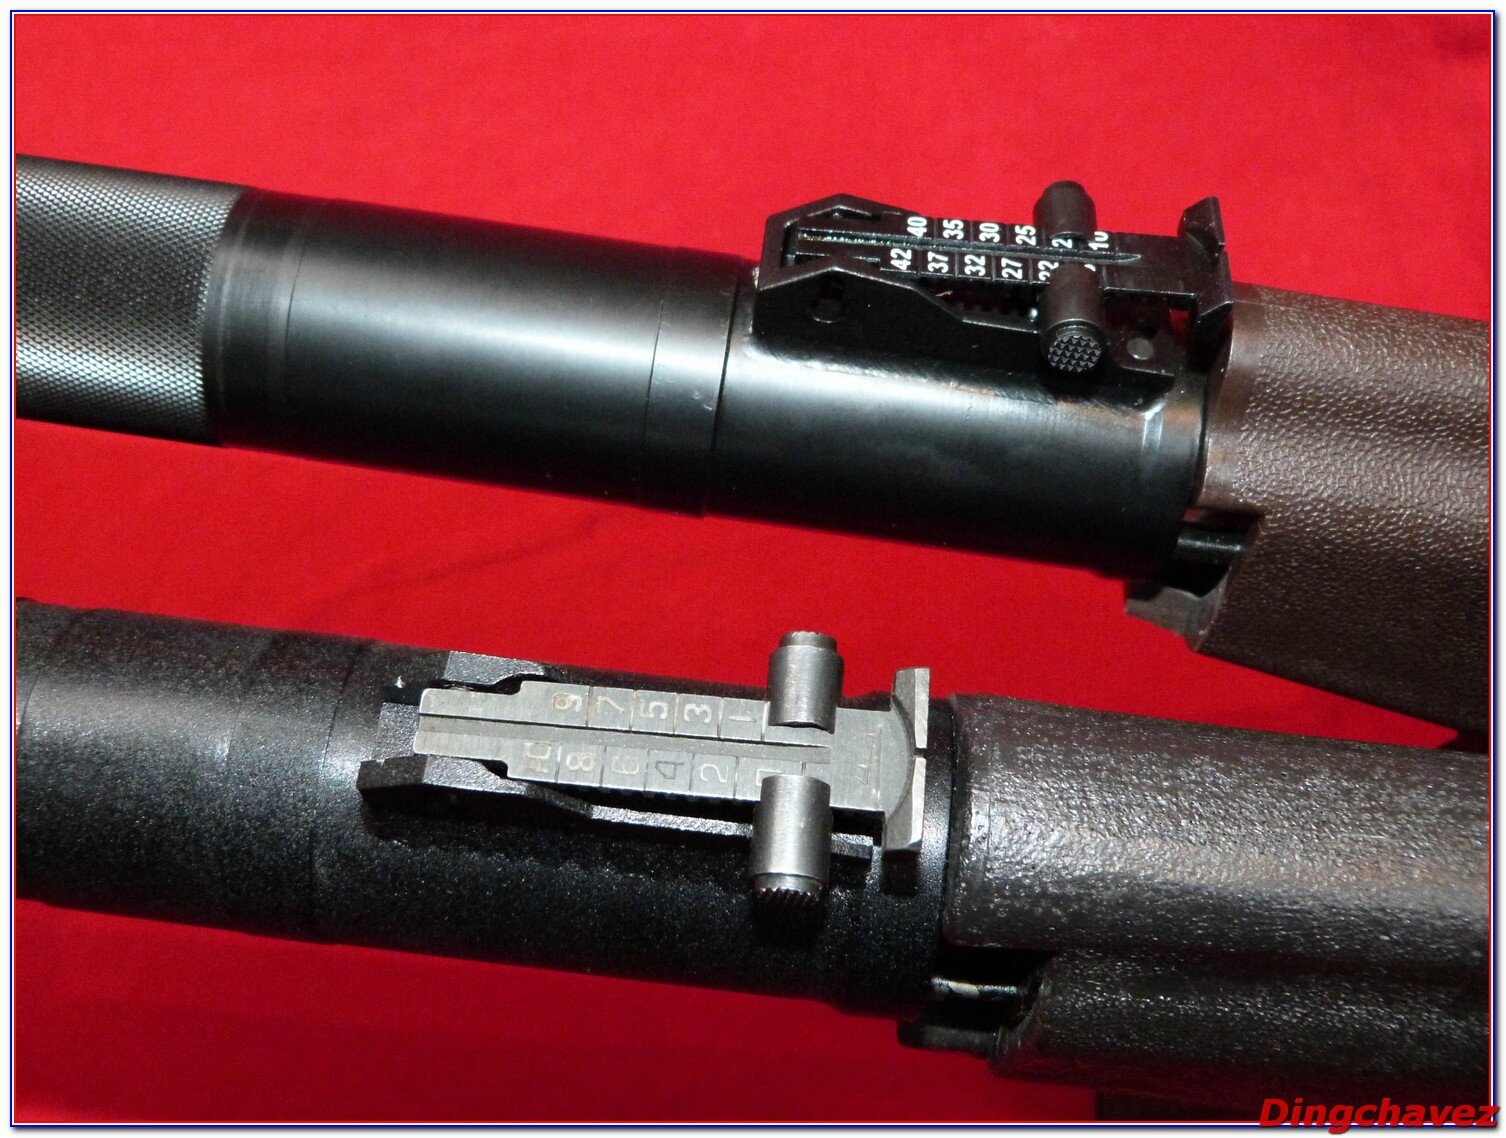
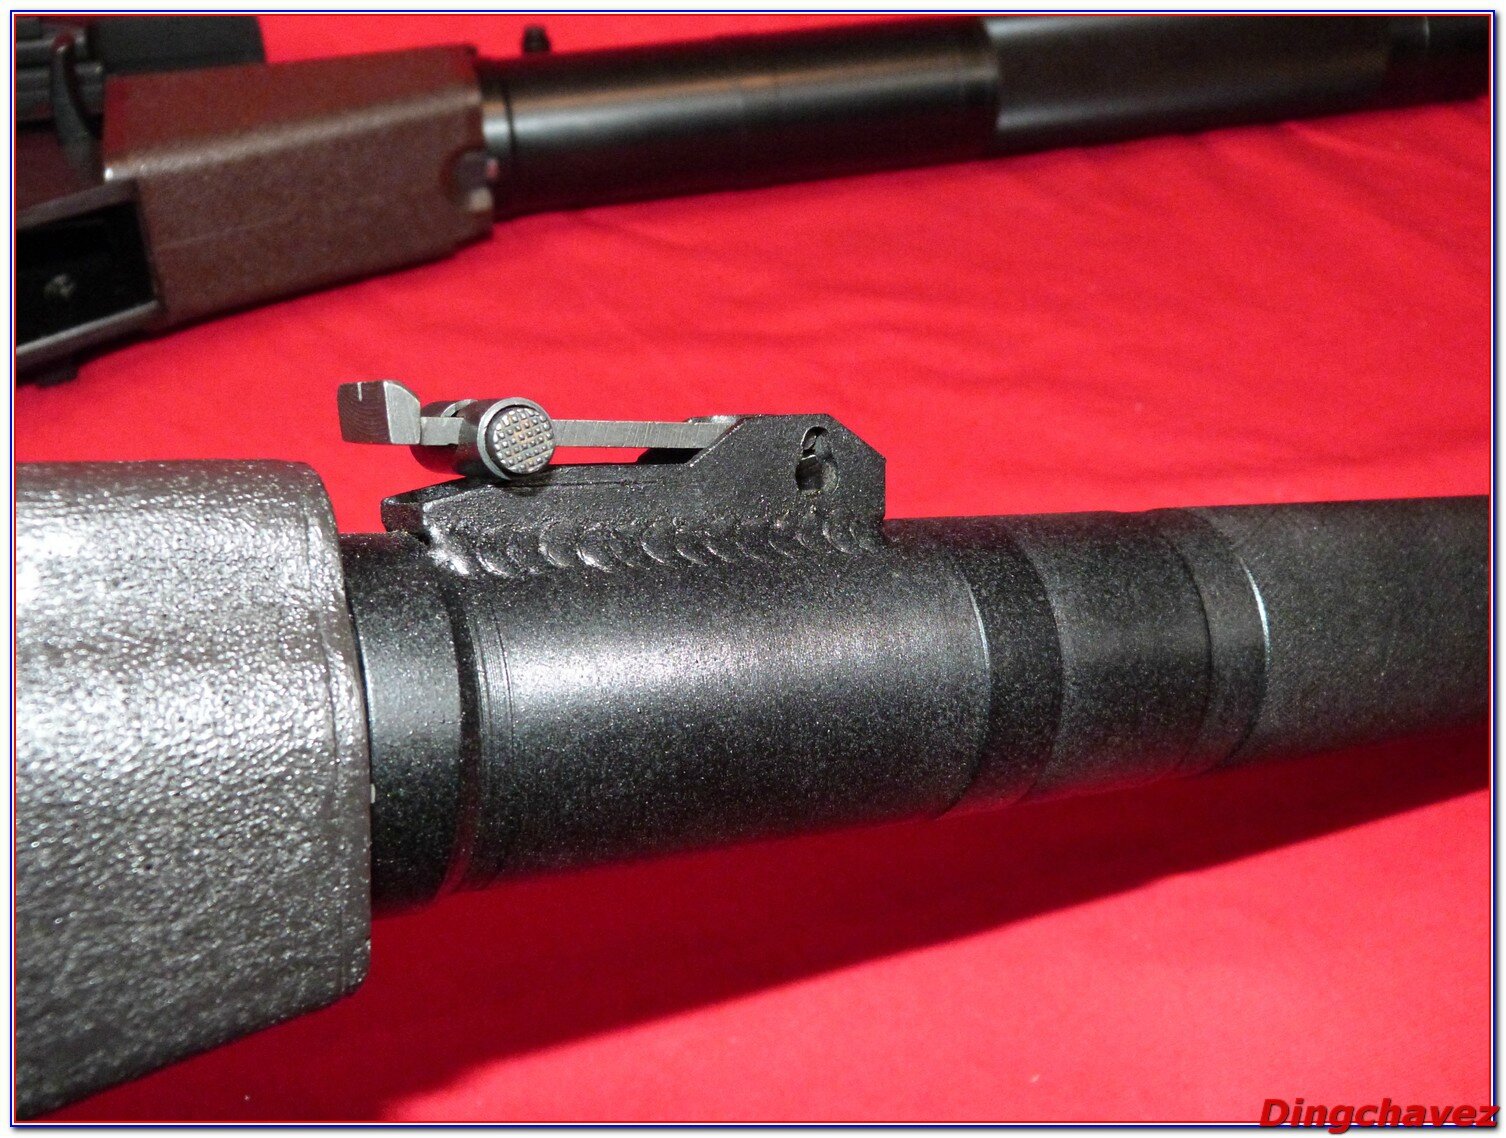
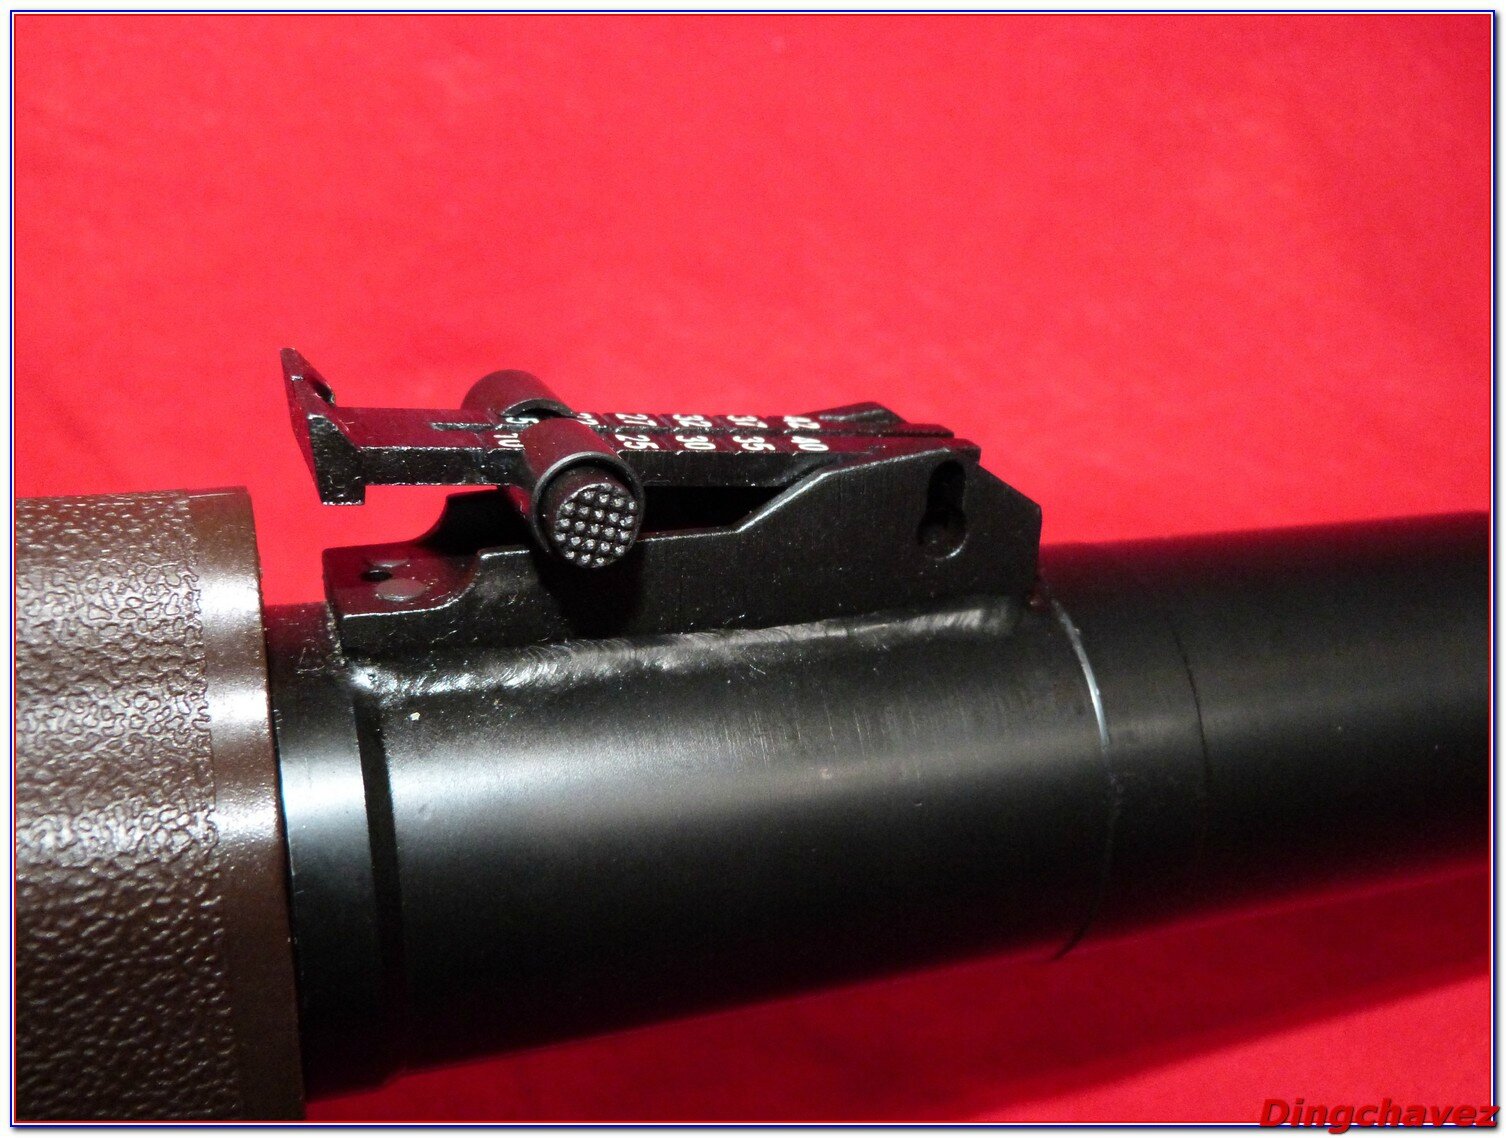
La hausse est graduée de 10 à 42, certainement 100 à 420 mètres étant donné que la portée maximale du modèle réel est de 400 mètres.
The rear sight is graduated from 10 to 42, certainly 100 to 420 meters as the real gun max range is about 400 meters…
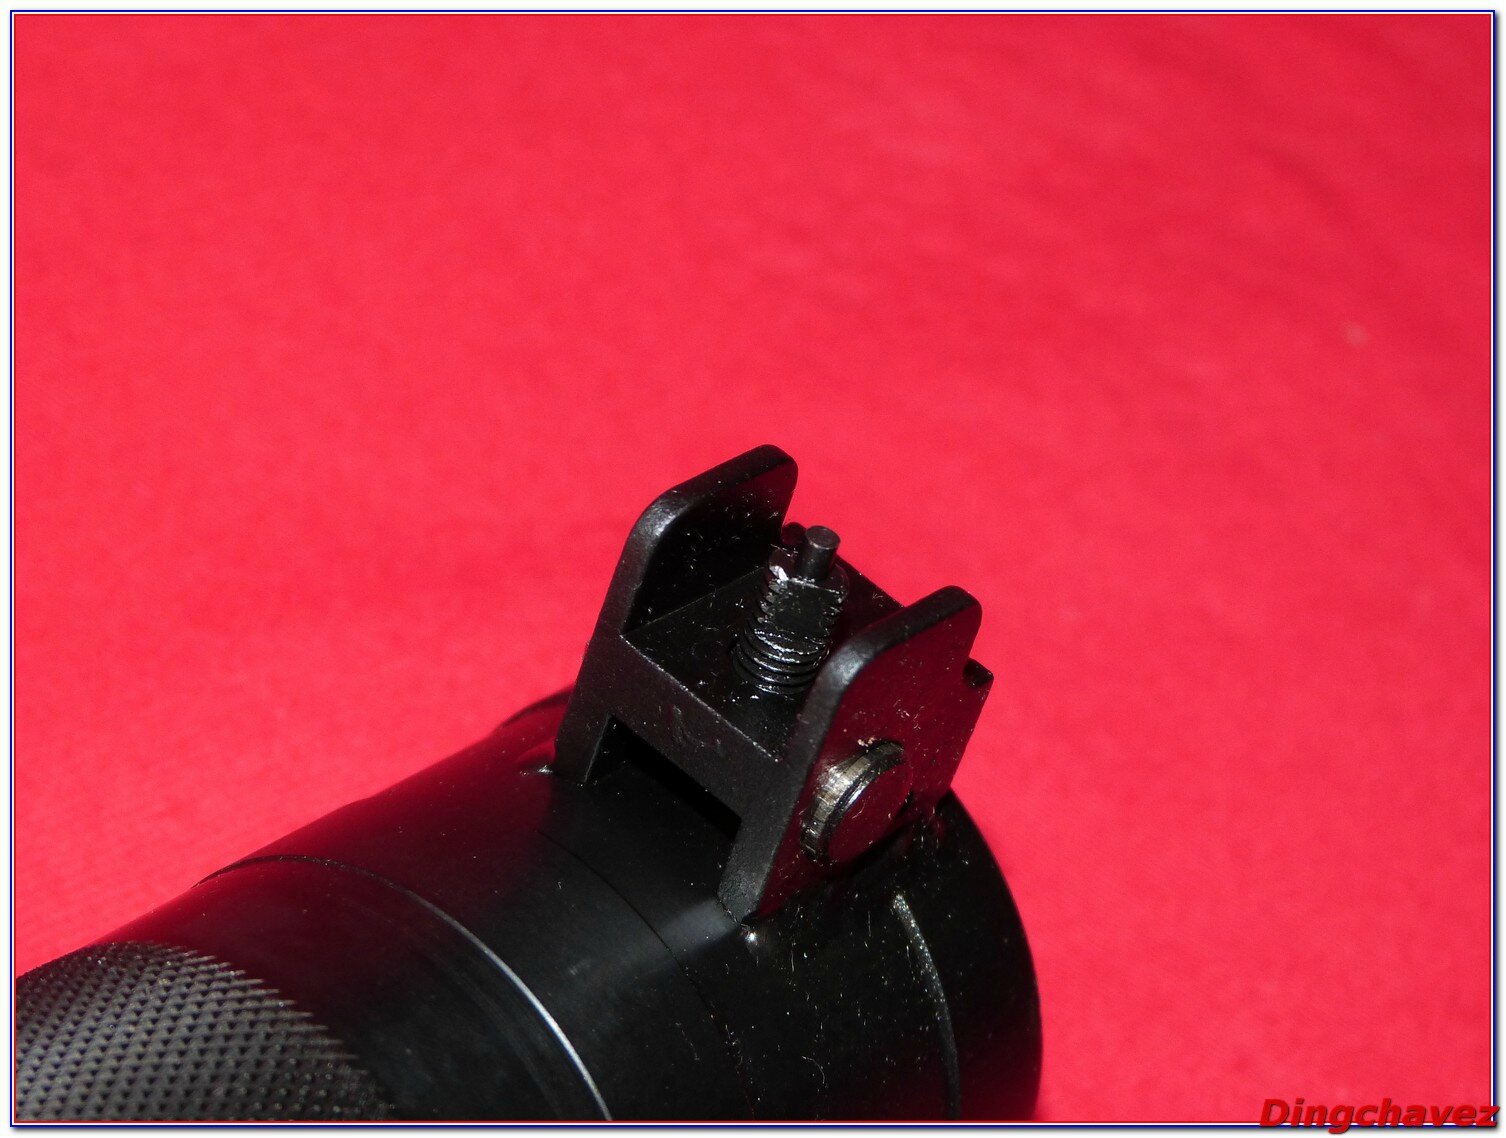
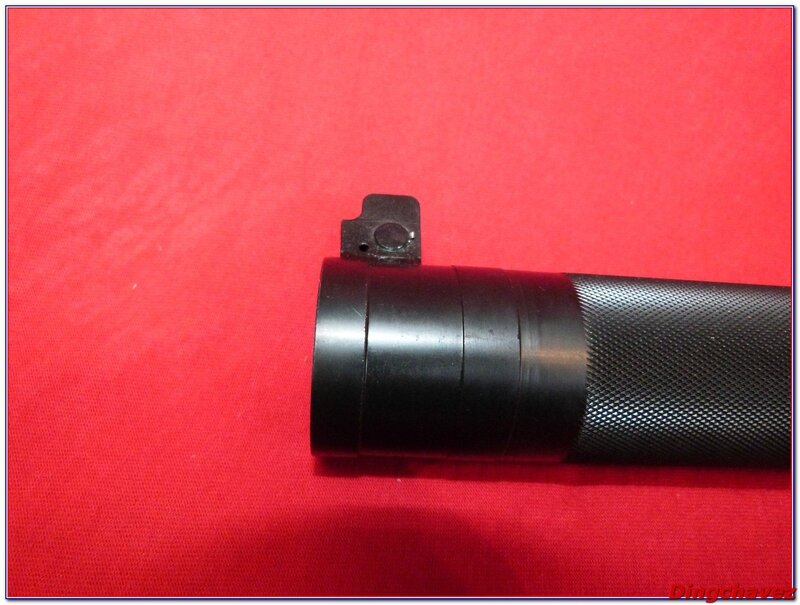
Le cran de mire est réglable en hauteur.
The front sight can be adjusted in height.
Les organes de visée sont tous les deux soudés sur le canon externe.
Both sights are weld on the outer barrel.
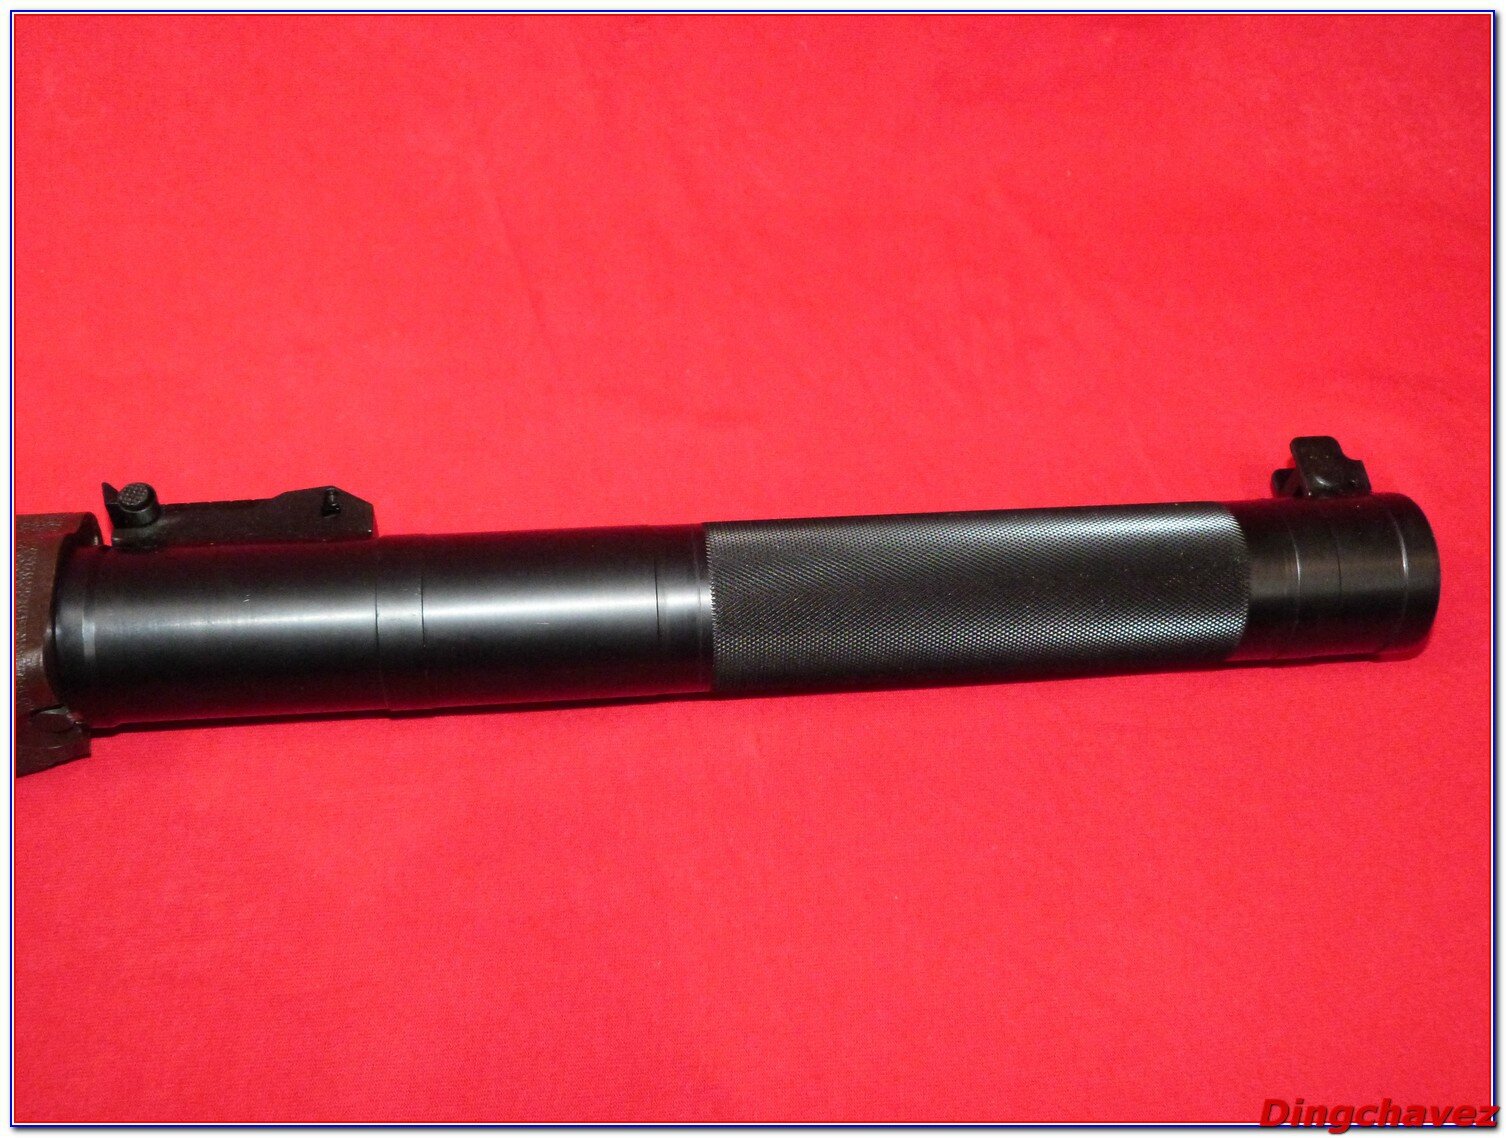
La visée est intuitive mais la plupart des joueurs préféreront ajouter un optique.
Aiming is quite intuitive, however, most players will mount optics on the gun.

Et voici le rail latéral. Il vous faudra un montage AK si vous ne voulez pas que cela touche le capot, les montages SVD sont donc inutiles.
And here is the side rail. You’ll need an AK mount if you don’t want your optic to be blocked by the top cover. SVD mounts are useless.

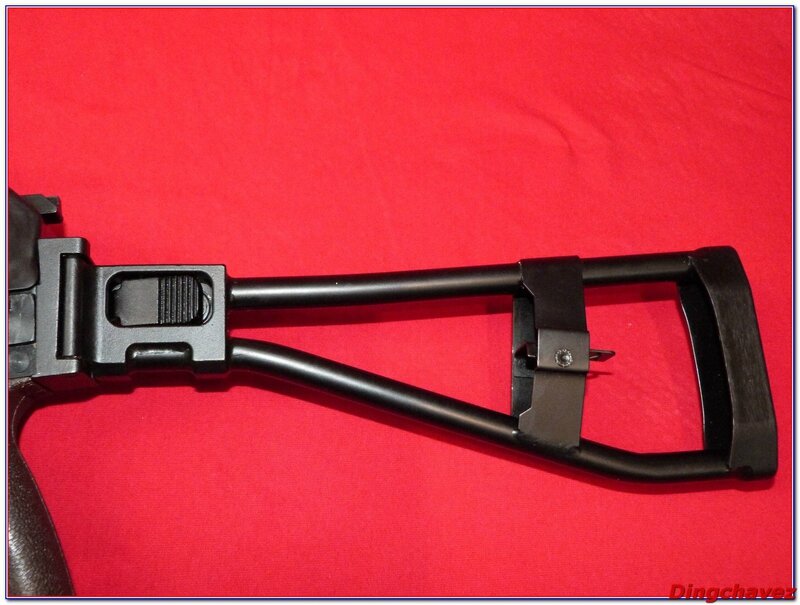
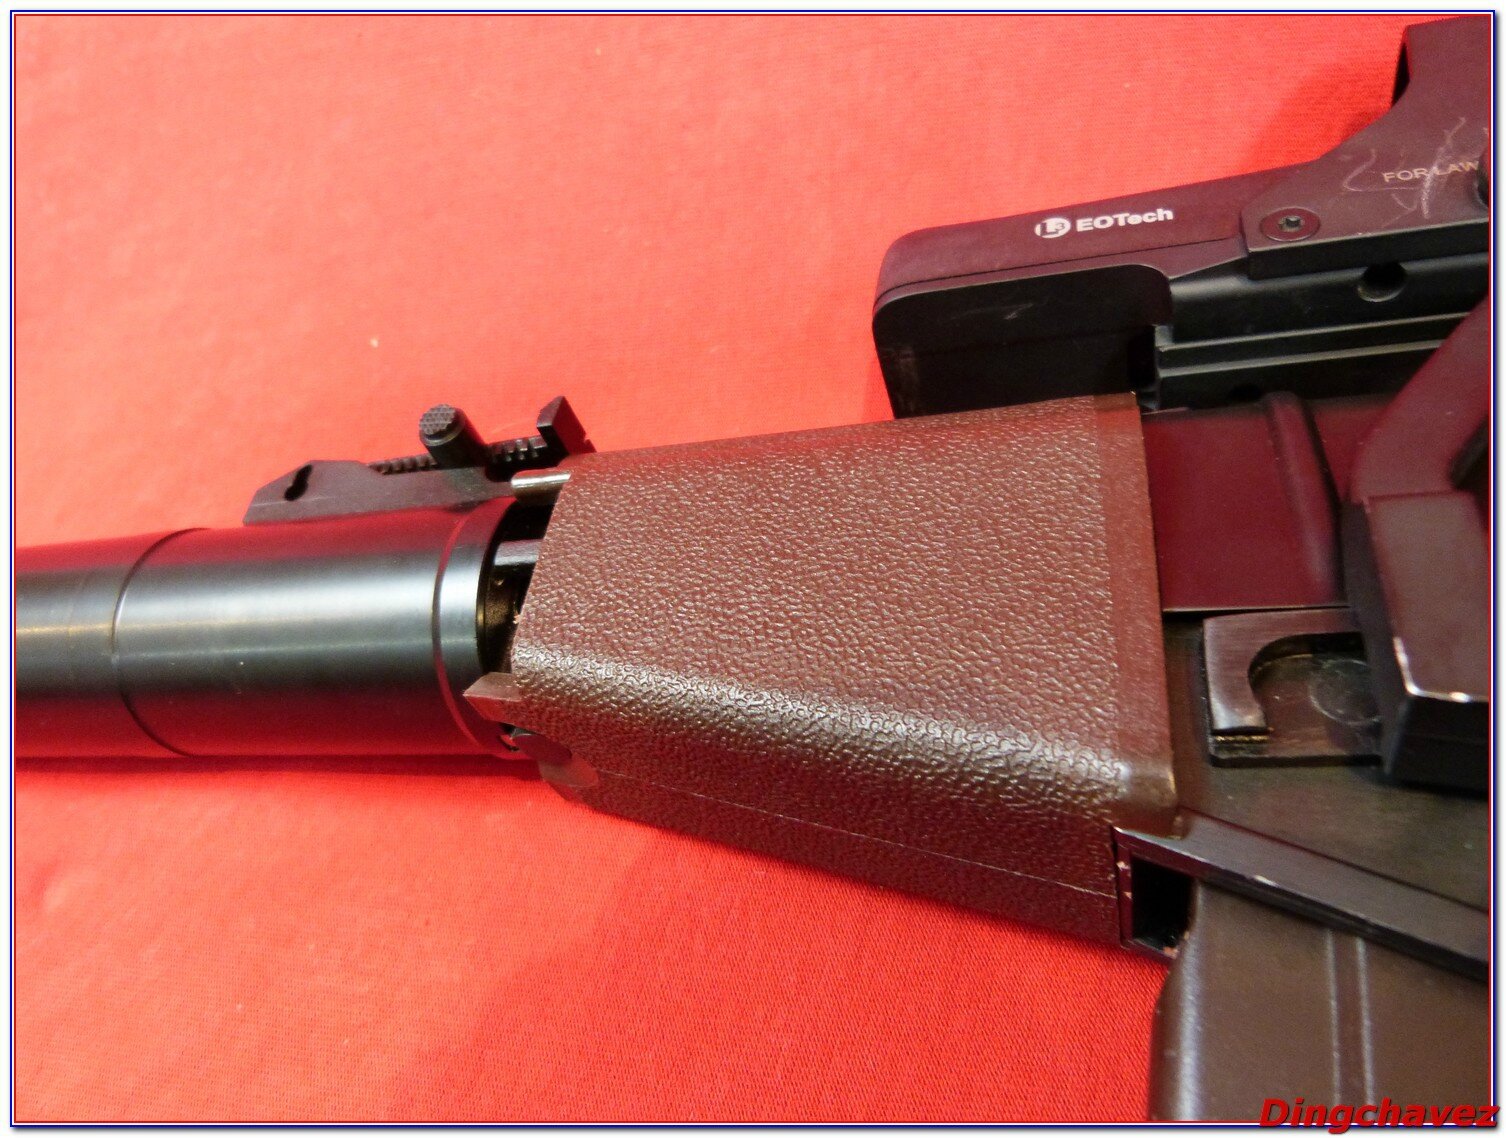
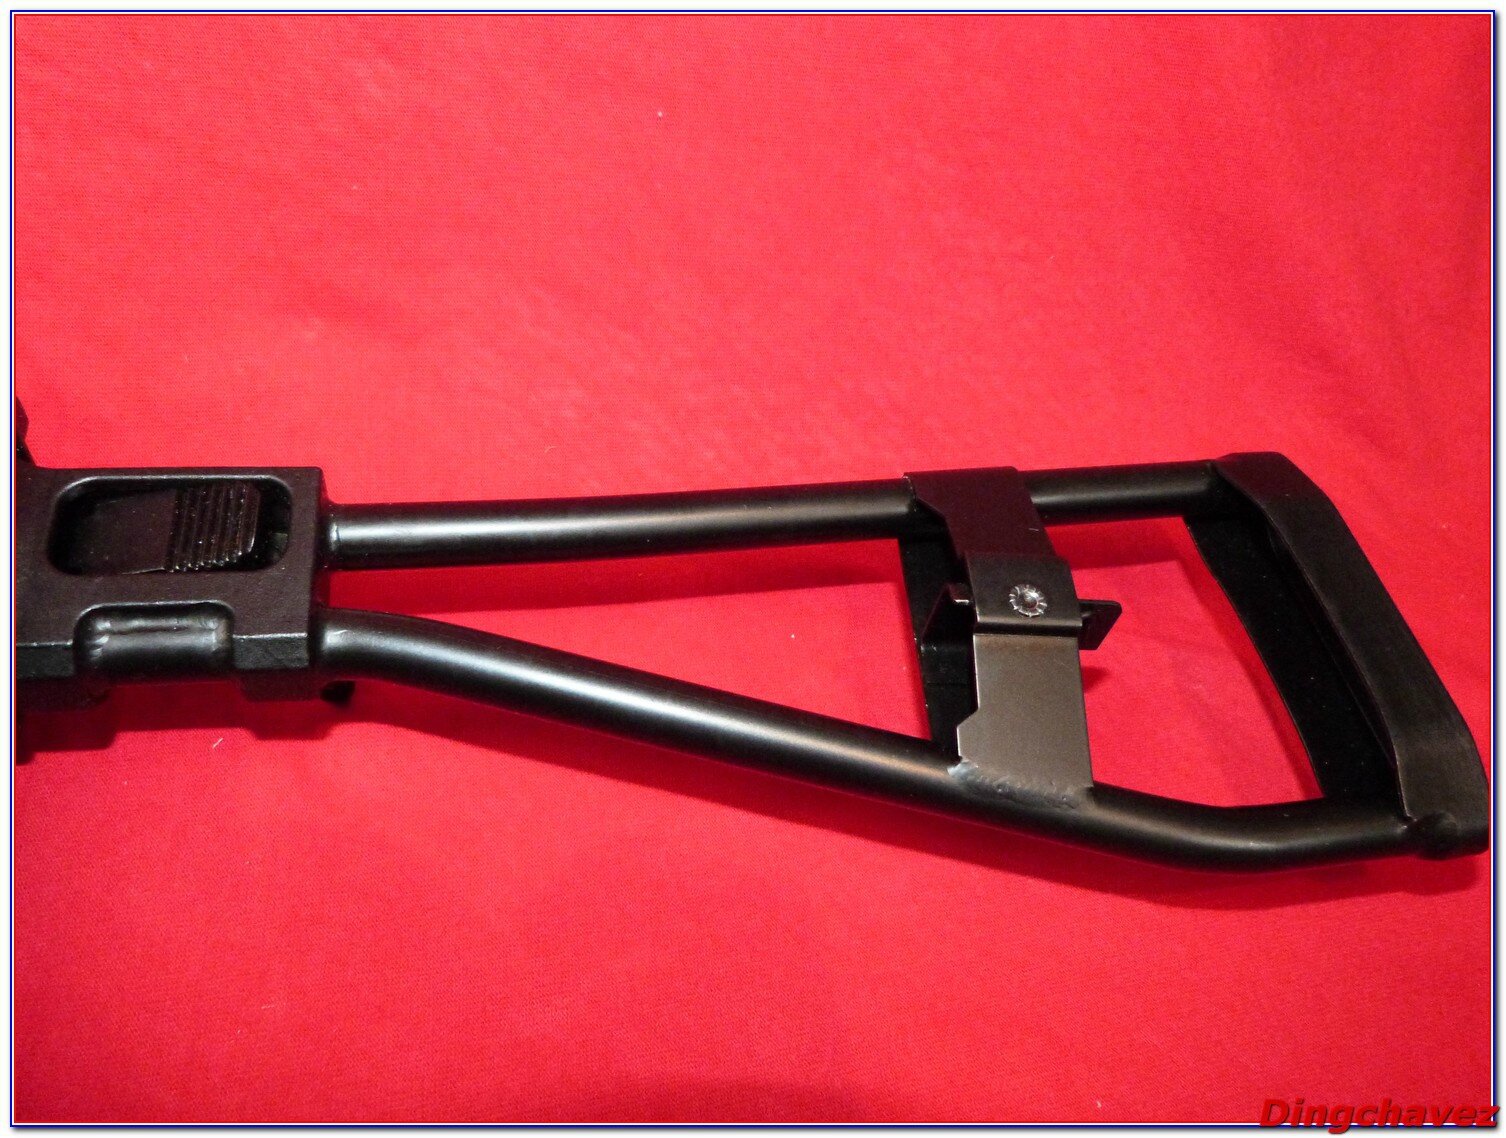
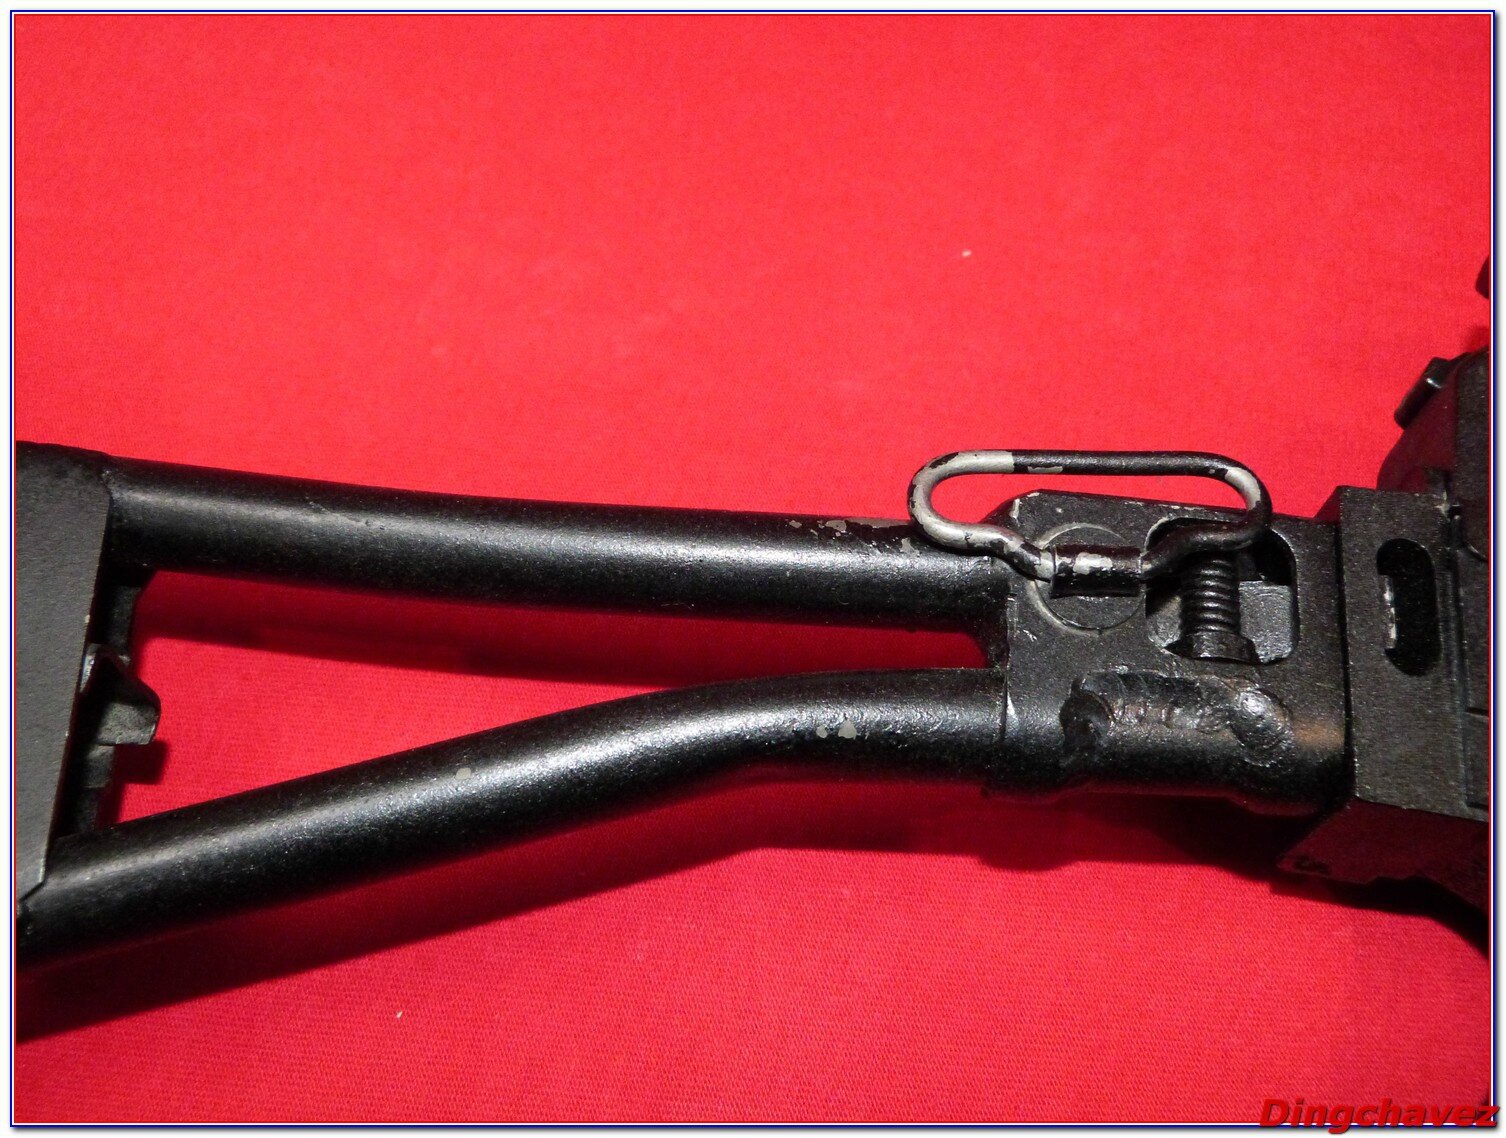
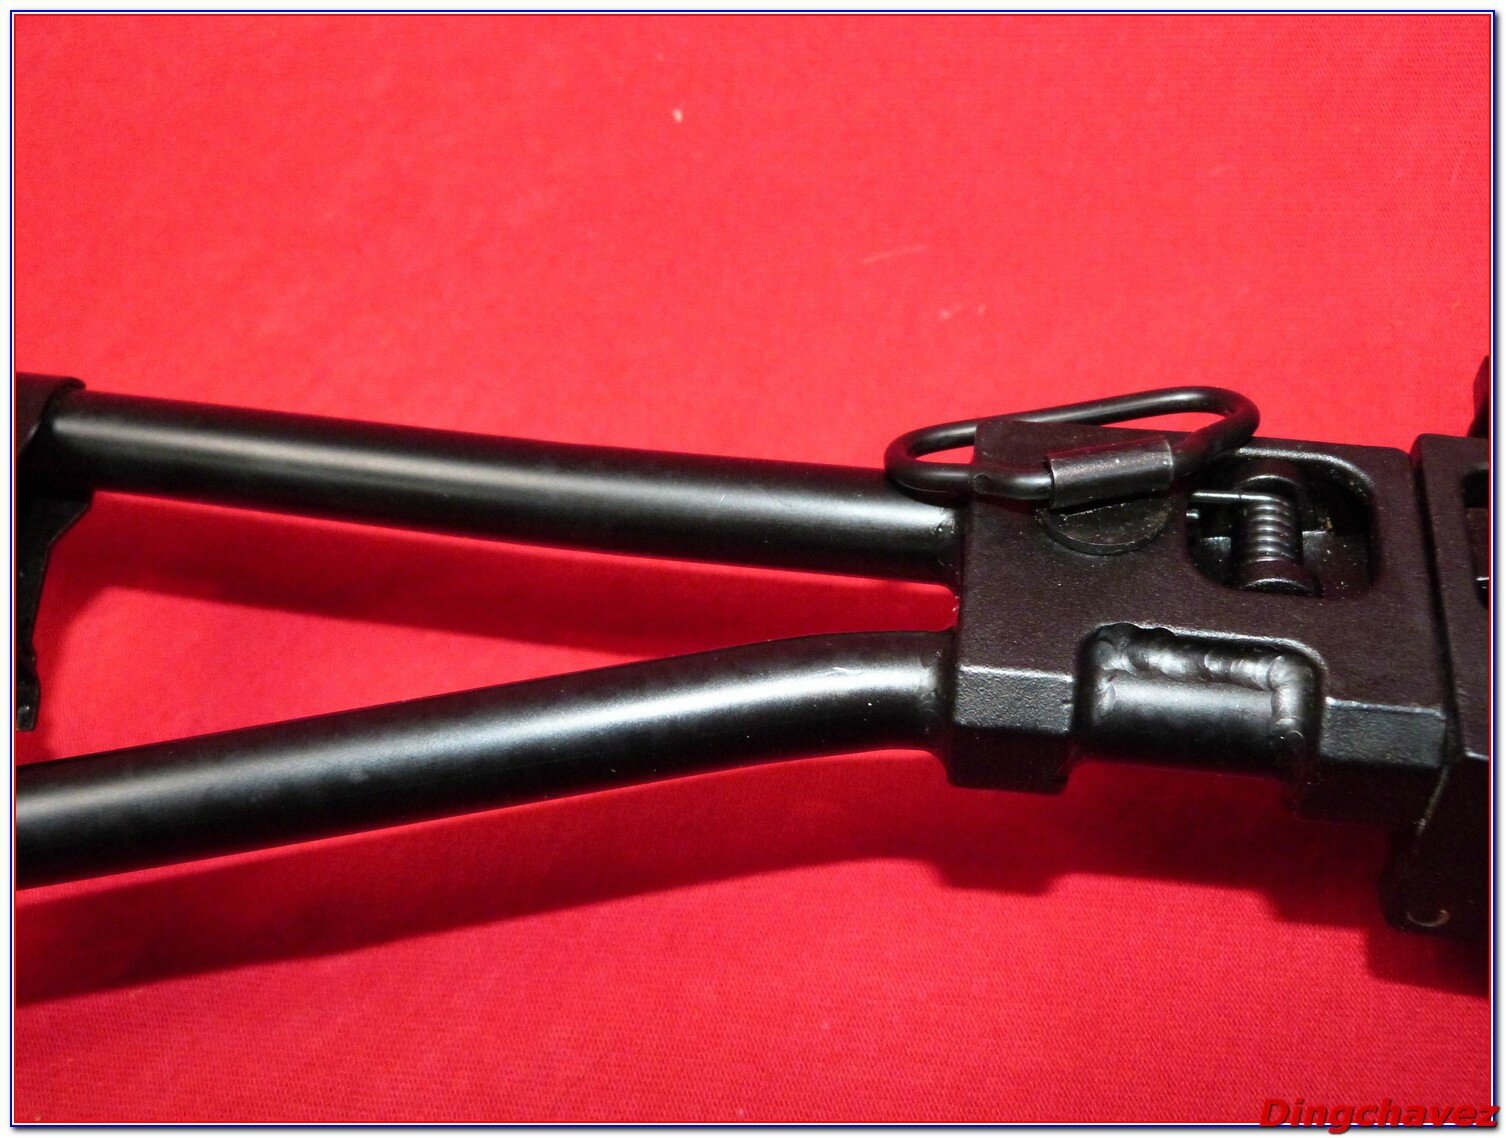
La crosse squelette est bien entendu repliable. Si vous ne vous sentez pas confortable, mettez un pad spécifique en caoutchouc. Il n’y a aucun jeu dans la crosse.
The skeletton stock. Of course it is foldable. If you don’t feel comfortable with it, put a rubber pad. There is no wobble.
Il est tout à fait possible d’utiliser la réplique crosse repliée.
It is possible to use the replica with the folded stock.

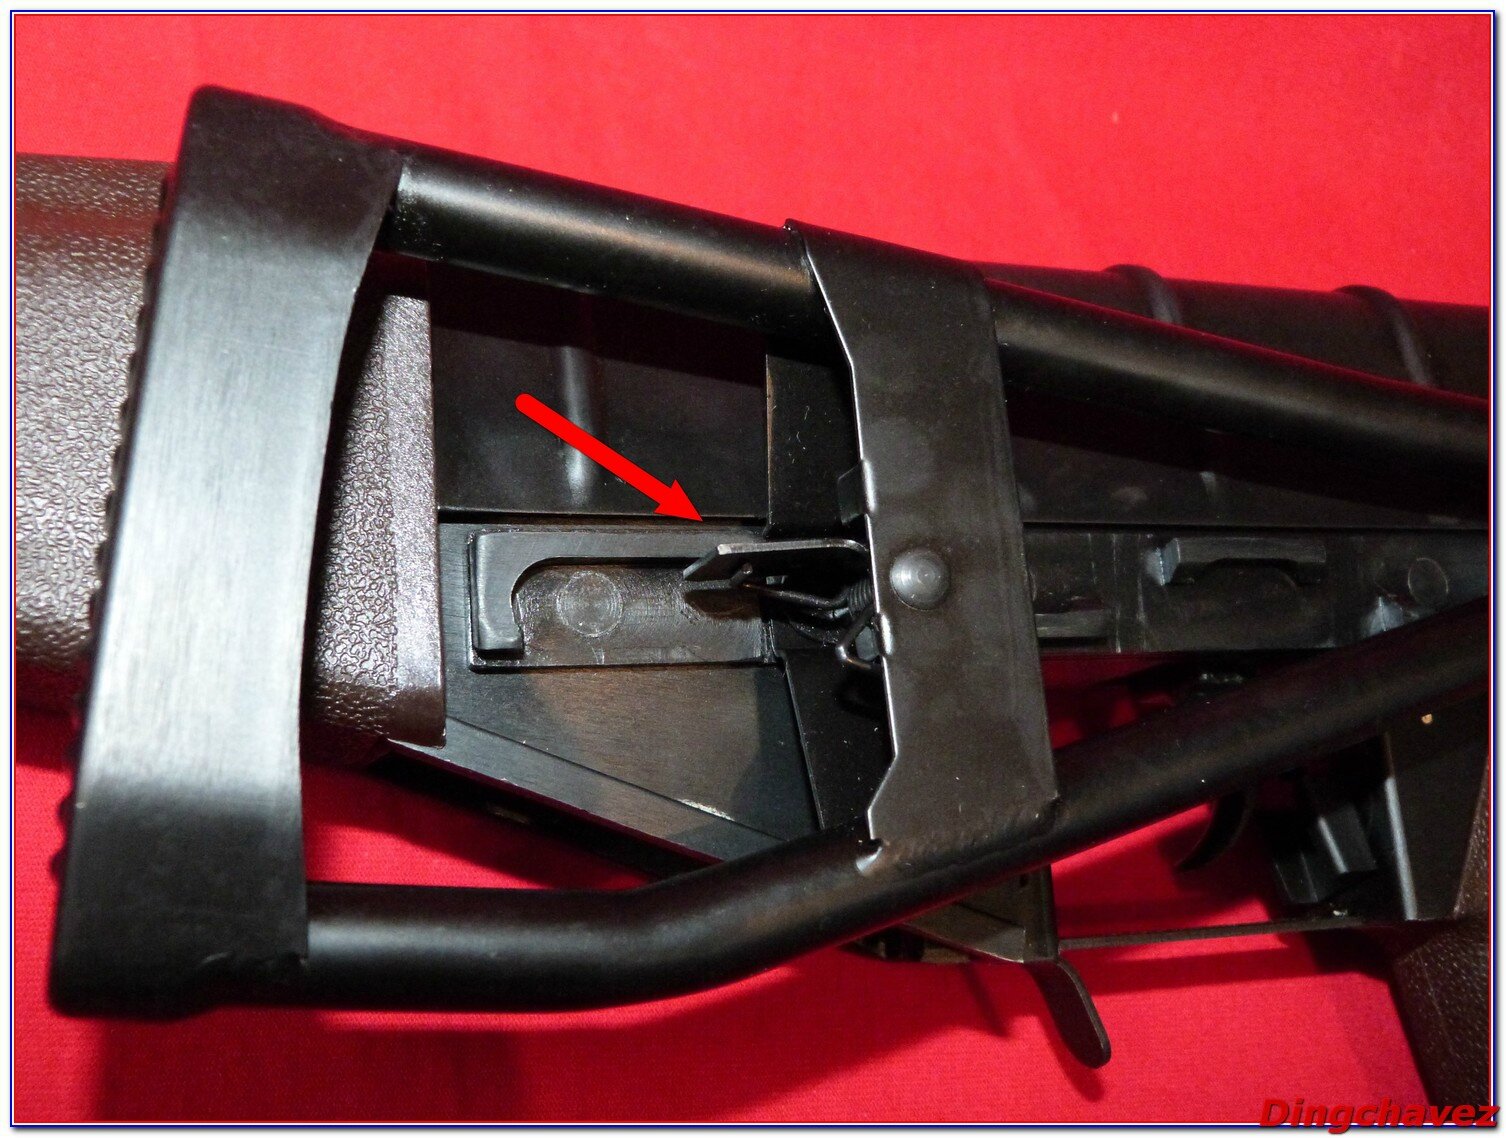
 Un bouton de verrouillage bloque la crosse en position fermée.
A latch holds the stock folded.
Et on retrouve le classique anneau de sangle sur la crosse.
And here is the classic sling swivel on the stock.

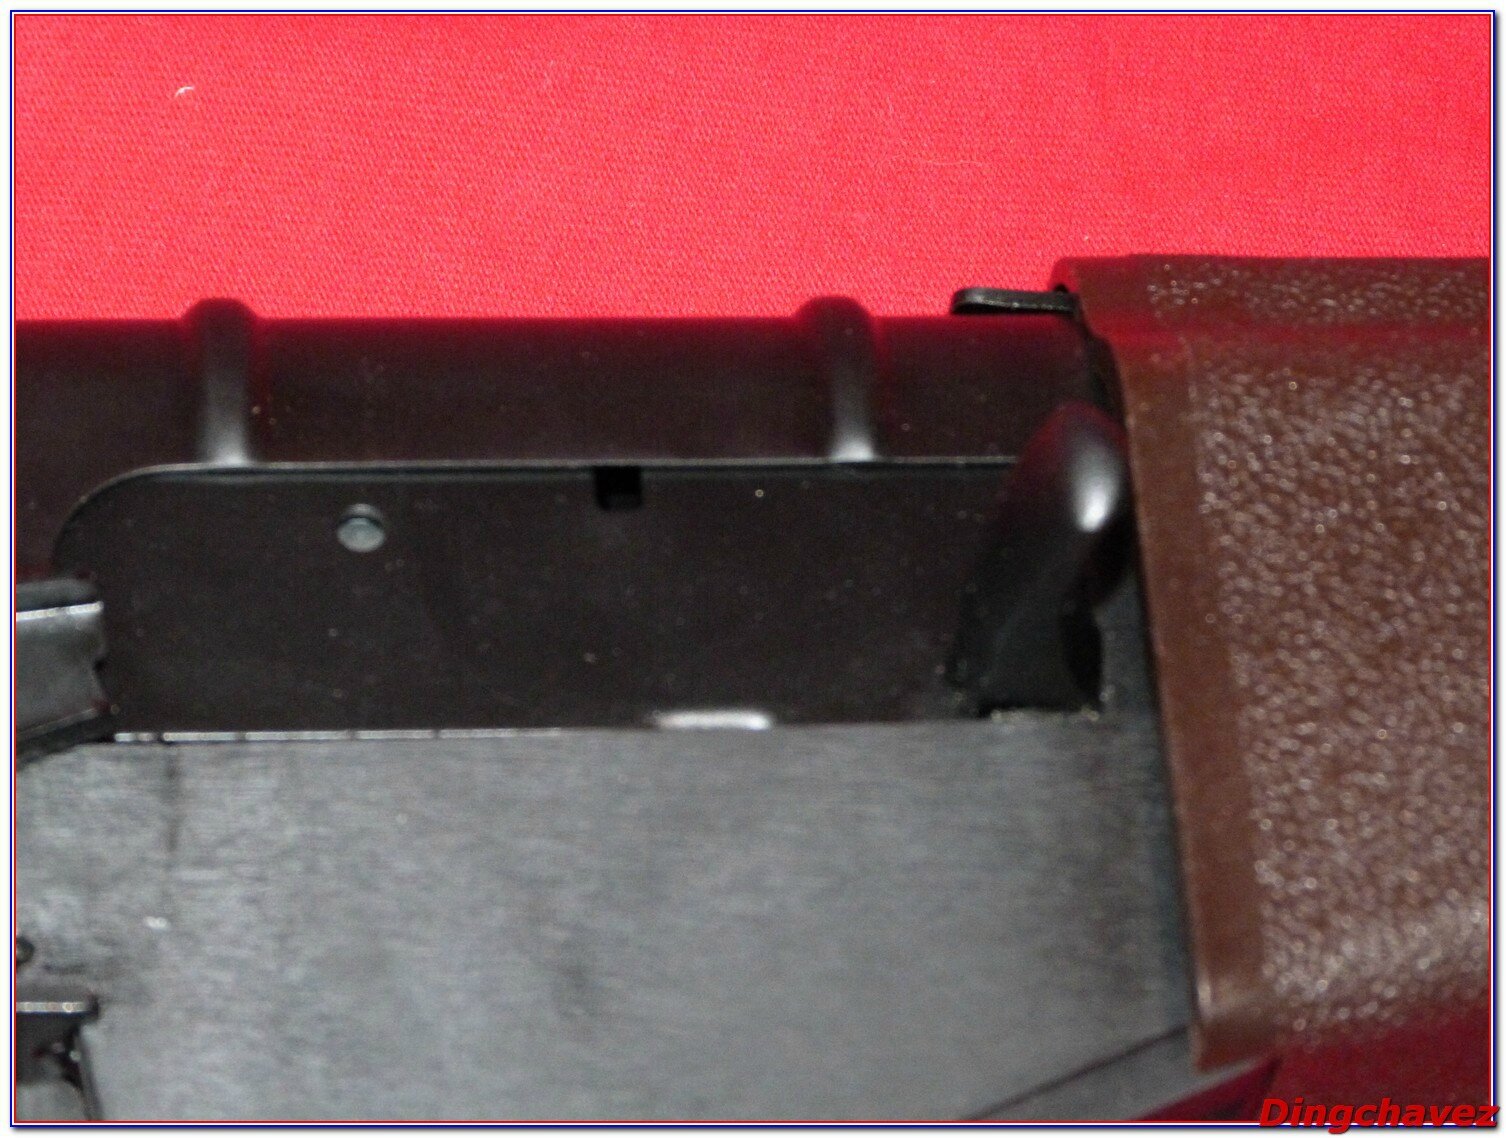
Et on termine ce tour d’horizon par le capot, attention en le manipulant, il est assez fin (bien que solide) donc on peut se couper.
Let’s finish with the top cover. Be aware that it is quite thin, so you can cut yourself.


La première étape consiste à enlever le couvercle en actionnant le bouton situé à l’arrière.
The first step consist in removing the top cover by pushing the buttun at the top rear of the gun.
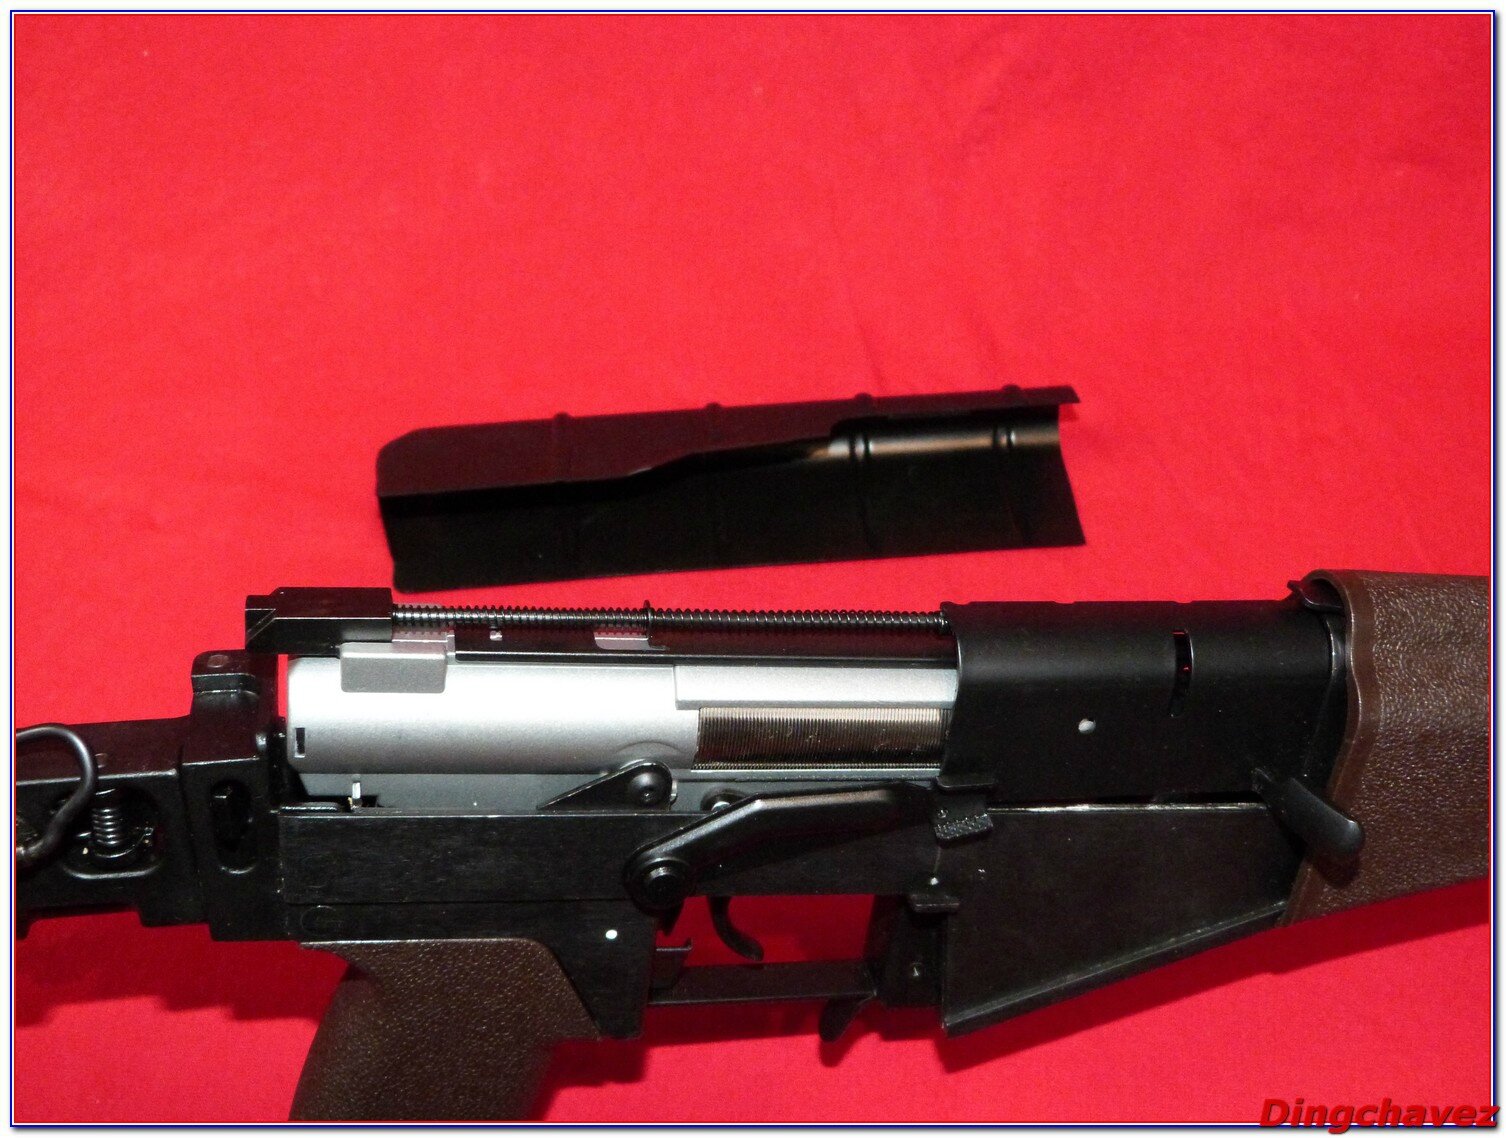
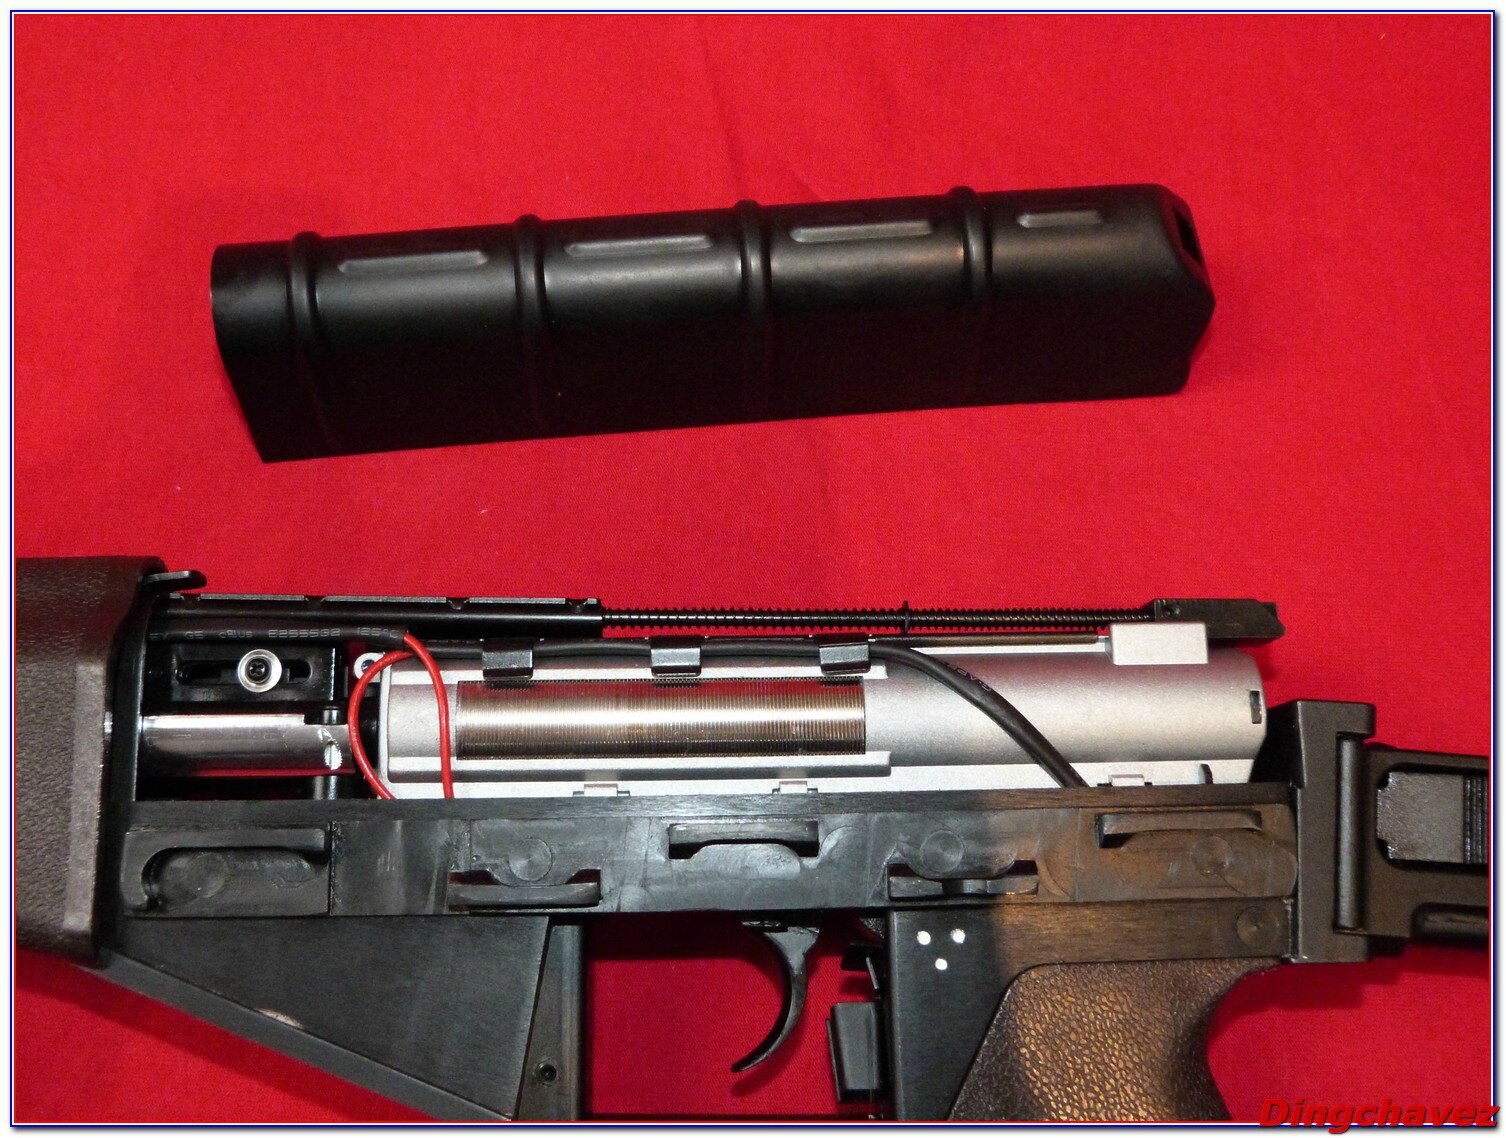
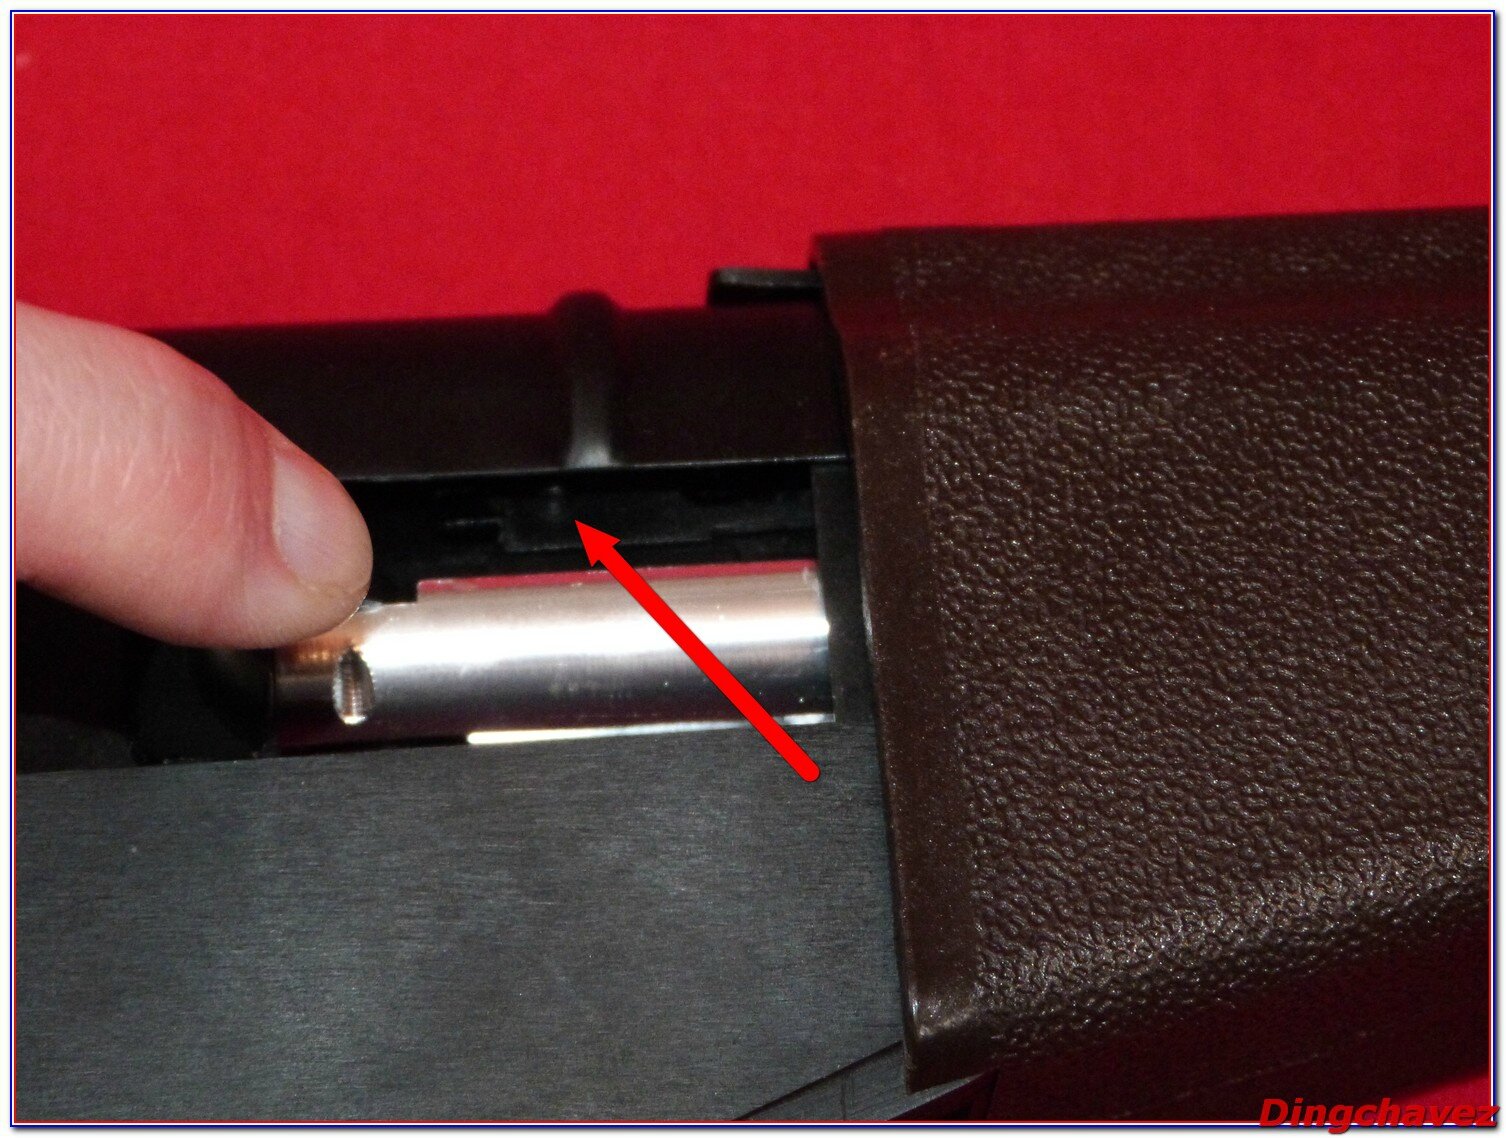
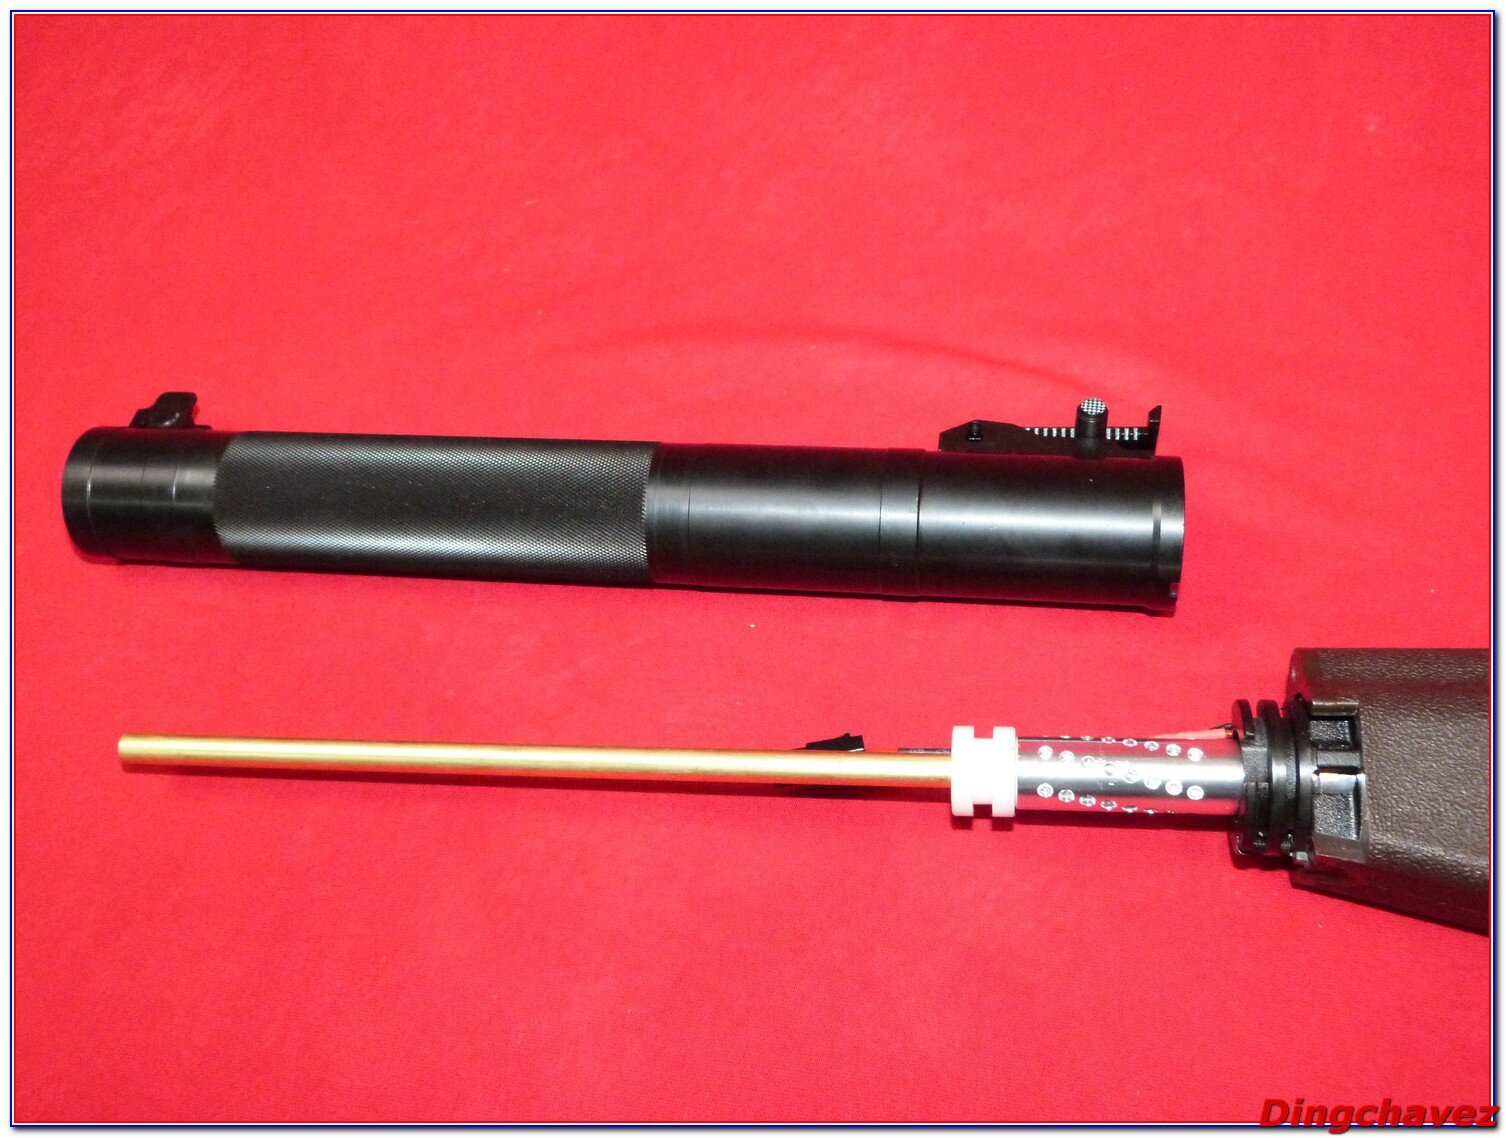
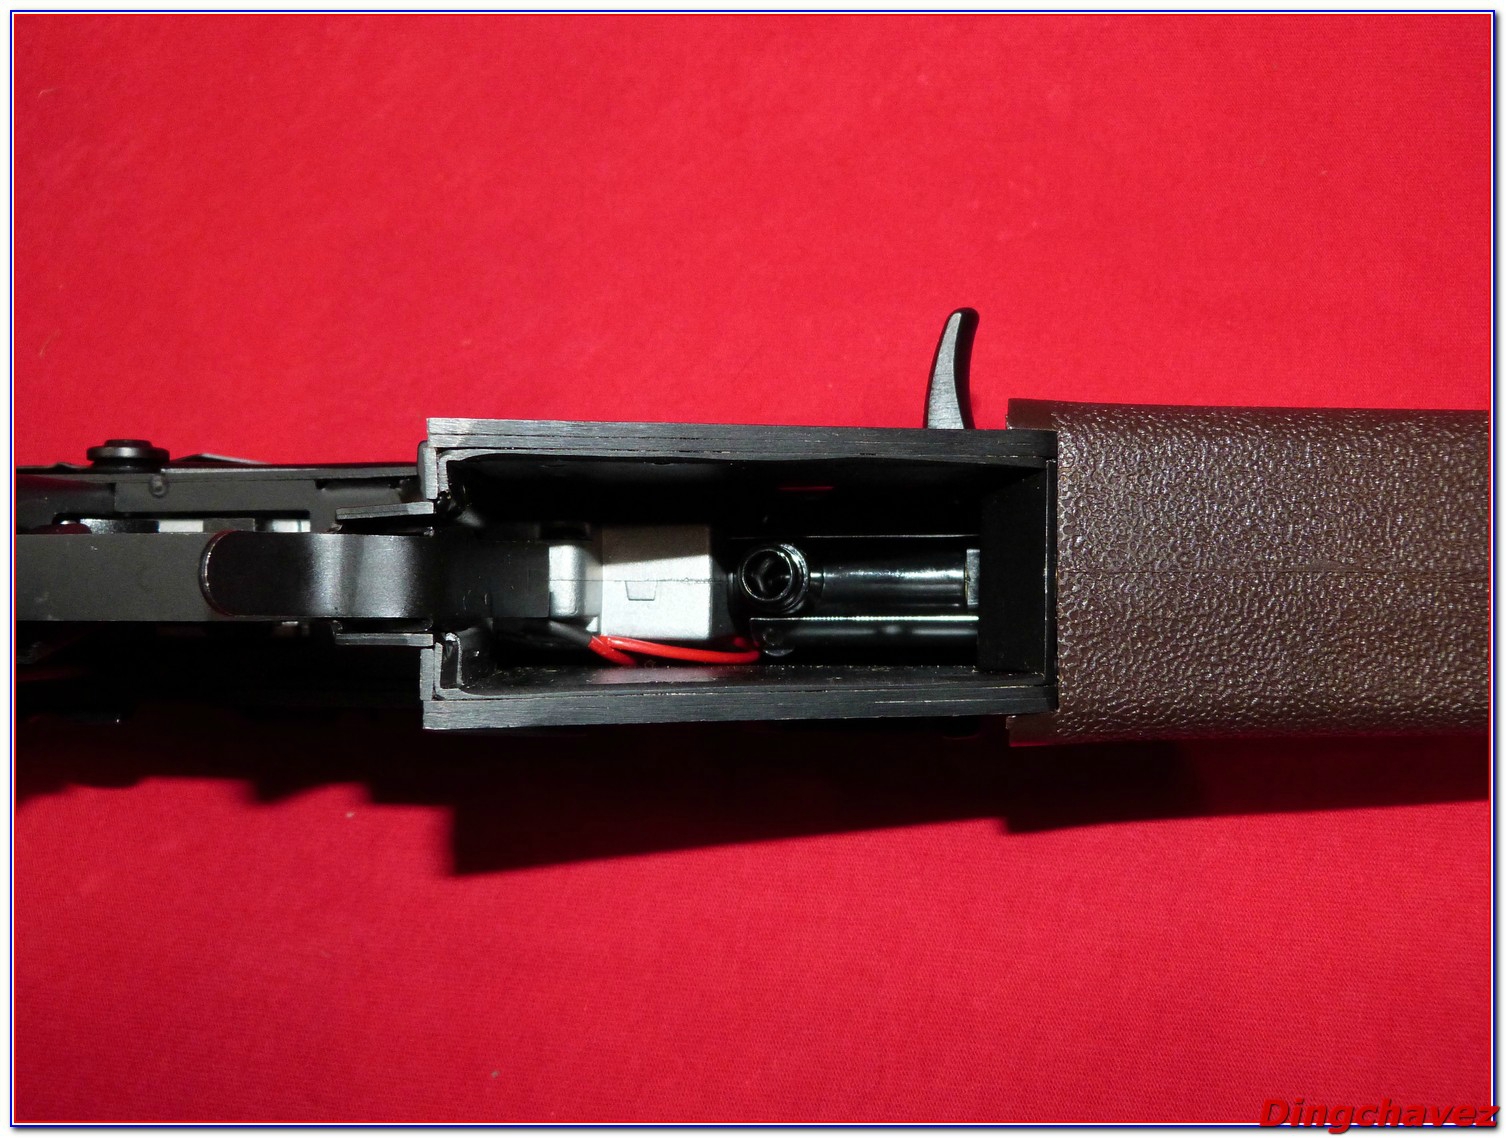
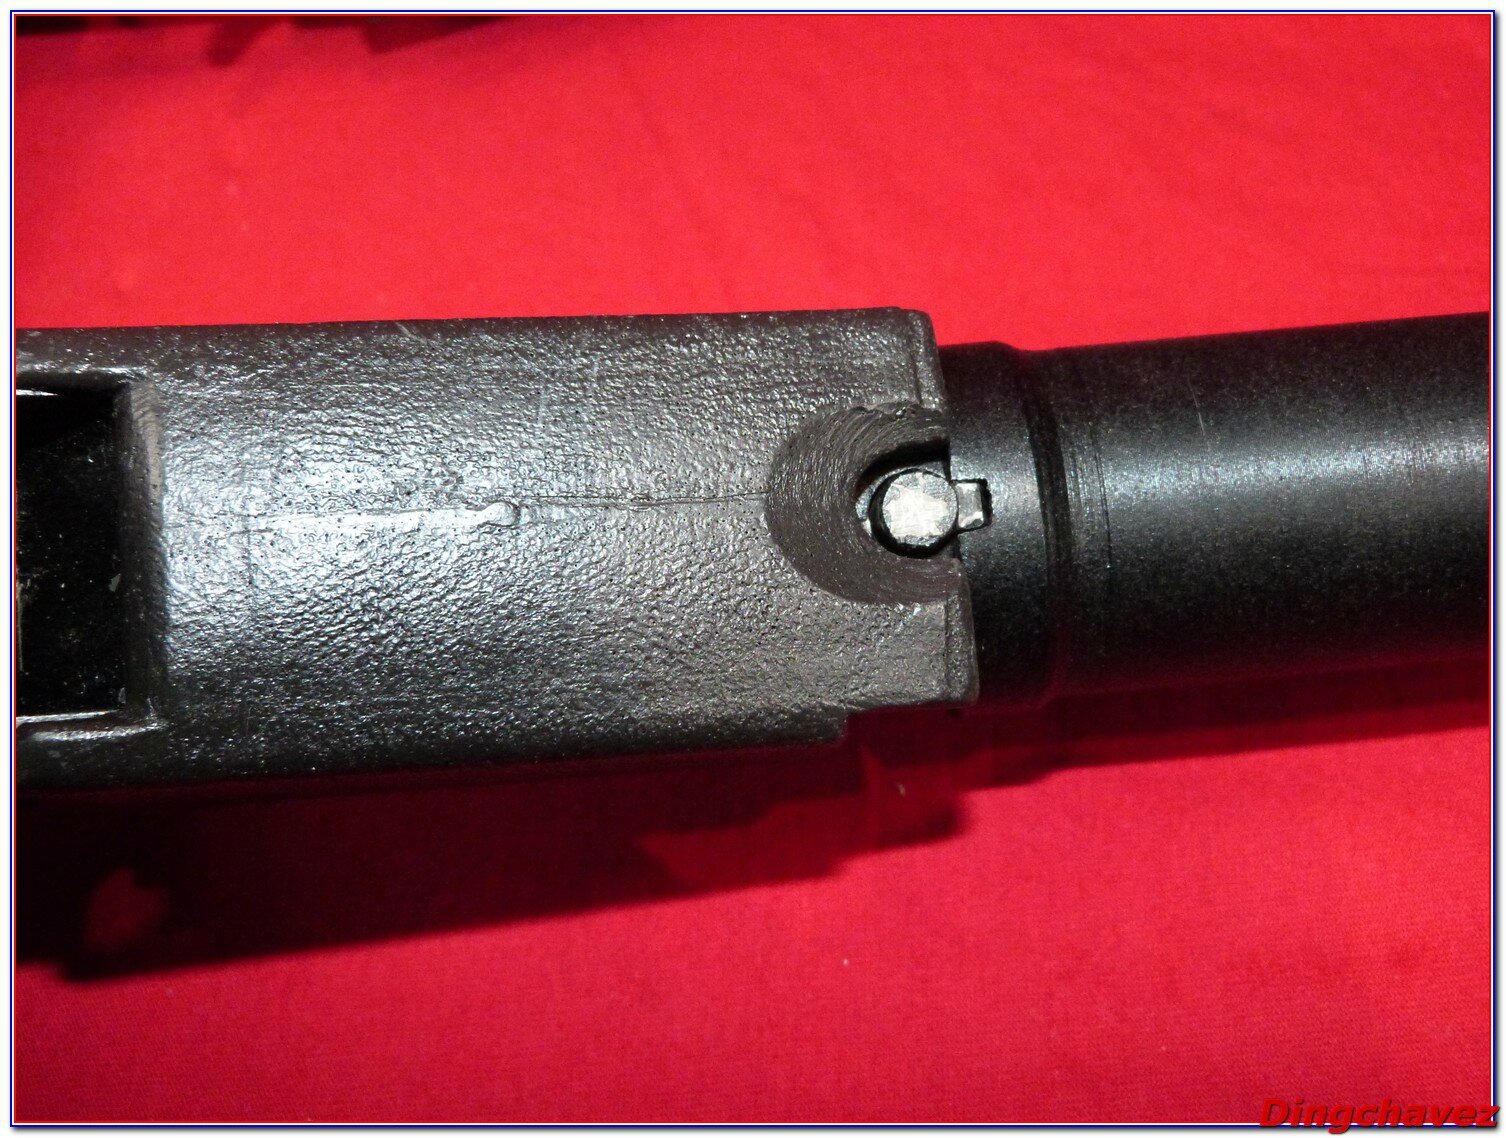
Démonter le canon permet d’accéder à l’emplacement de la batterie. Il suffit d’actionner le bouton situé sous le garde-main et de tourner de 90 degrés, puis de tirer le canon vers l’avant.
Removing the outer barrel allows to plug the battery. Just push the small button under the handguard and rotate the outer barrel 90°, then pull it forward.

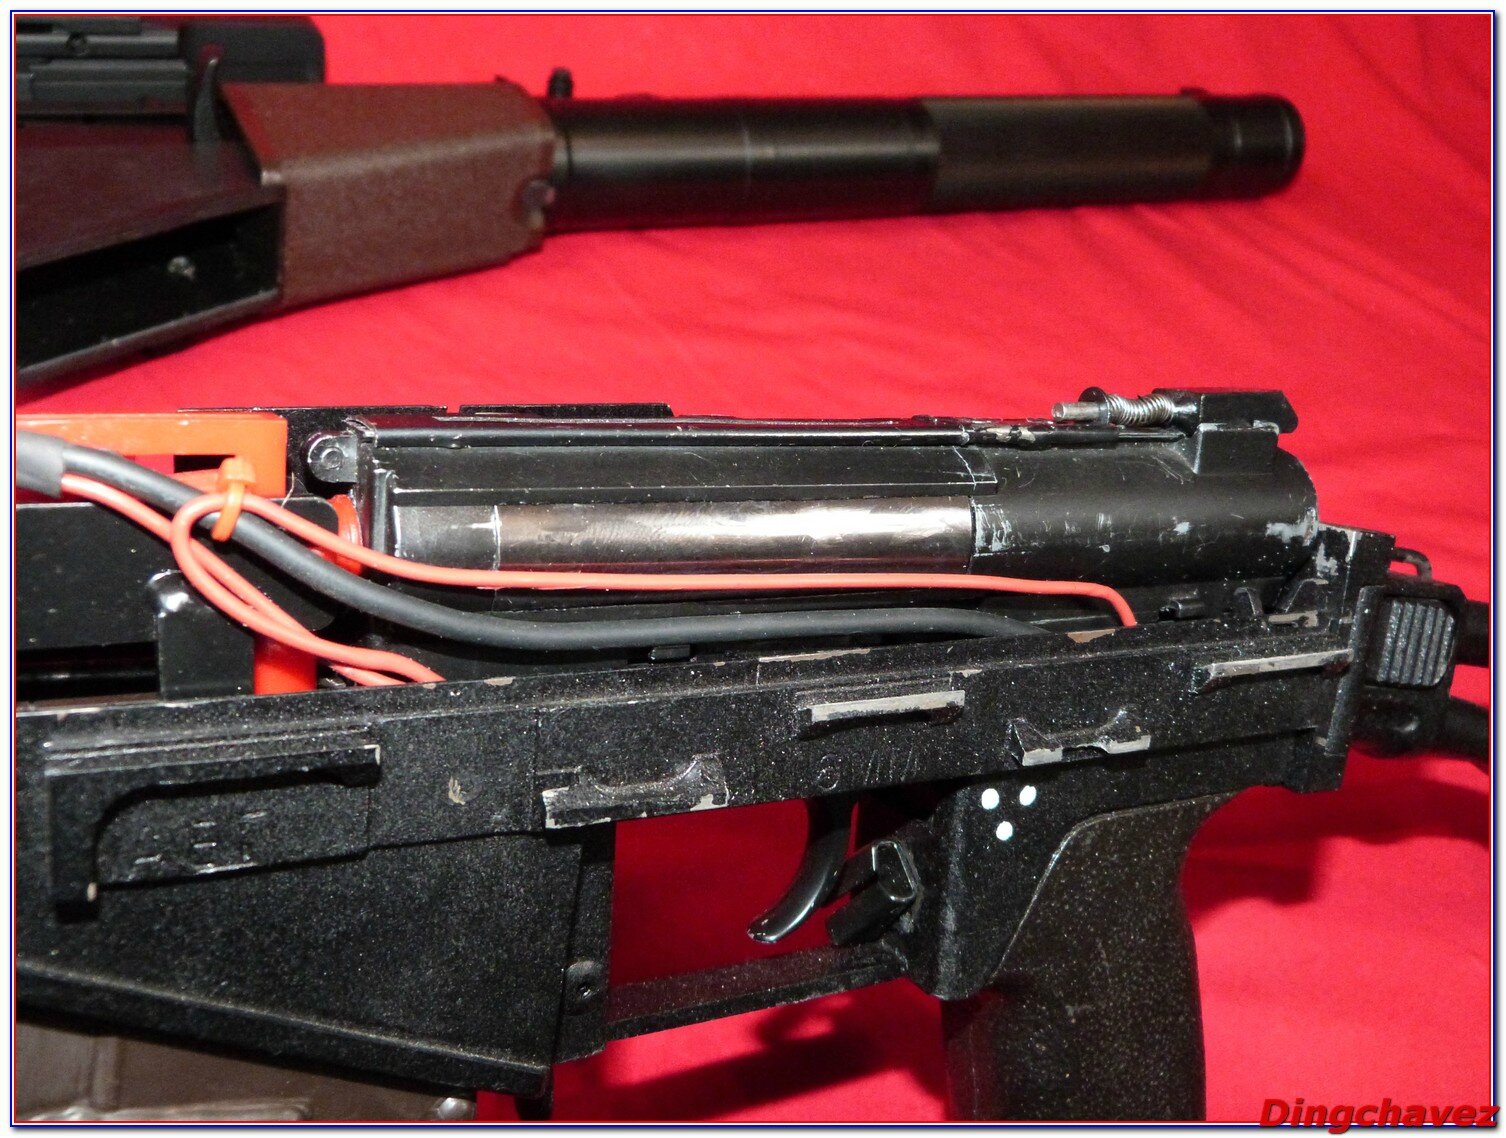
Le câblage est muni de cosses rapides.
The wires are equiped with fast connectors.
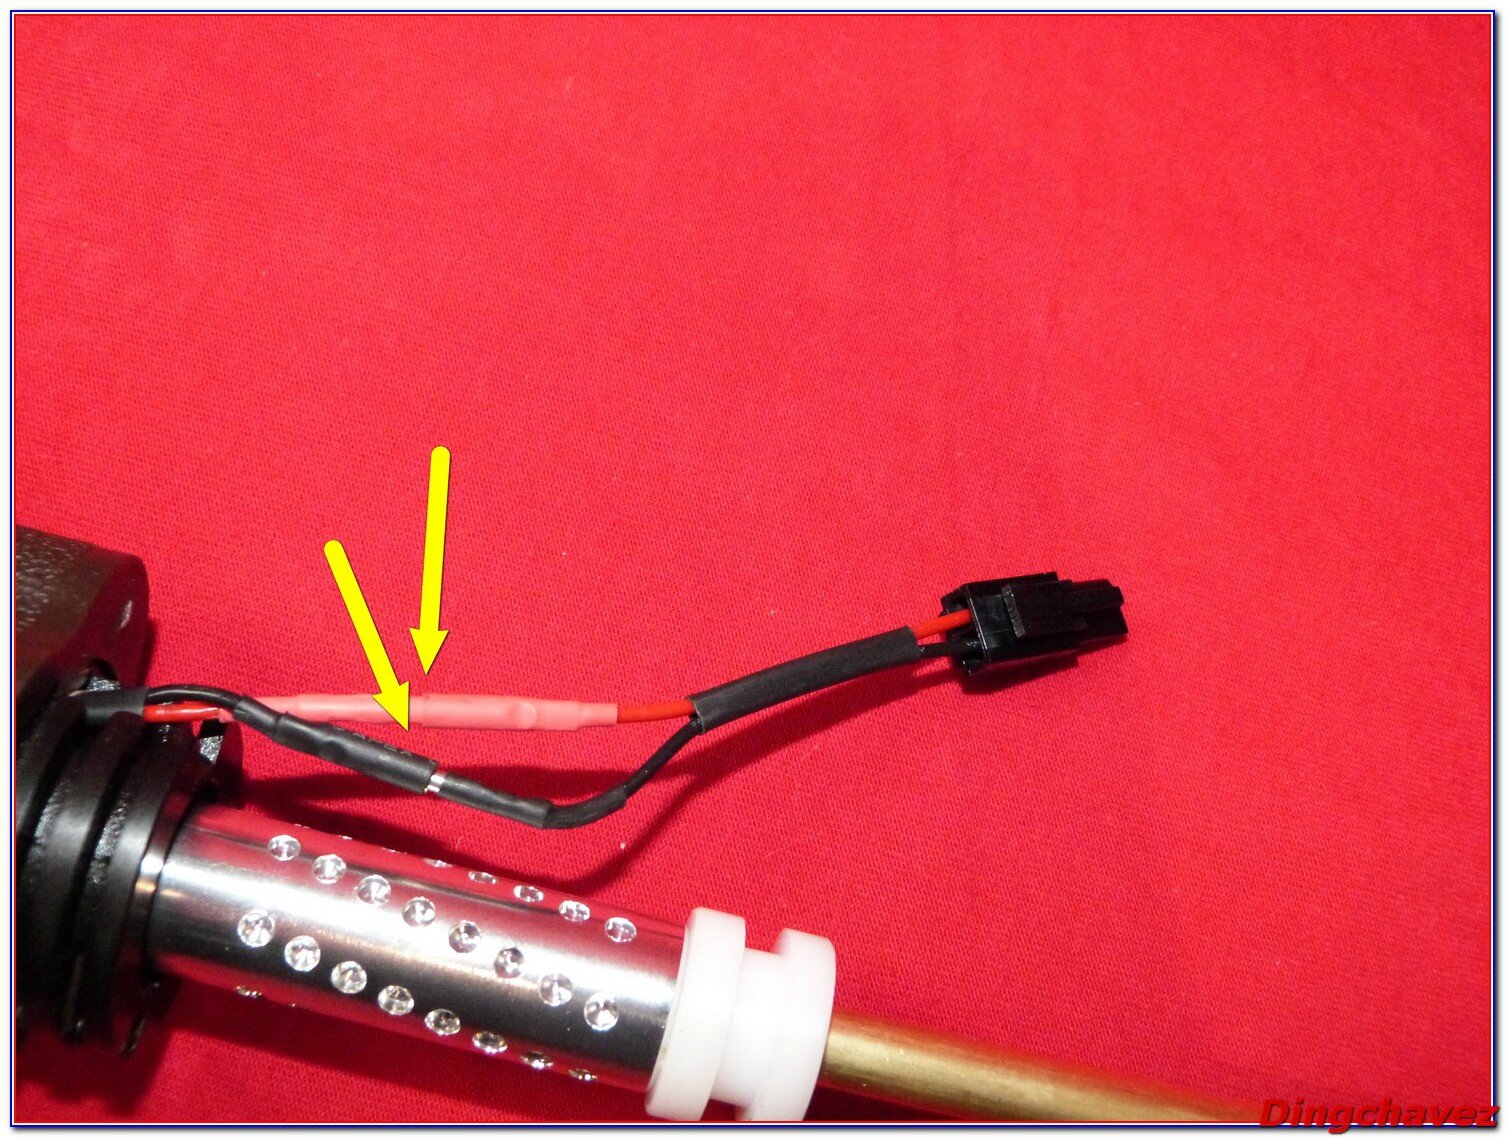
Plusieurs types de batteries sont compatibles, les « nunchucks » 2 ou 3 éléments si les éléments sont fins, ou ici un stick type « AK » 7.4V.
A few battery types are compatible. « Nunchucks » type with 2 or 3 thin elements, or like me, you can use AK 7.4V stick batteries.


Le garde-main se retire en le faisant glisser vers l’avant. Repérez l’emplacement du câblage entre les vis de protection.
The handguard slides forward to be removed. Note the wire setting between the protection screws.


Retirons la fausse culasse.
Let’s remove the dummy bolt.
Dévissez la petite vis Alen et poussez la tige vers l’avant, il faut ensuite retirer les deux ressorts.
Loosen the small screw and then push the rod forward, then remove the two springs.


On peut voir le bloc hop-up.
Now we can see the hop-up unit.
Si on replace le capot, on voit bien qu’il est difficile de régler le hop-up.
If you put the top cover back, you can see that it is not easy to set the hop-up.
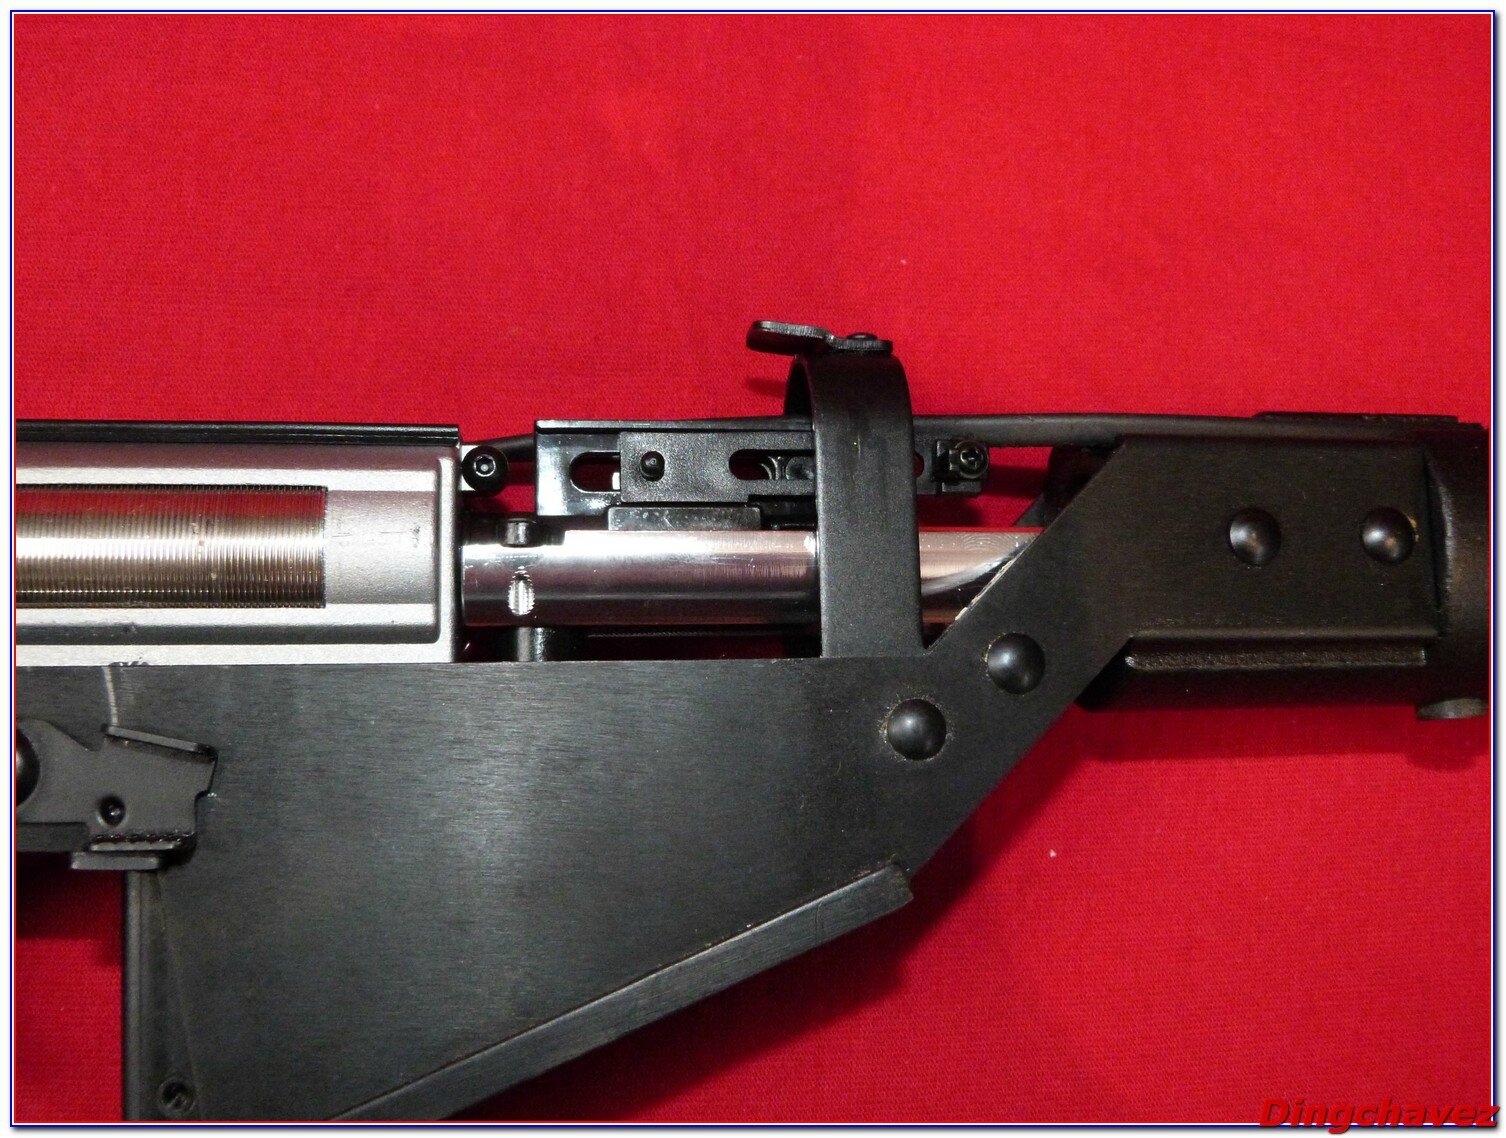
Dévissez les deux vis 6 pans qui retiennent le support de canon interne, puis les deux vis de protection du câblage.
Remove the 2 screws maintaining the inner barrel prop, then the 2 wire protection screws.

Il est temps de dévisser le bloc hop-up de son support.
It’s time to unscrew the hop-up unit from its prop.

Ici, la pièce qui retient le bloc hop-up et de ce fait le canon interne. La bague blanche est un poil plus large que le canon, cela occasionne un léger jeu que vous pourrez combler avec un petit morceau de radio (astuce fournie par Skaru sur le forum Frontovik).
Here is the part which holds the hop-up unit and the inner barrel. The white plastic ring is slightly loose around the barrel, that causes a slight wobble. To get rid of it, place a small piece of X-ray film between the two parts (tip by Skaru, on Frontovik forum).

On dépose la poignée.
Remove the pistol grip.
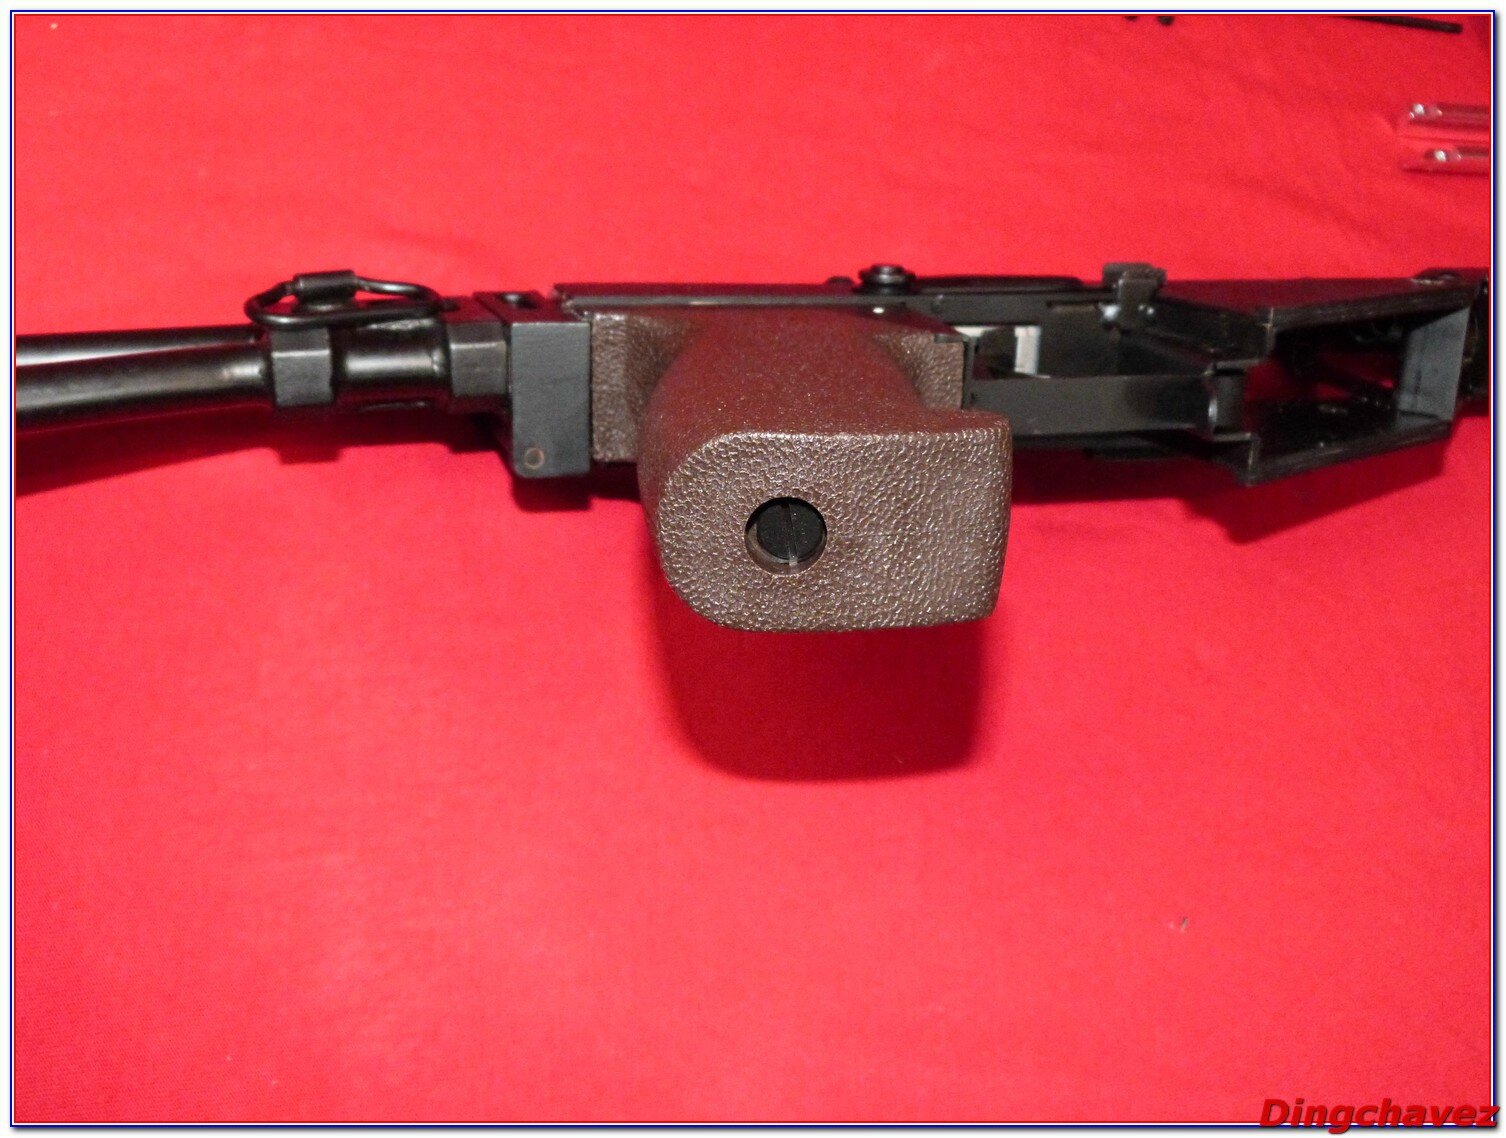 La cage moteur est spécifique à ce modèle.
The motor housing has been designed for the AS-VAL.
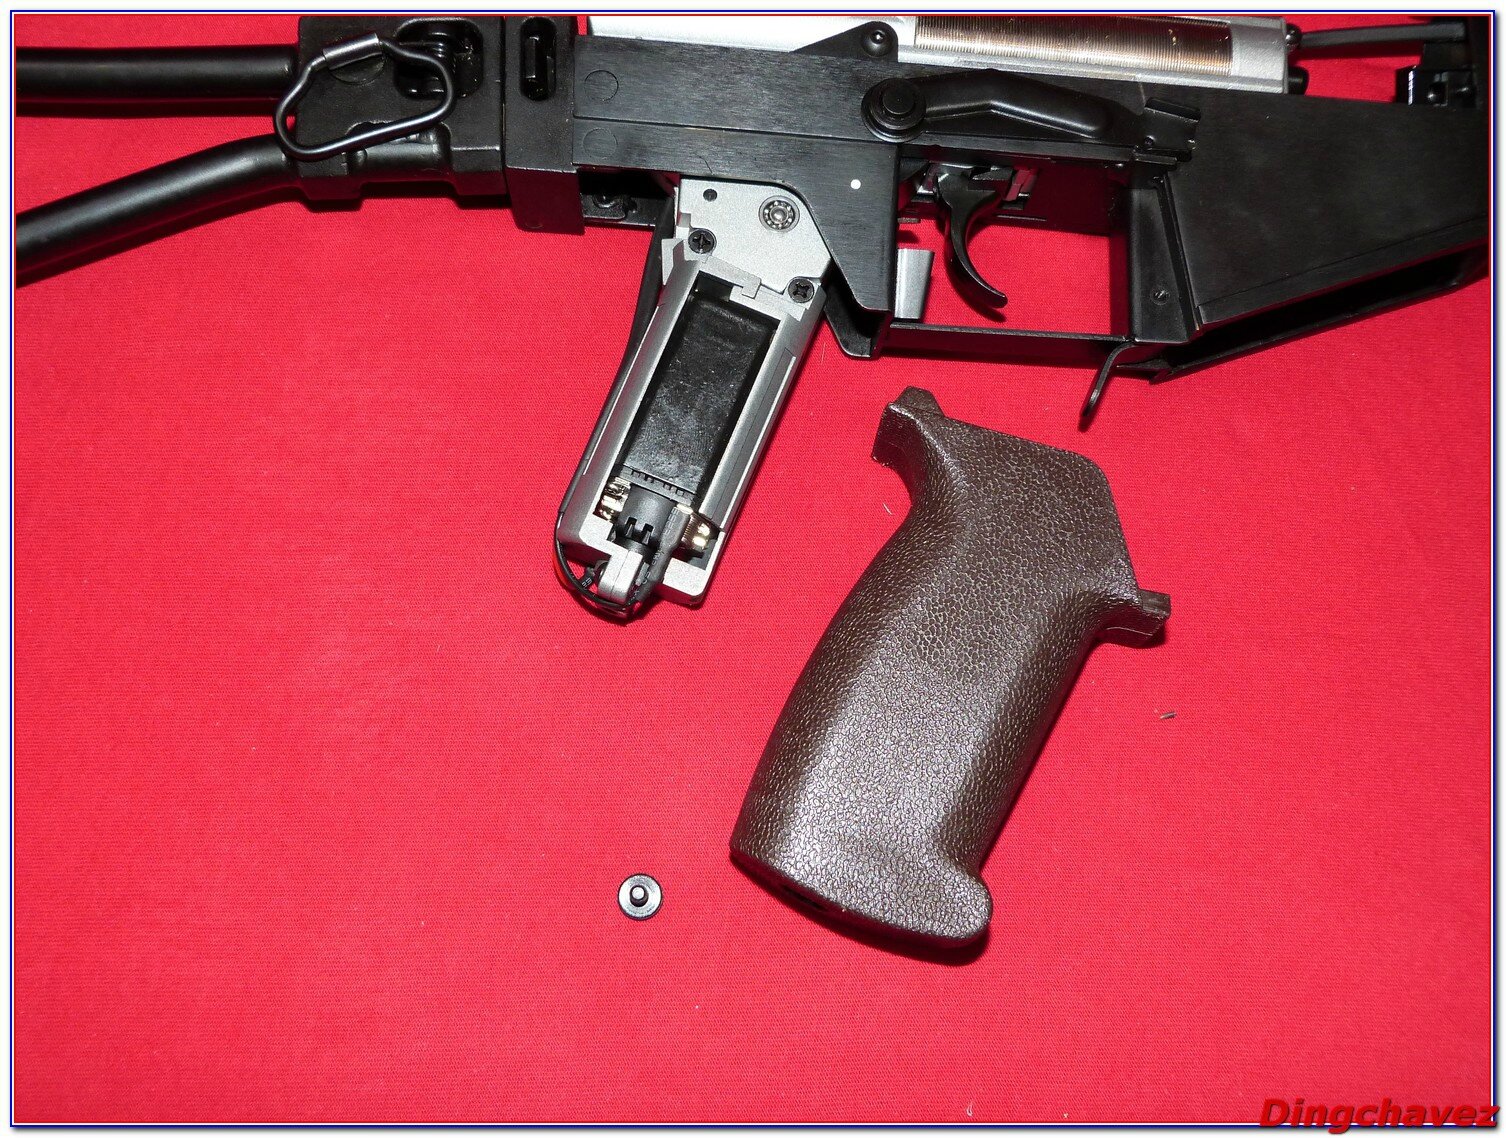
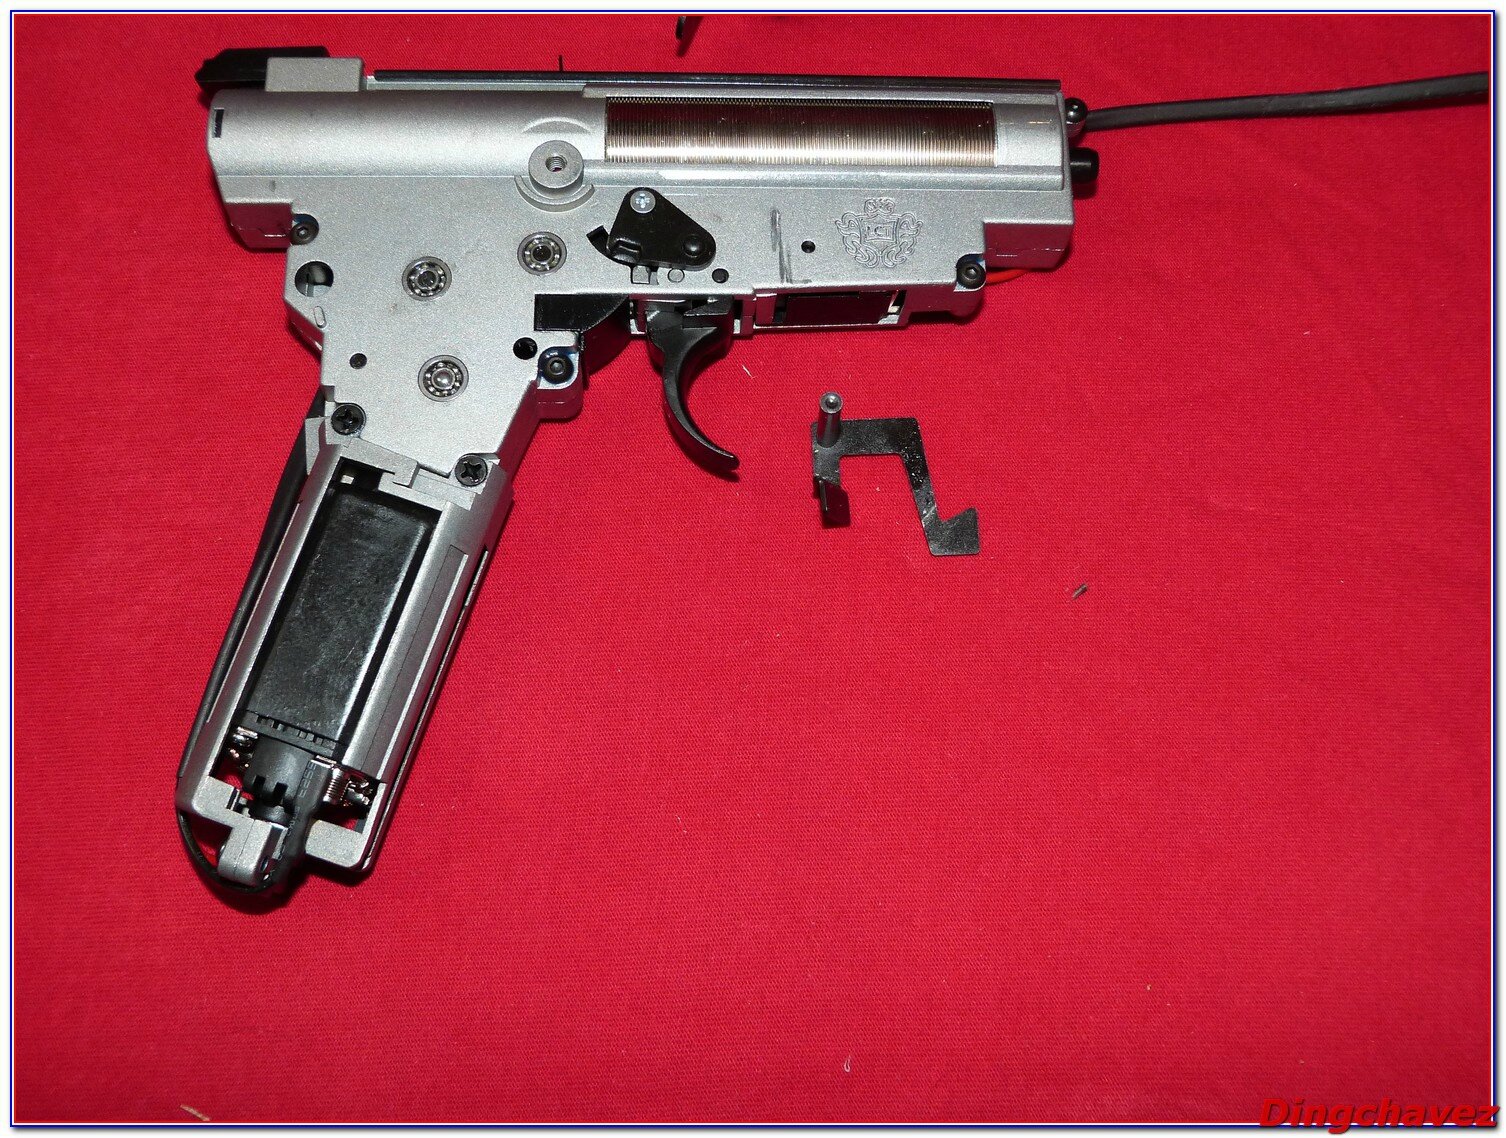
Il ne reste qu’à défaire une vis 6 pans et le levier de sûreté pour désolidariser la gearbox.
There’s a last Alen screw to remove as well as the safety lever and you’ll be able to bring the gearbox out.

On tire doucement vers le haut puis vers l’arière. ATTENTION, un petit levier est solidaire du corps de la réplique.
Pull gently upward, and then backward. BE CAREFUL, a small lever is attached to the gun frame.
Le levier en question, il fait le lien entre le levier de sûreté et la sûreté de la garbox.
The said lever, it links the safety lever to the gearbox safety.

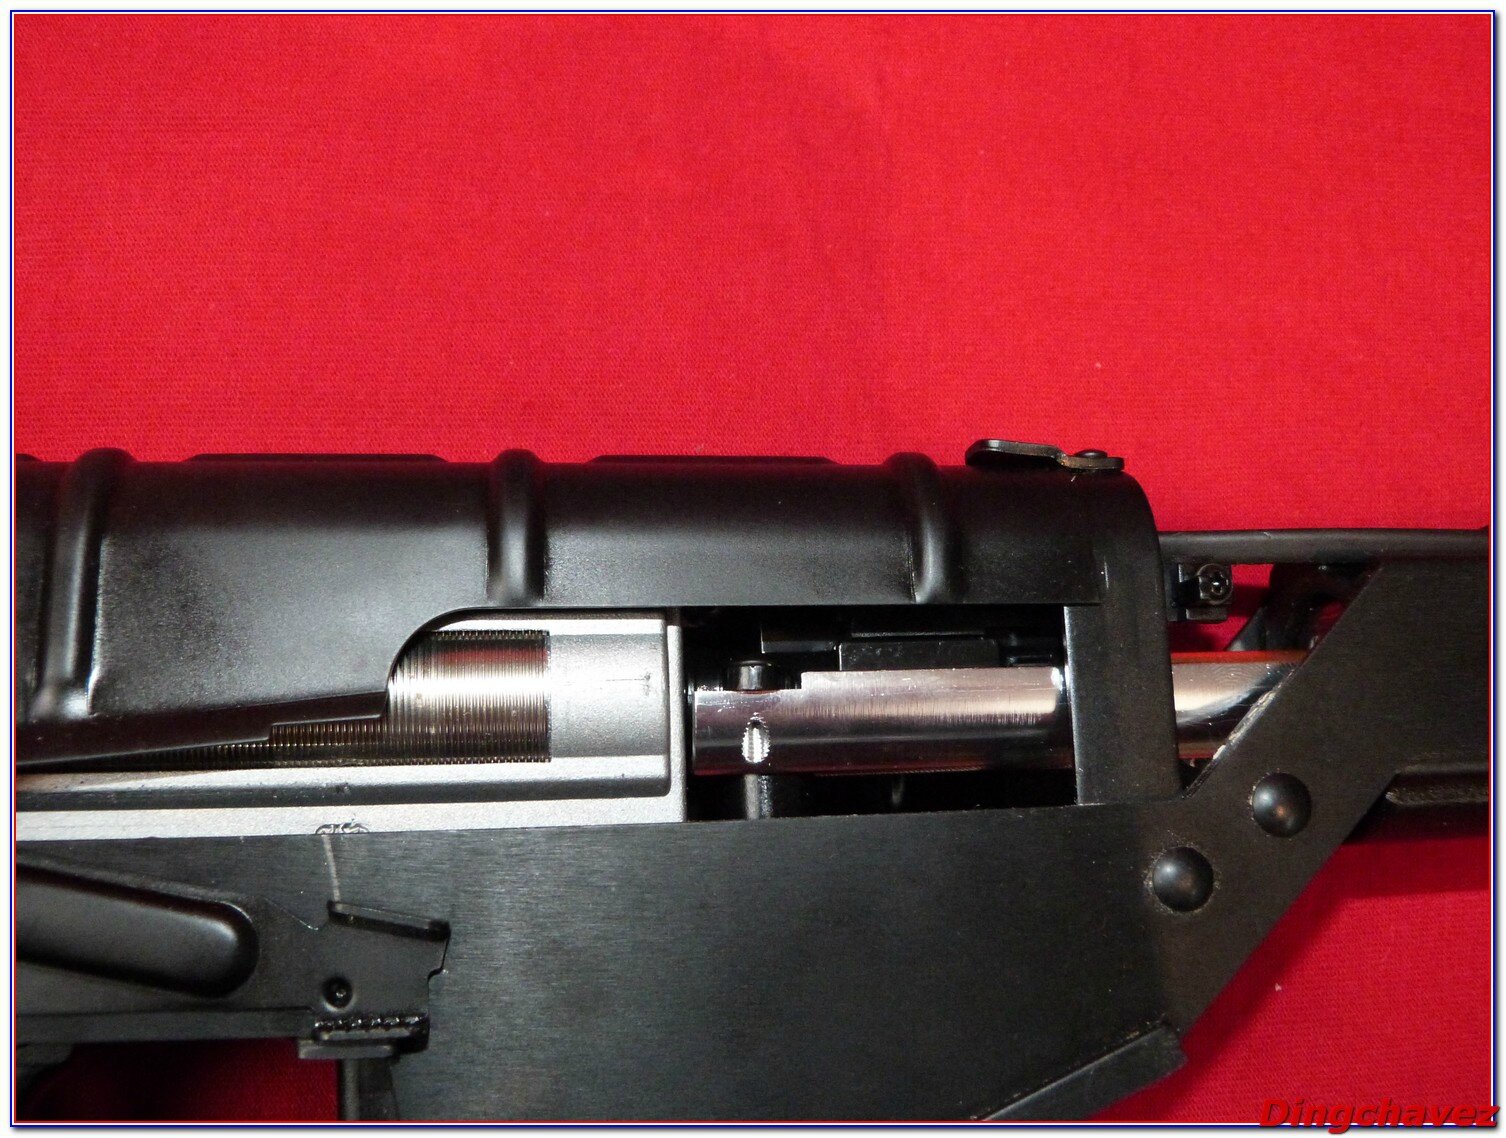
On peut ensuite retirer le canon interne et le bloc hop-up.
Then we can remove the inner barrel and hop-up unit.
 Le canon en laiton fait 425mm de long.
The brass inner barrel is 425mm long.

Et voici un AS-VAL à poil !
And here is a naked AS-VAL !

J’en profite que tout soit démonté pour faire le test de l’aimant. Beaucoup d’acier sur cette réplique !
Let’s make the magnet test while the gun is stripped; As you can see there is many steel parts on the AS-VAL

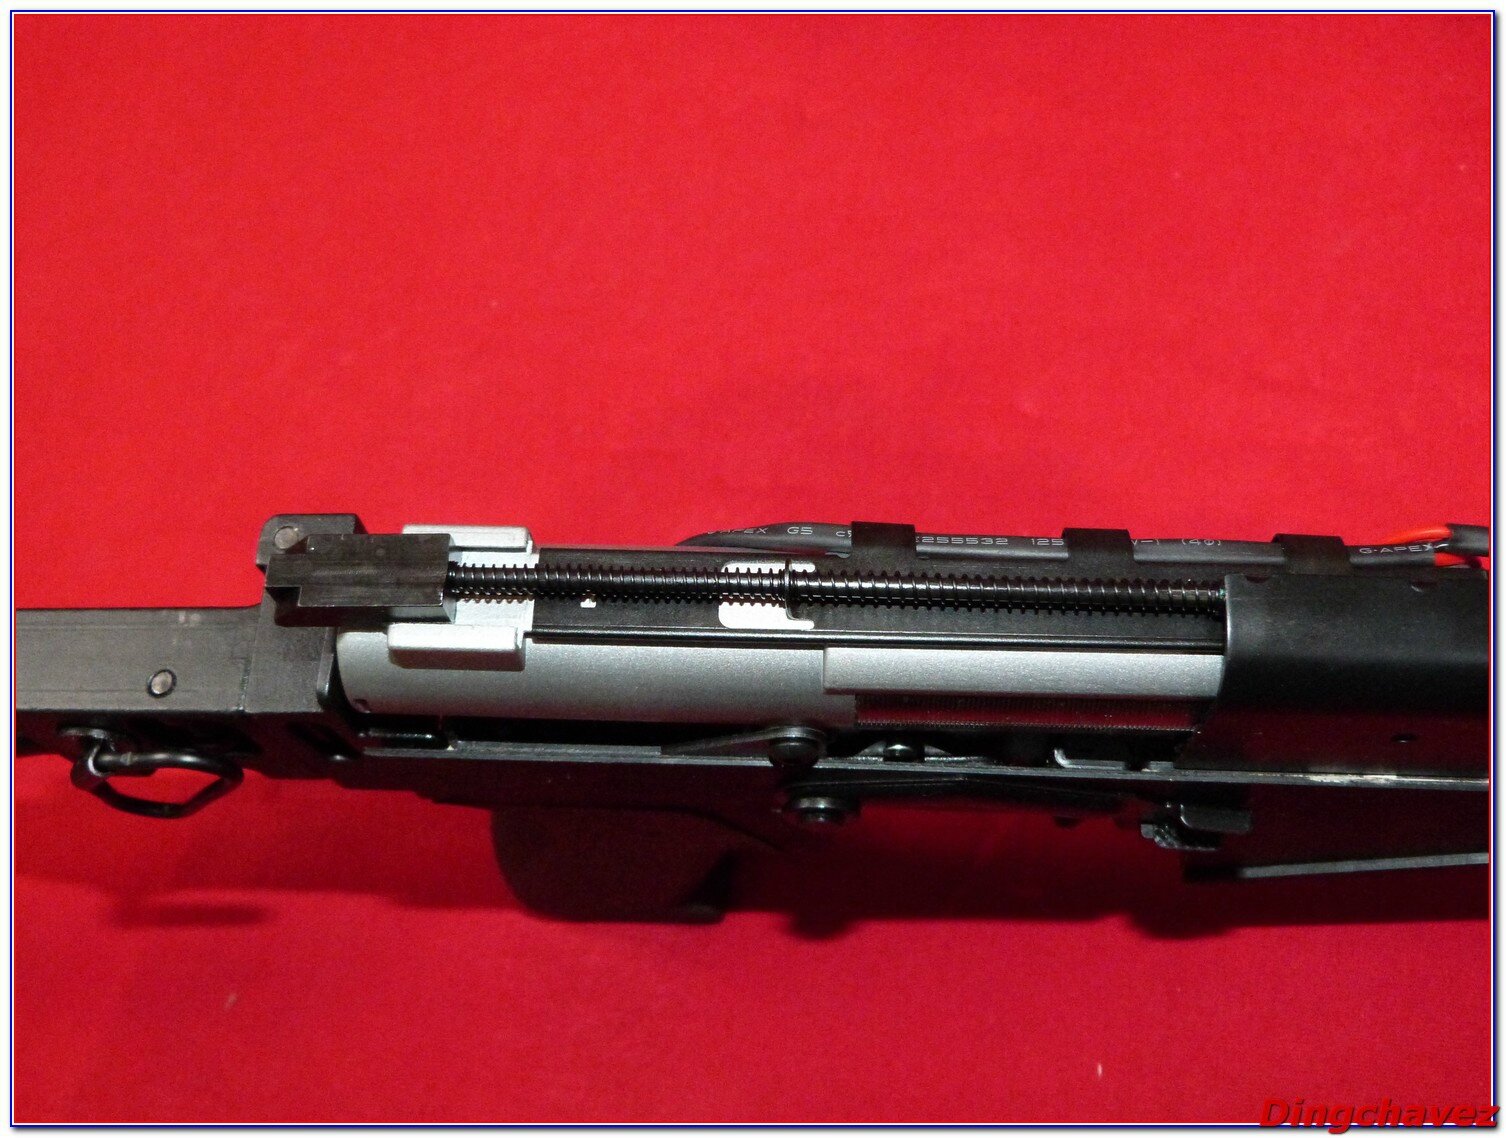
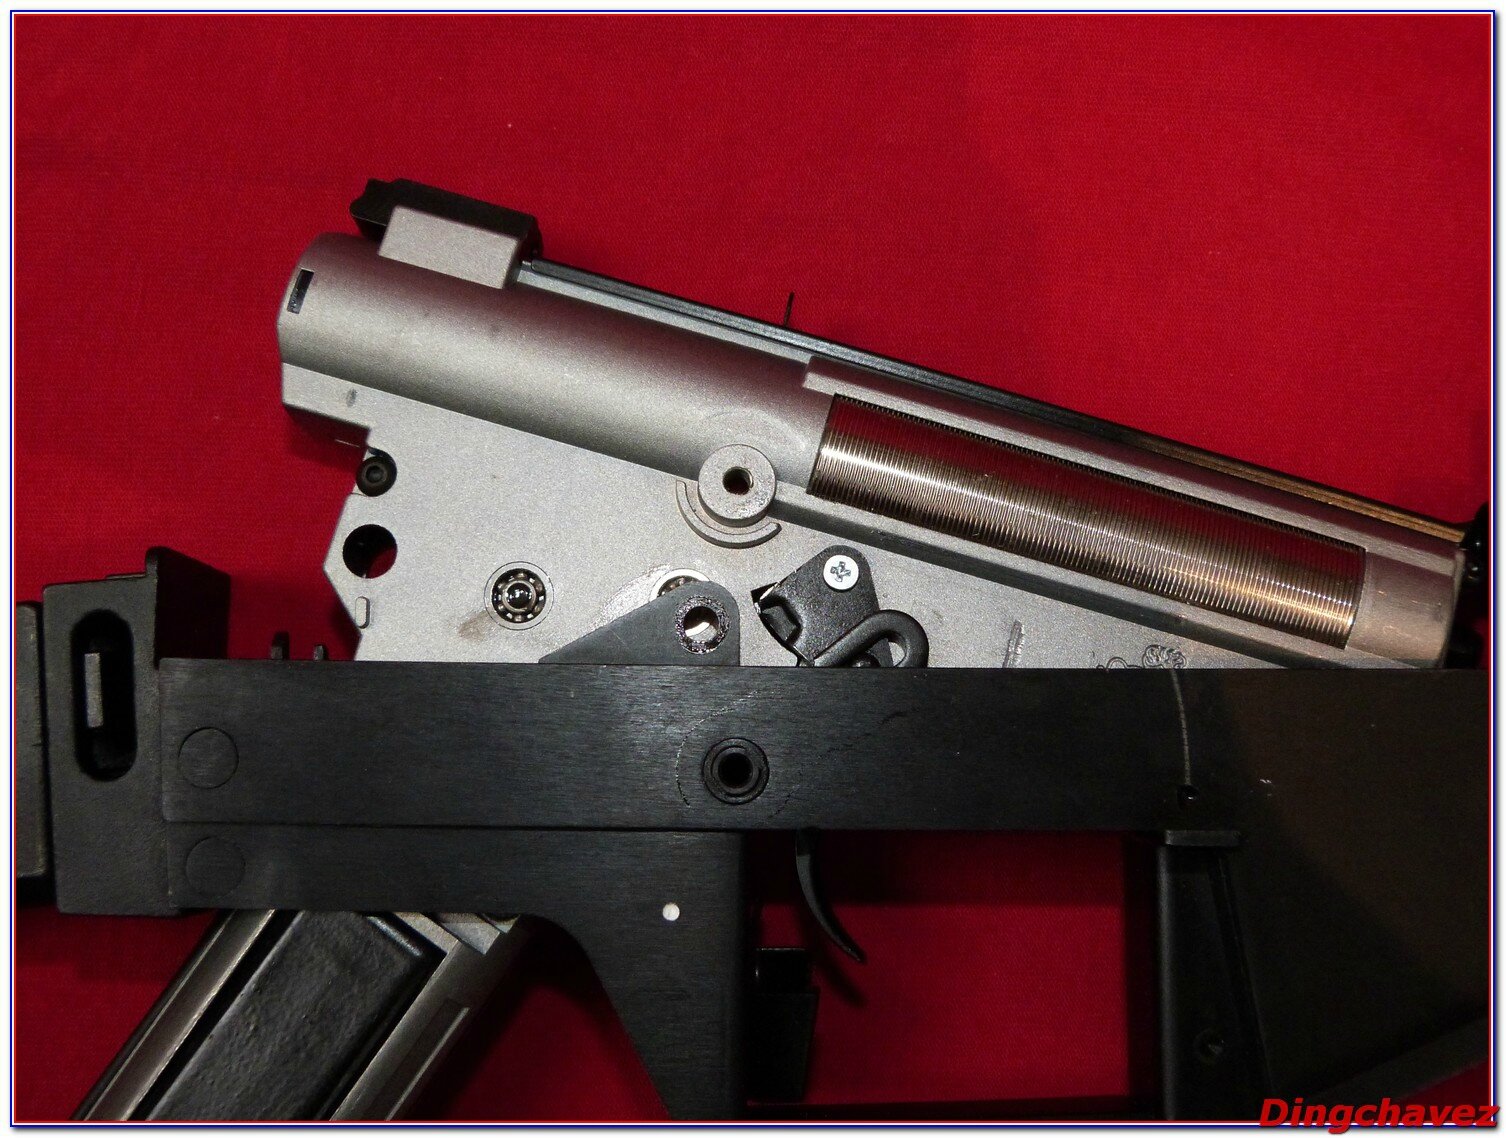
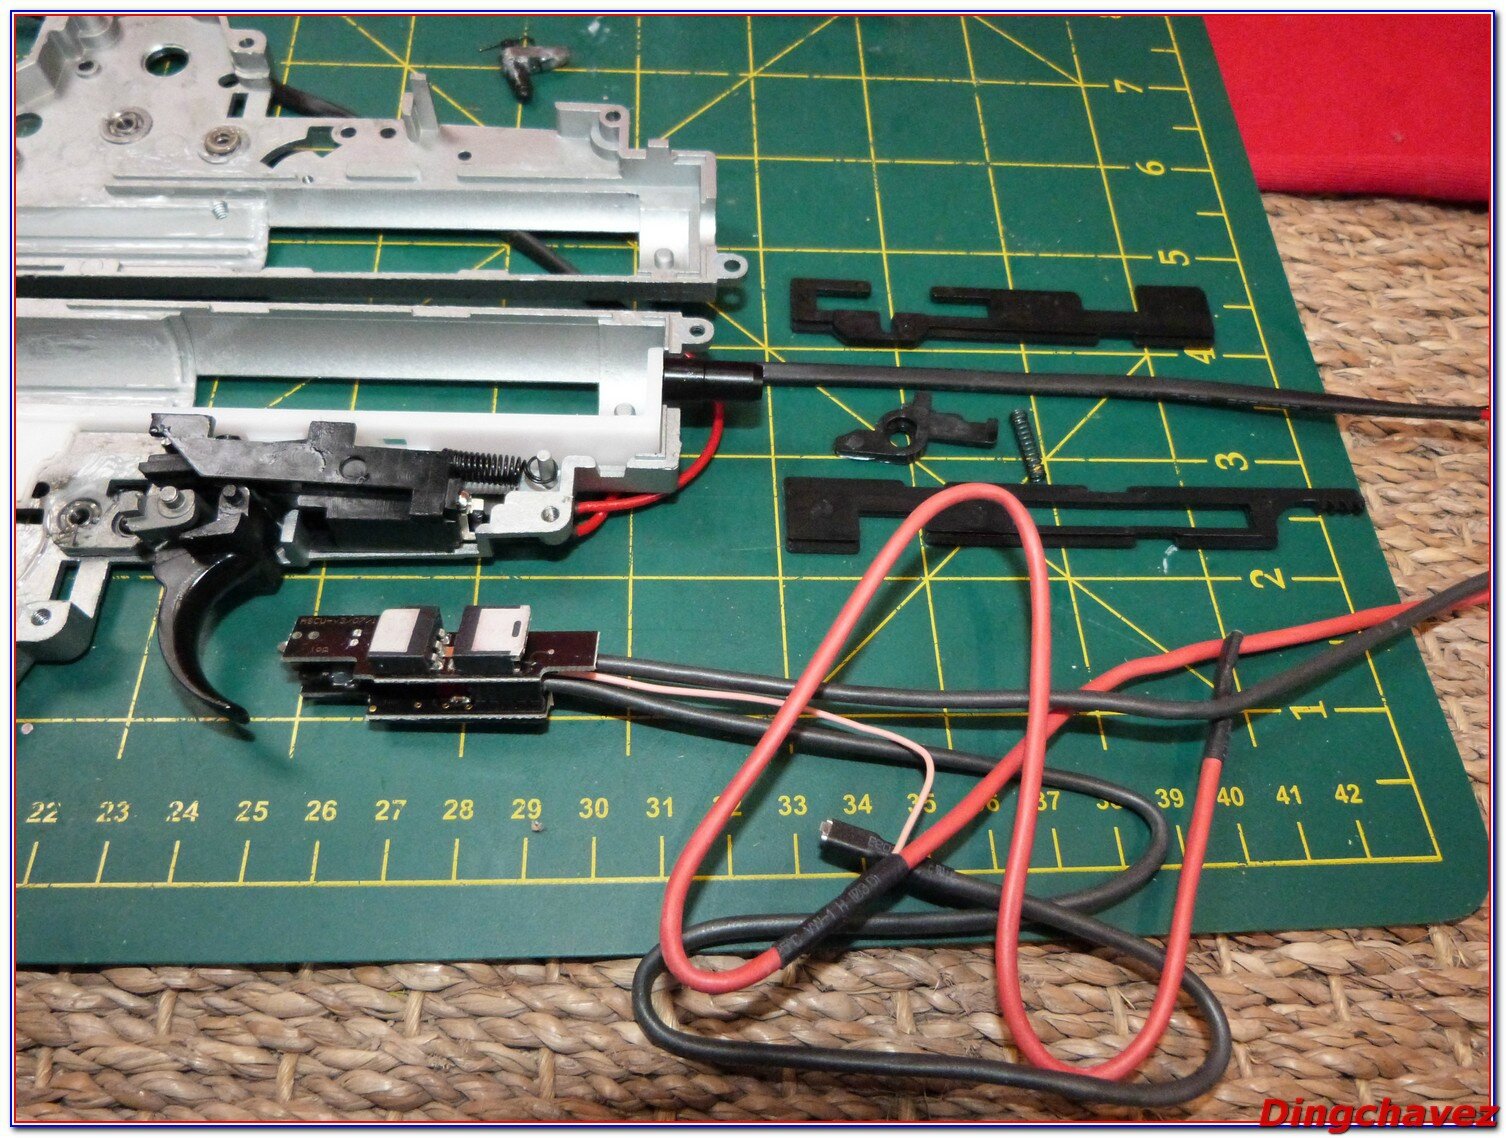
Place à la gearbox, une version 3 un peu modifiée pour les besoins des spécificités du AS-VAL.
Sous la gearbox on peut voir la pièce qui vient actionner le semi et le full par l’intermédiaire du sélecteur de tir.
Let’s review the gearbox. This is a V3 one, a bit modified to fullfill the AS-VAL specs.
Under the gearbox, you can see the part acting as fire selector.

Il est donc normal de ne pas retrouver les pièces habituelles de sélection de tir.
So it is normal not to see the well known fire selector parts.

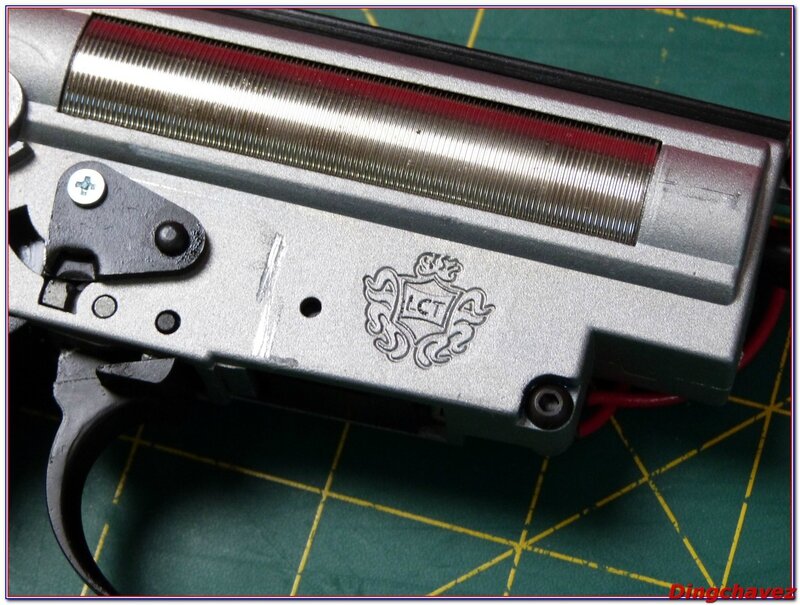
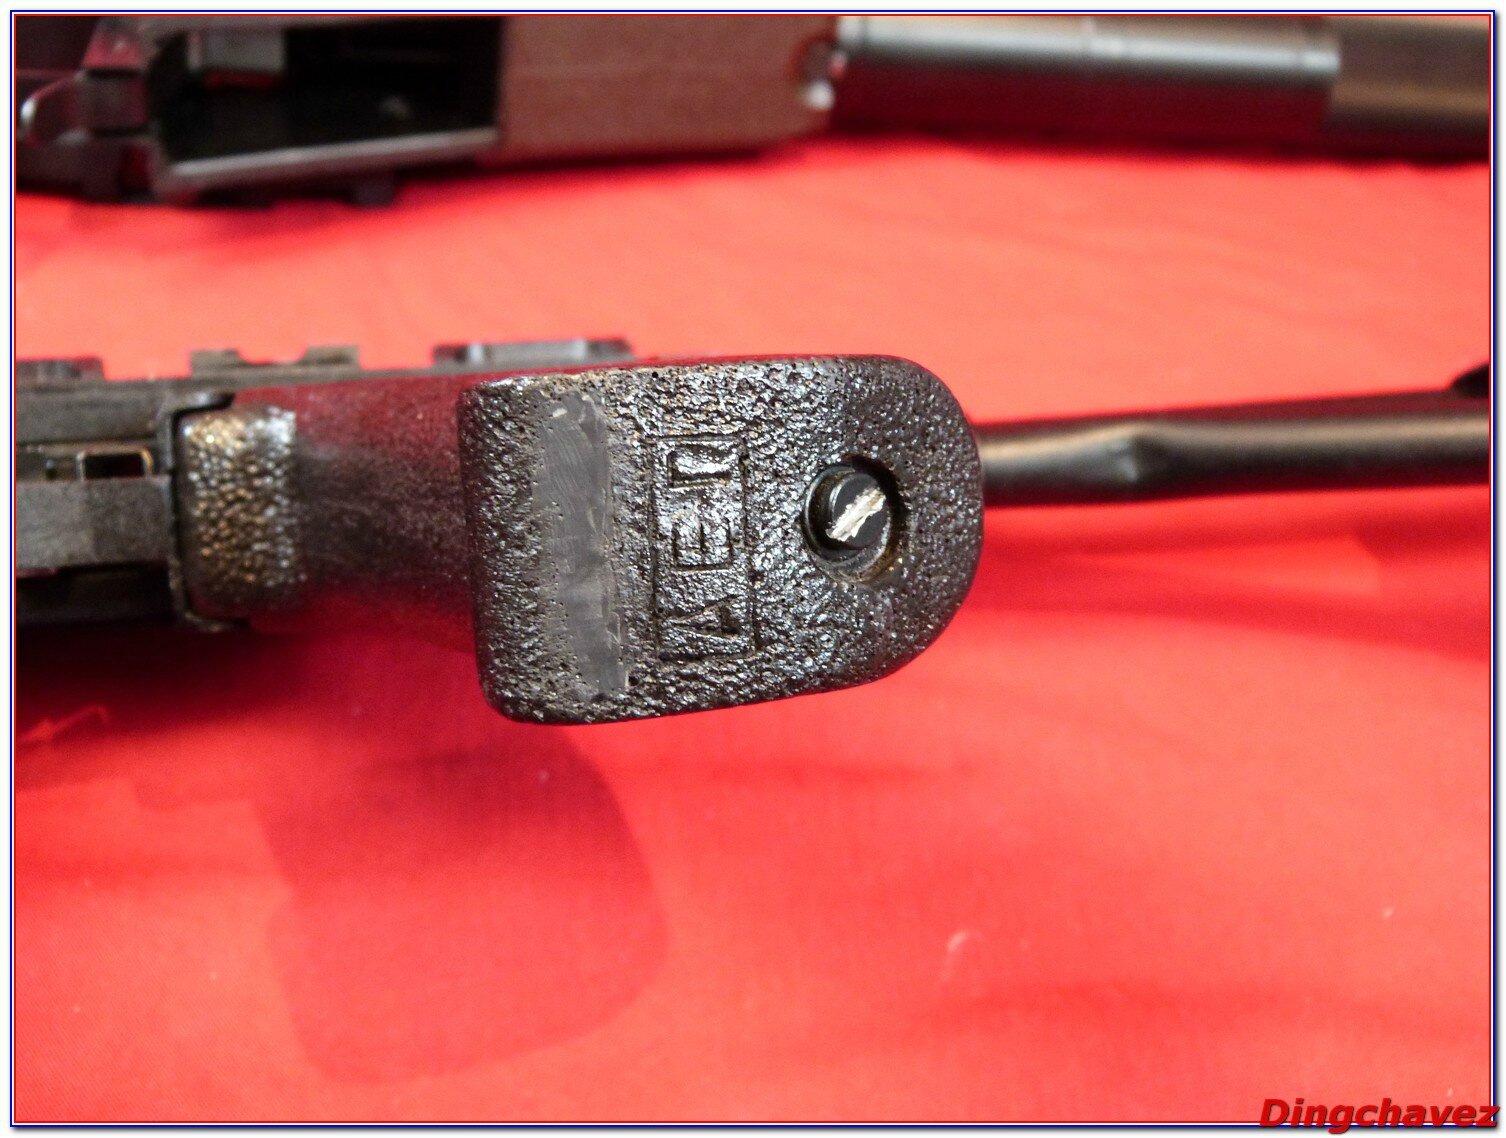
La coque est gravée de l’emblème LCT.
The shell is engraved with LCT logo.
Aucune indication sur le type de moteur utilisé.
No clue about the motor type.

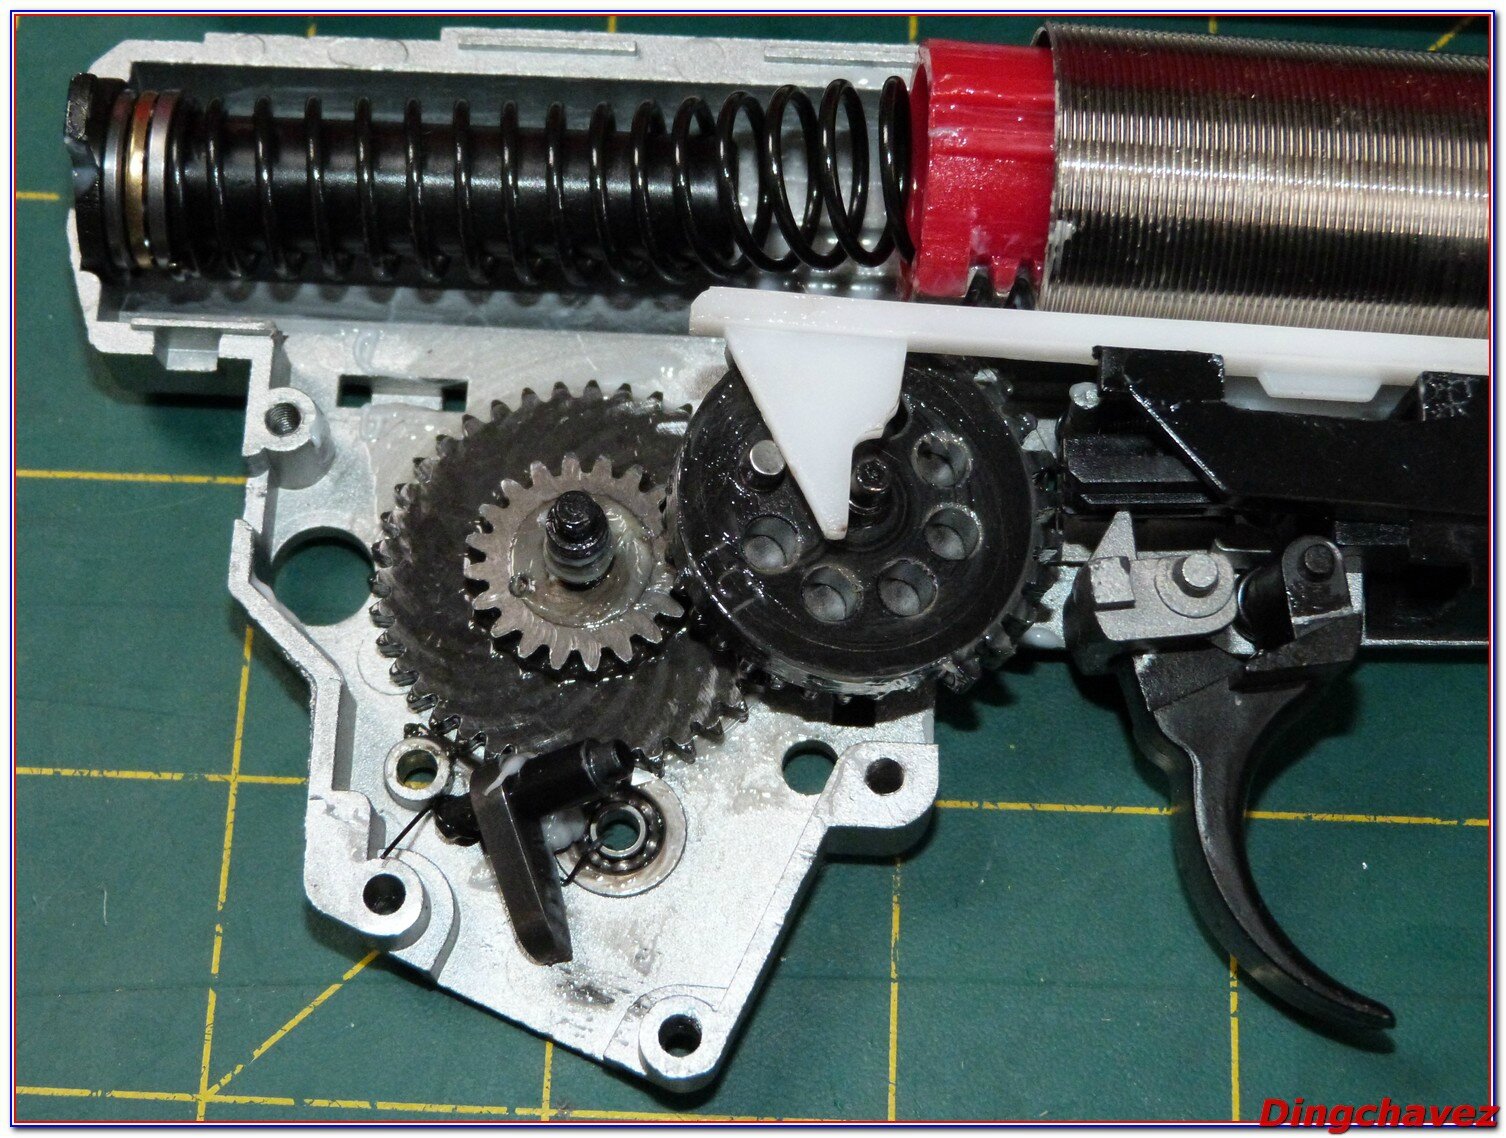
Quelques vis plus tard la voici ouverte. A première vue cela semble très bien ! Engrenages montés sur roulements, guide de ressort également sur roulement, graissage ok et calage au poil. Attention à ne pas faire sauter le bloc détente, c’est un peu chiant à replacer.
A few screws later, it is open. At first sight it seems very good ! Steel gears on bearings, spring guide with bearing, lubrication all right and no excessive game between the gears. Be careful not to remove the trigger bloc, it is a pain in the neck to put back together !
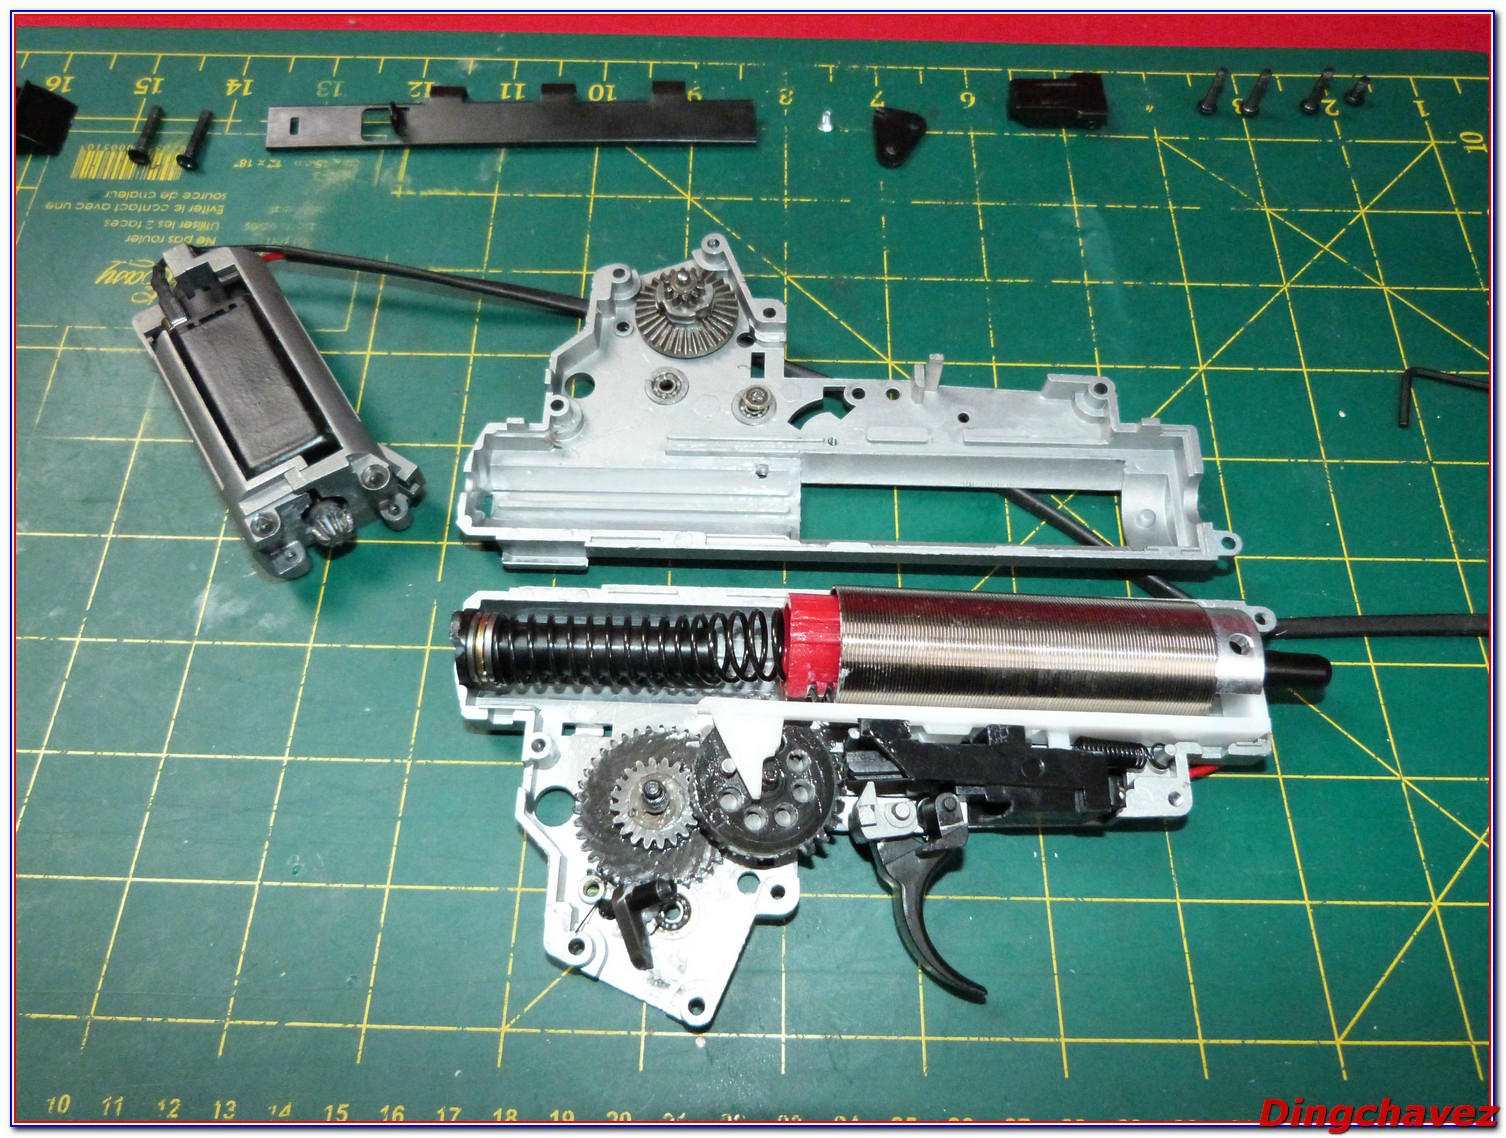
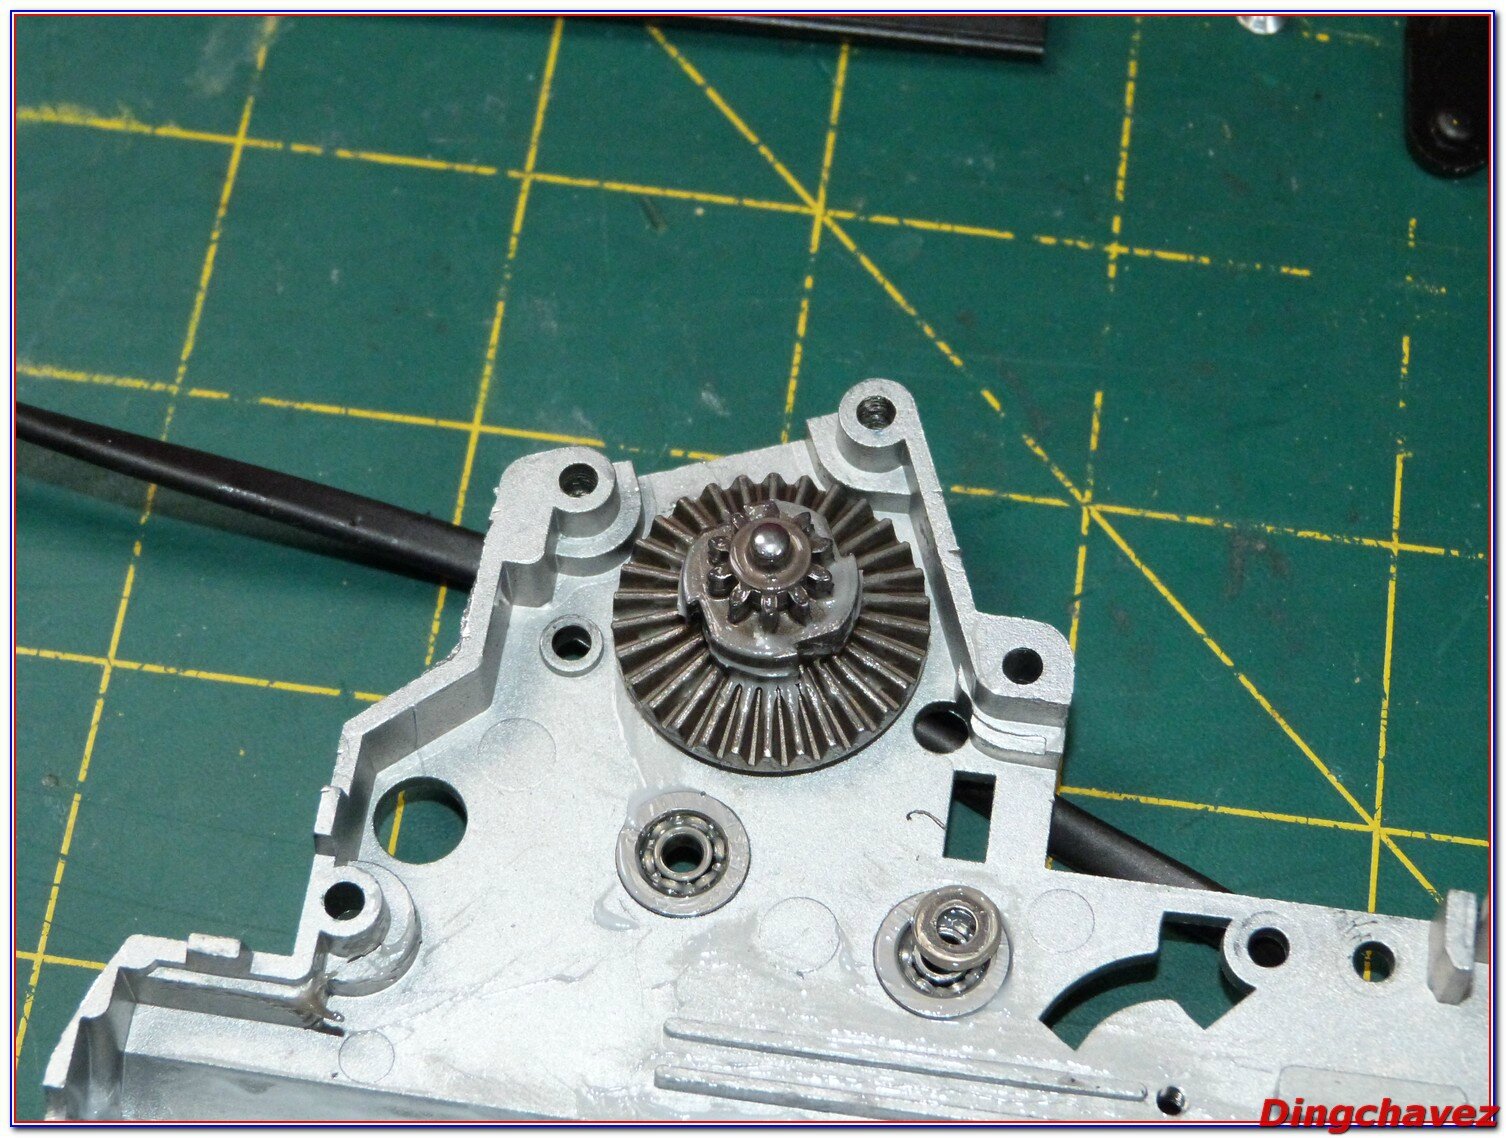
L’engrenage moteur est resté sur la seconde partie de la coque…
The motor gear stayed on the gearbox shell…
Le cylindre est un modèle plein, ce qui est logique avec un canon de 425mm.
The cylinder hasn’t got any holes due to the 425mm barrel.

Le piston est muni de dents en acier, la tête de piston est montée sur roulement.
The piston has full steel teeth, the piston head has got bearings.

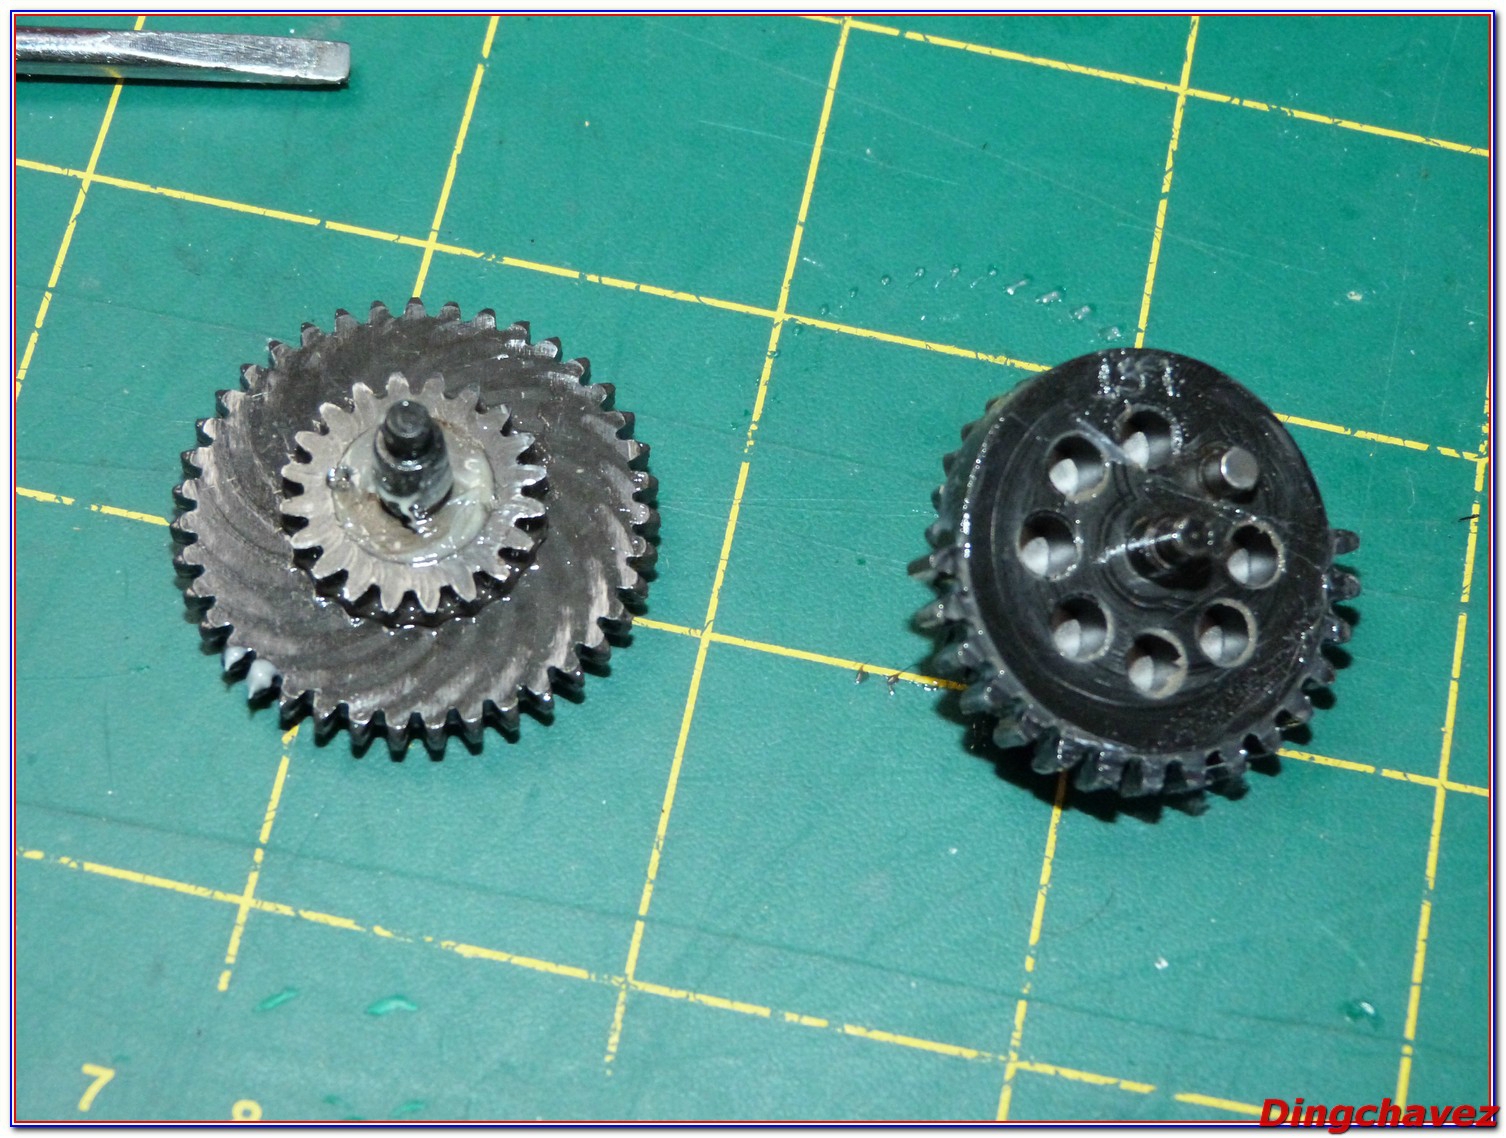
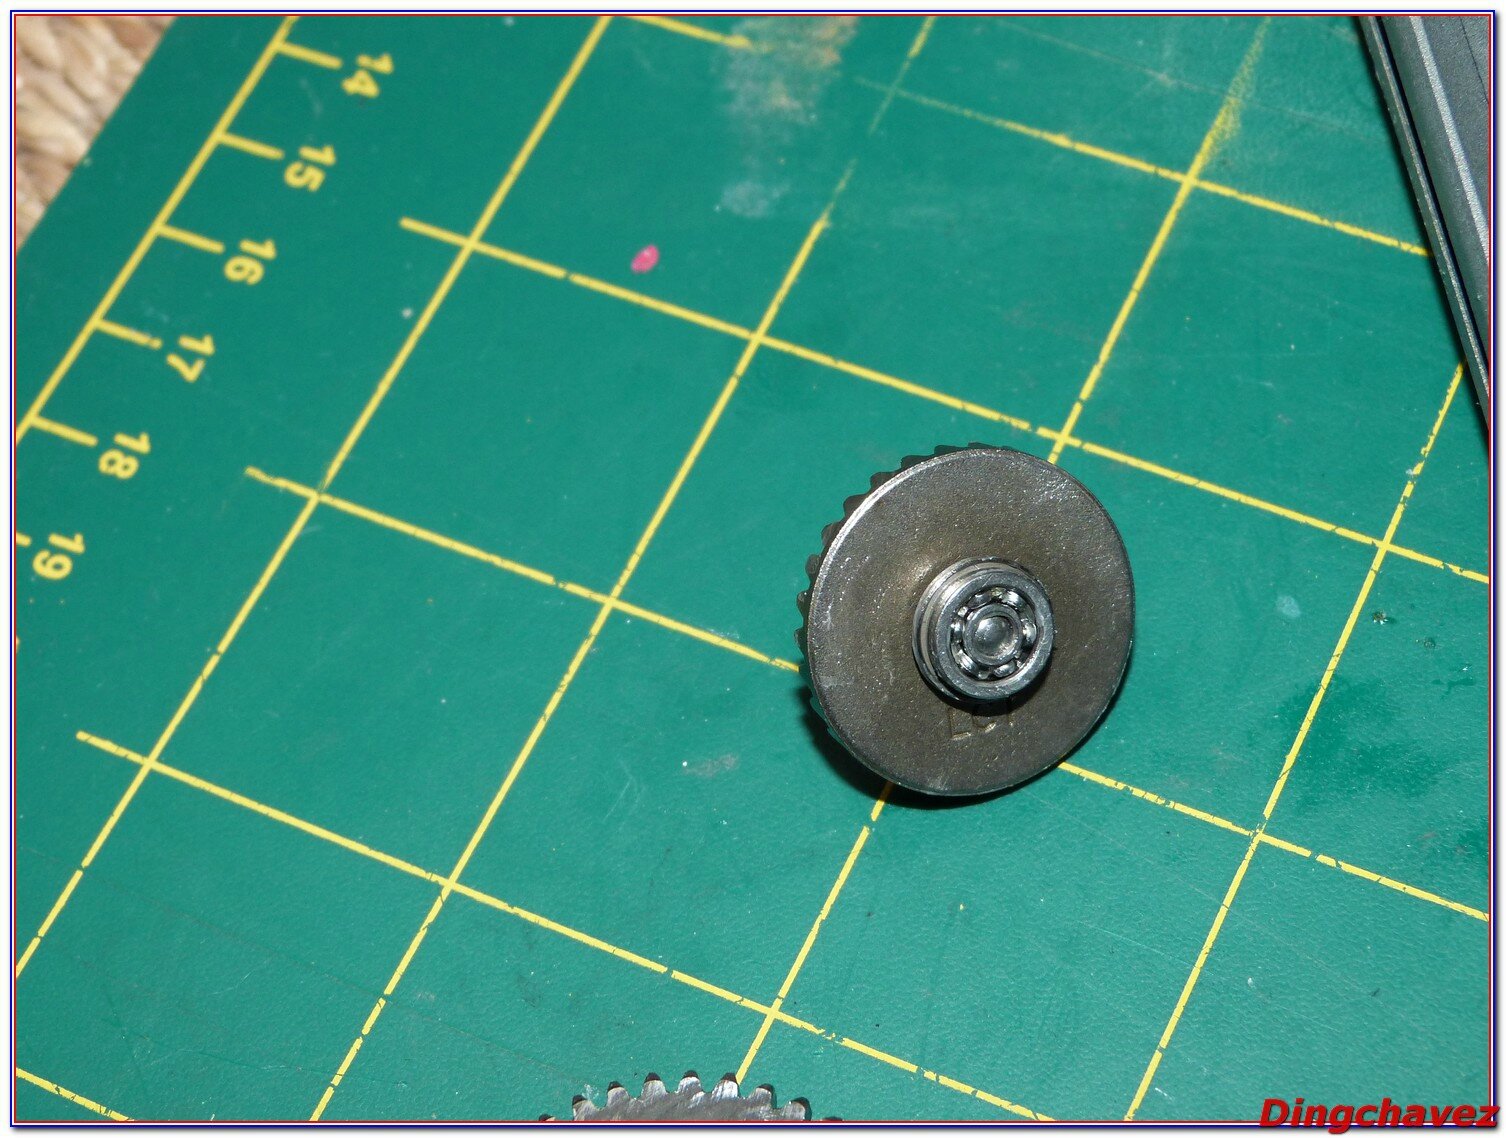
De jolis engrenages en acier marqués LCT. On est loin des internes Cyma (même s’ils sont solides !).
Nice steel gears with LCT markings. It is far from Cyma internal (even if it is sturdy ! ).
L’engrenage moteur, je n’ai pas réussi à enlever le roulement…
The motor gear, I didn’t manage to remove the bearing…
La tête de cylindre en alu comporte deux joints toriques, le nozzle est également équipé d’un joint, l’étanchéité est excellente.
The aluminum cylinder head hosts two O-rings, the nozzle also has an O-ring. Airtightness is excellent.

Paf, j’ai tout pété !
Boom, I gutted the gearbox !

ASCU ou pas ASCU ? Je me tâte, en tout cas pas de raison que ça ne soit pas compatible avec le VAL !
ASCU or not ? I can’t decide now, but there is no reason that it’s not compatible.
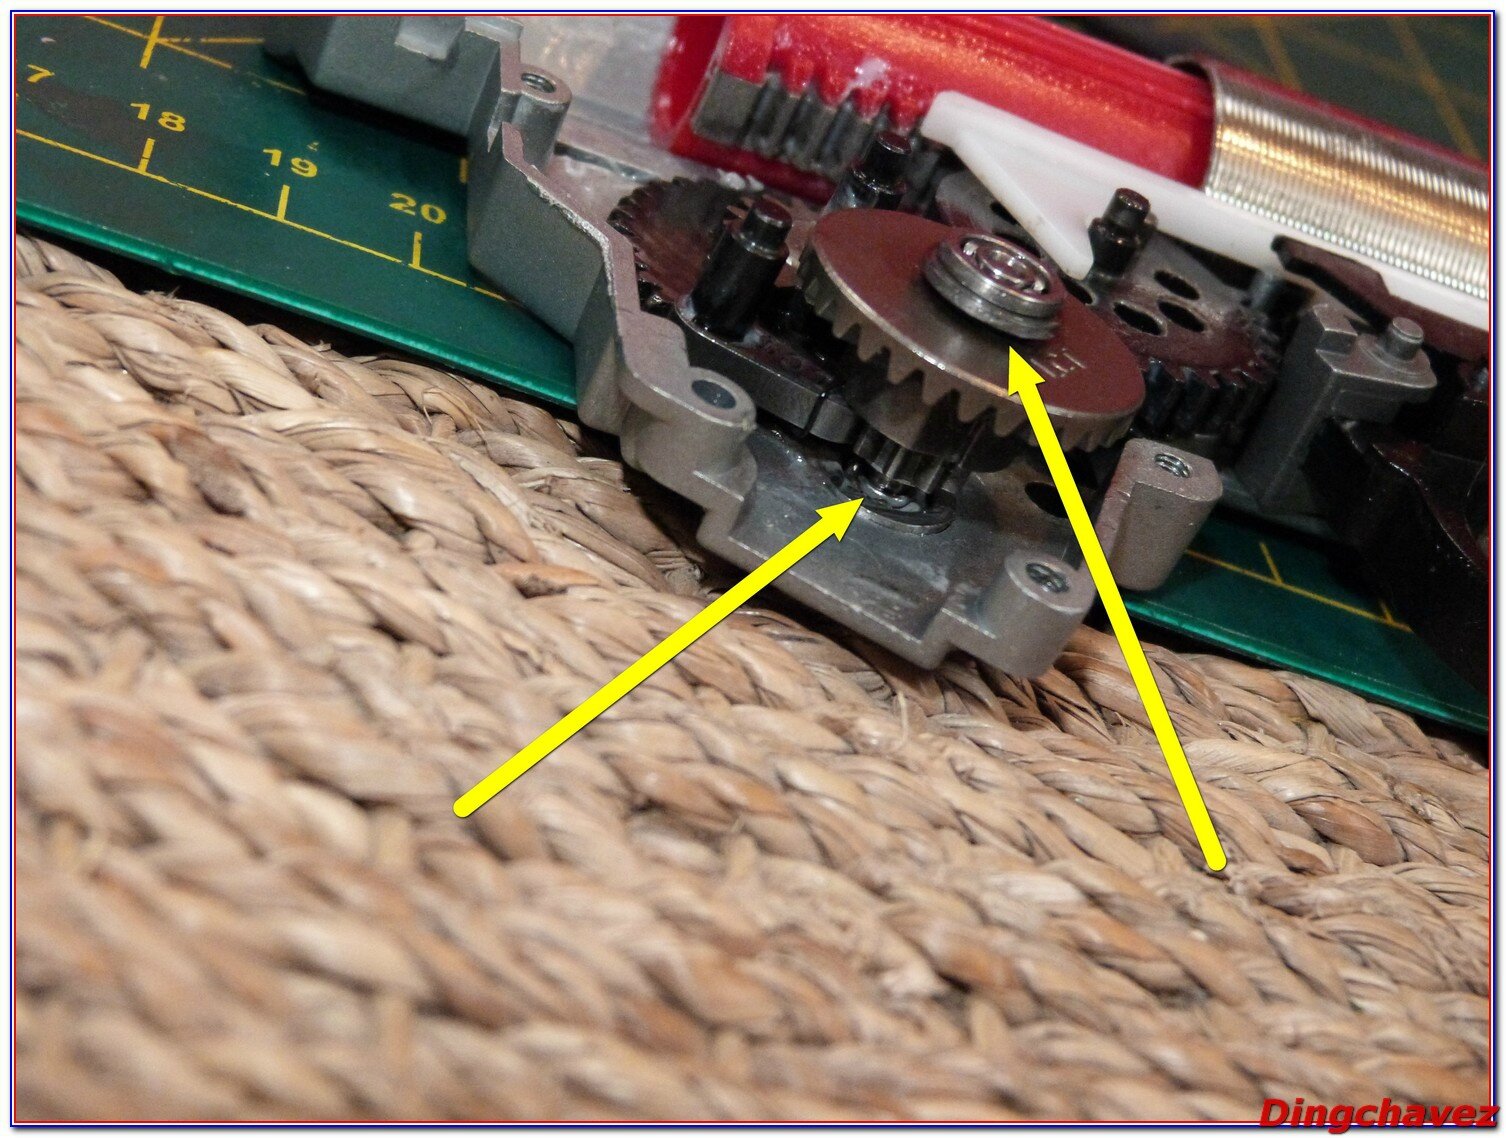
Comme vous pouvez le constater, le fait que l’engrenage moteur en soit pas libre sur la bague interne des roulements occasionne un espace assez conséquent. Il faut attendre le serrage des coques de la gearbox pour que tout se mette en place. Je suis curieux de savoir si je suis le seul à avoir ce problème.
As you can see, the motor gear isn’t fully inserted in its bearings. Thus, you have to force a little bit to assemble the gearbox. I’m curious to discover if I’m the only one with this issue.
Lors du remontage, placez un chargeur pour aligner l’ensemble avant de serrer les vis.
When assembling the gun, insert a magazine to align everything before tightening the screws.

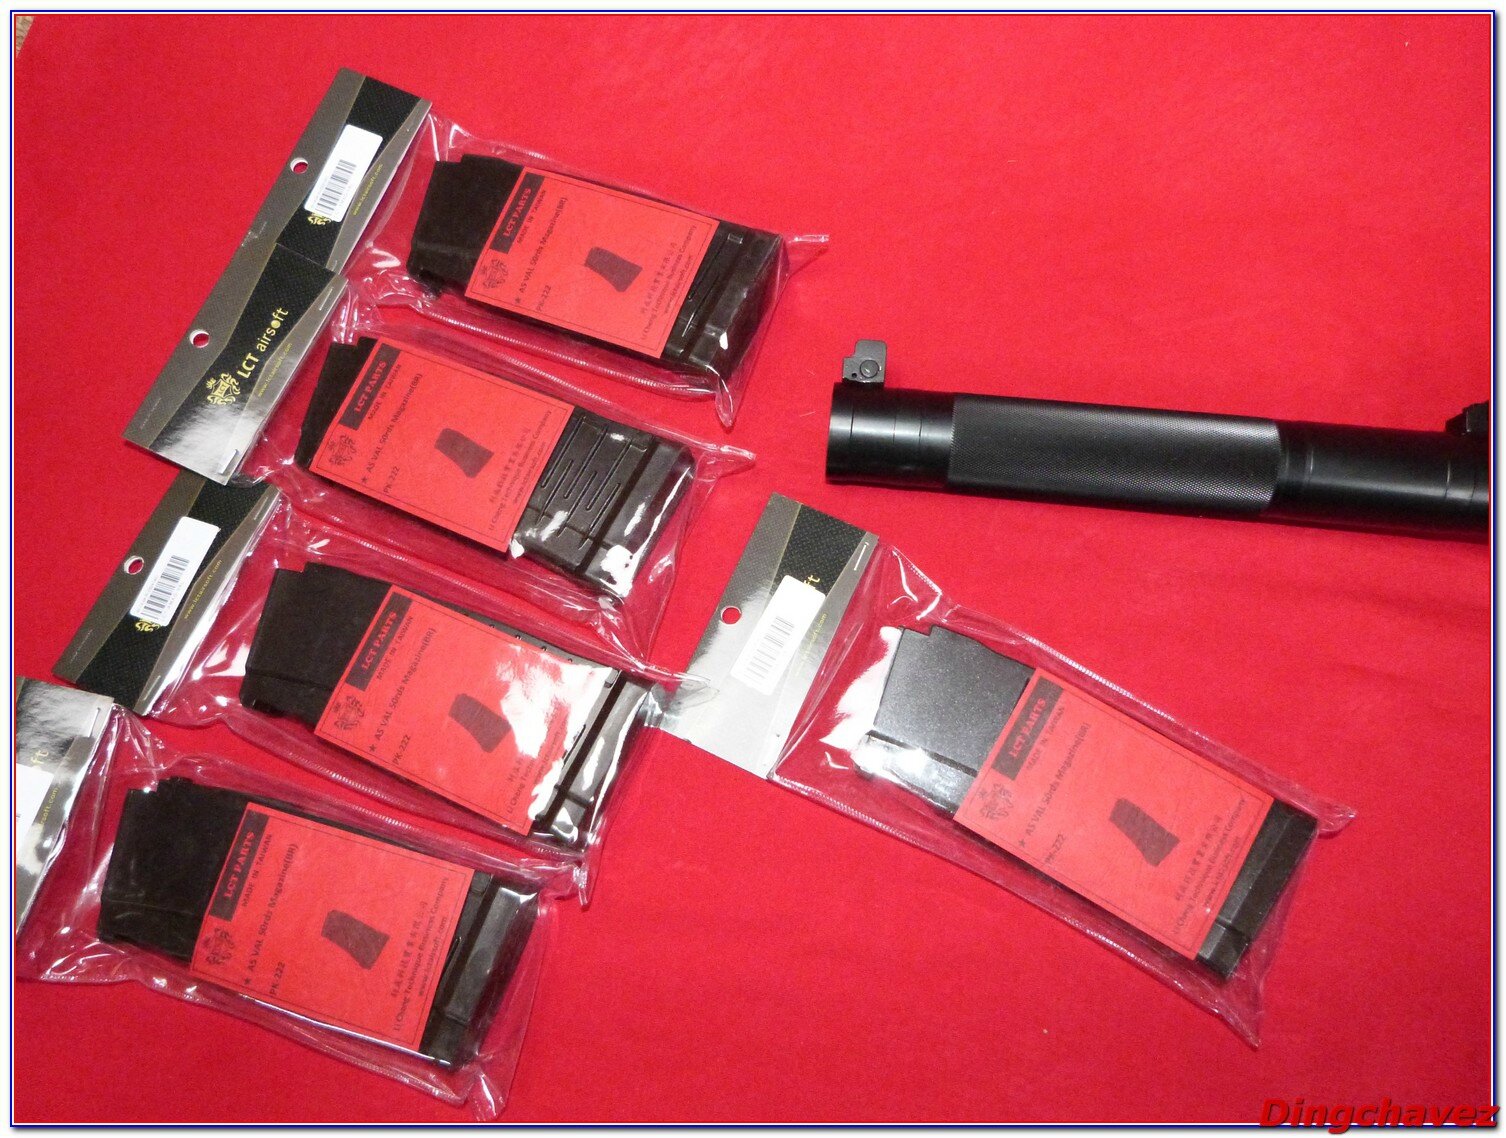
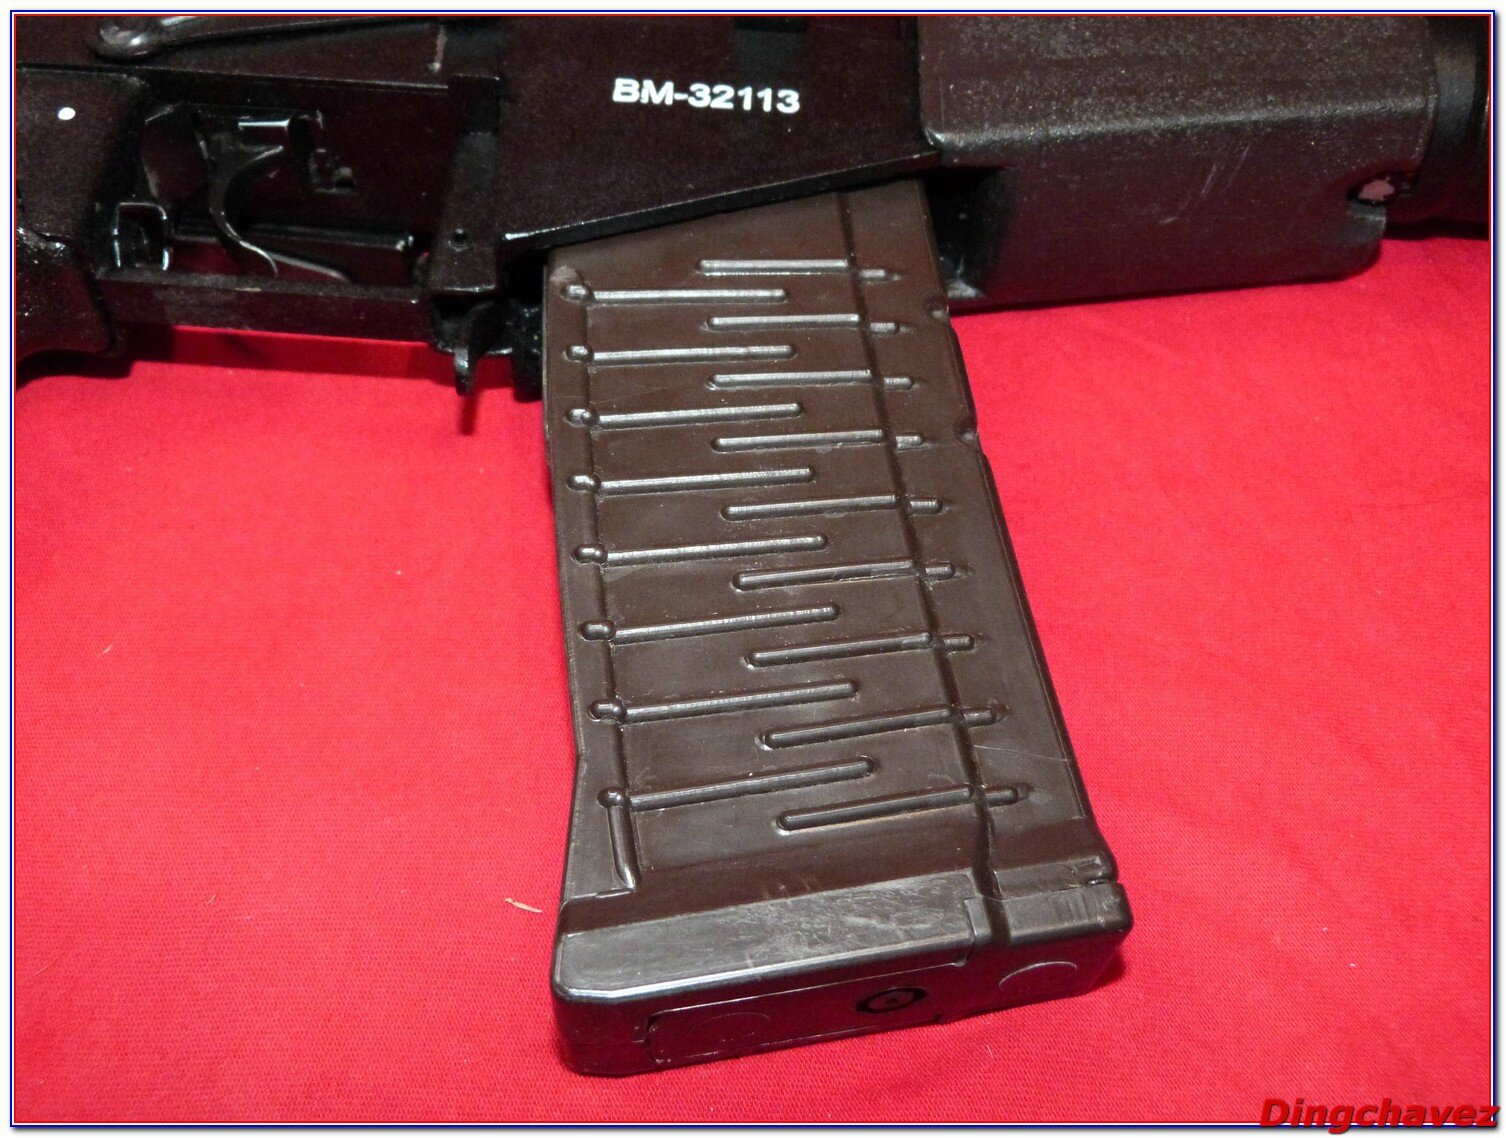
Les chargeurs sont en plastique couleur « plum » et contiennent 50 billes. Il semblerait qu’un chargeur Hi-cap soit en projet mais à 9$ le chargeur, LCT ne matraque pas le client, même si, je vous l’accorde, ça fait toujours cher pour un morceau de plastoc et un ressort…
En tout cas les billes y entrent bien, sans forcer et je n’ai constaté aucun misfeed que se soit en full ou en semi.
The magazines are made of « plum » plastic and hold 50 BBs. It seems that a hi-cap mag will soon be issued, but with $9 for a magazine, LCT doesn’t milk consumers.
BB feeding is smooth and I didn’t experience any misfeeds.
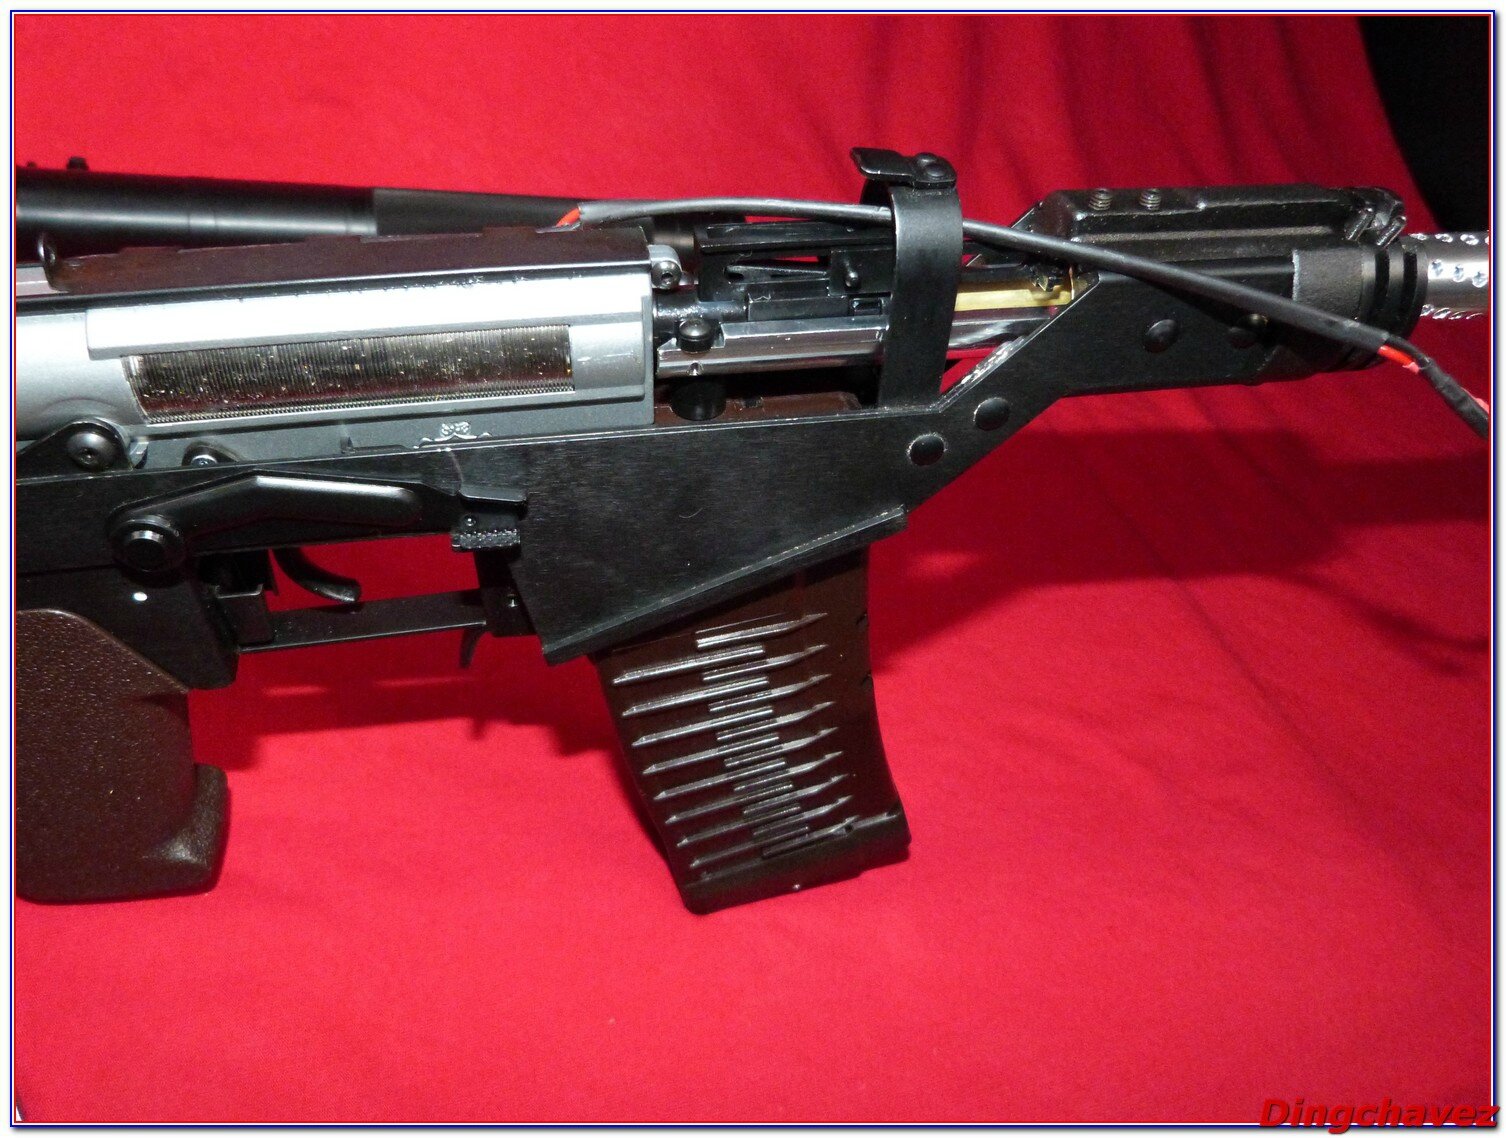
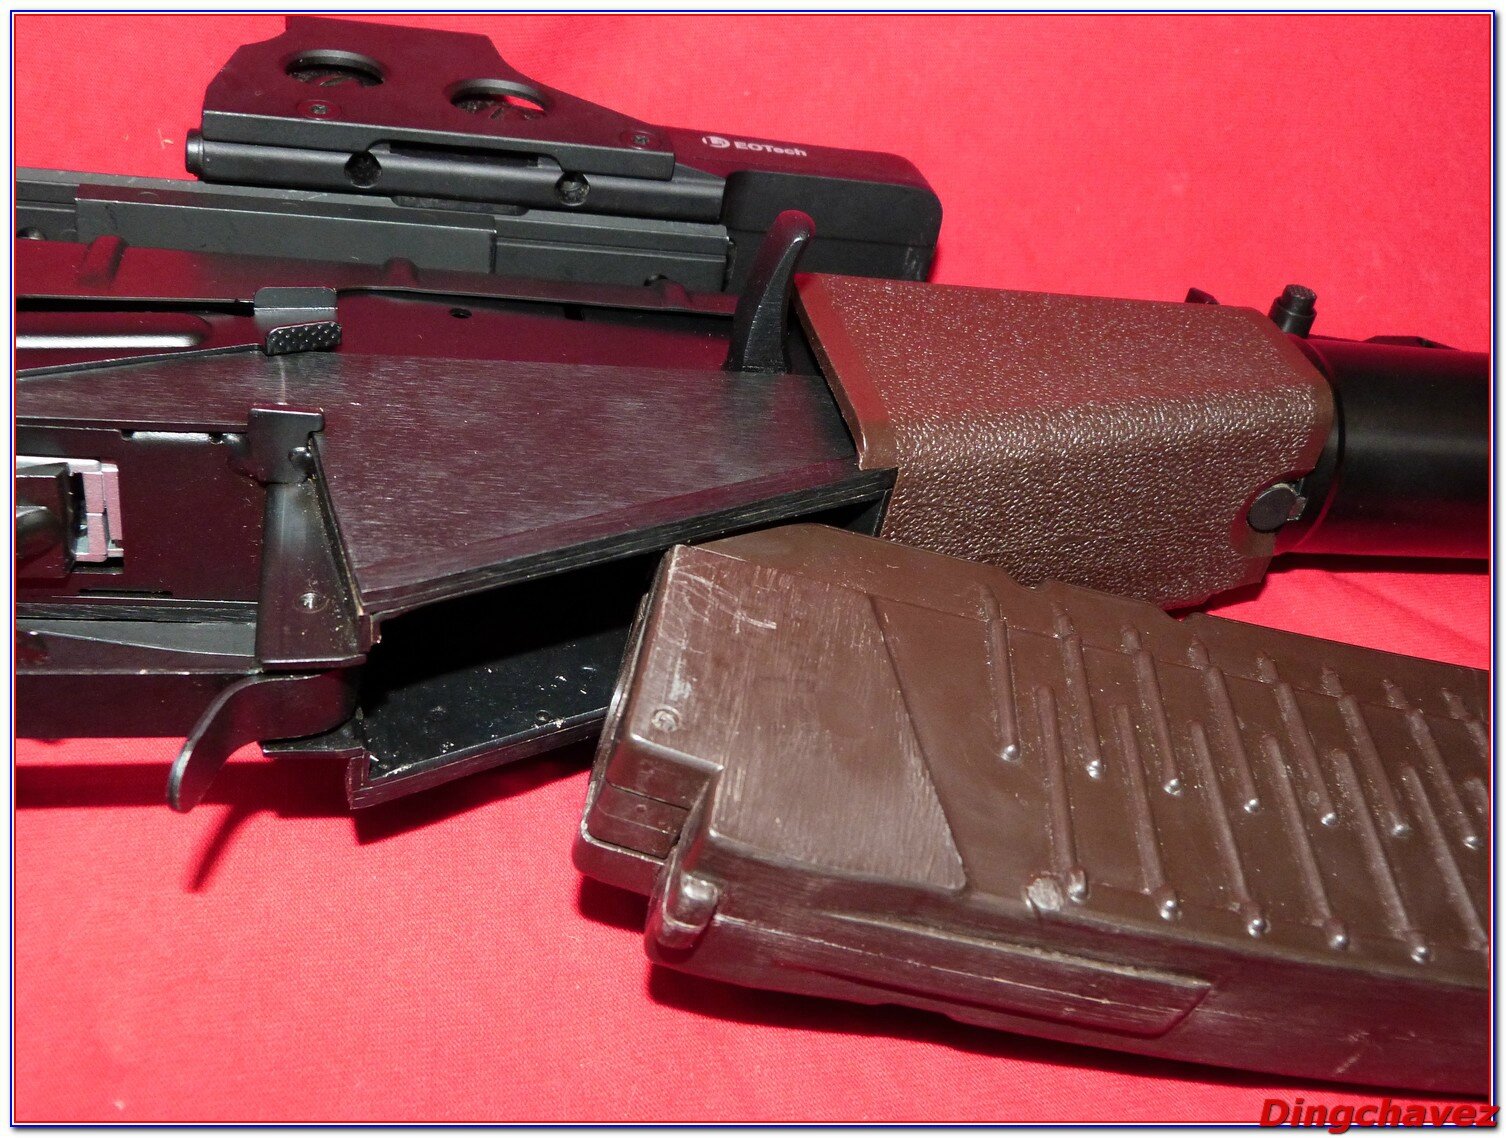
Le puits de chargeur est assez particulier, il faut le coup de main pour changer de chargeur rapidement.
The mag well is a little bit weird, you’ll have to practice to be able to change magazine quickly.

Les tests de tirs ont été fait avec un Chrony Xcortech 3200, des billes 0.2 grammes Xtreme precision Bio et des batteries Turnigy stick 7.4V 1300mAh et Firefox 11.1V 1300mAh.
The shooting tests have been made using a Xcortech3200 chrono, 0.2g Xtreme precision bio BBs and stick batteries (7.4V 1300mAh Turnigy and 11.1V 1300mAh Firefox).
WGC annonce 290-300fps sur le site, j’ai constaté une moyenne de 285 fps sur 10 billes sur le modèle que j’ai acquis, certains ont eu des modèles qui sortaient 330 fps, la magie des ressorts… Ne sachant pas encore si je compte dédier la réplique au CQB pur ou également m’en servir en terrain ouvert, je n’ai encore rien modifié.
WGC mentionned a 290-300fps velocity on their website, I shot 10 BBs and witnessed an average of 285 fps on my gun. Some players have 330 fps out of the box, that’s the magic of airsoft springs ! As I still don’t know for what role I want to use that gun (CQB or open field) I haven’t changed the spring yet.
La cadence de tir avec la 7.4V est de 13 BB/seconde et on passe à 19 BB/seconde en 11.1V
Rate of fire is 13 BB/second with 7.4V battery and 19 BB/sec with 11.1V battery.
Niveau performances, ma chance légendaire a frappé et j’ai hérité d’un modèle qui n’envoient pas deux billes au même endroit. Alors que je visionne de nombreuses vidéos de propriétaires de VAL qui obtiennent un trait de bille en full auto, mon exemplaire est le digne héritier d’un fusil de chasse, ça disperse à mort en sortie de boite, mais je ferai de nouveaux tests une fois le canon changé et callé.
I must say I’m a lucky guy. Usually I buy the only non-working appliance in the shop ! Here I am : my gun doesn’t shoot two BBs to the same spot ! So long with the wanted « line of BBs » that I could see on some videos, instead I’ve got a nice shotgun-like dispersion !
I’ll conduct more tests once I’ve changed the barrel…
Le hop up fonctionne bien et la portée est dans la moyenne pour une réplique sortant 285FPS : au dela de 35 mètres la bille tombe.
Voici une vidéo de test à 25 mètres.
Anyway, the hop-up works well and the range is into the average for a 285FPS replica : after 35 meters the BB falls.
Here is a test video at 25m range.

LCT signe une belle réplique, comme à son habitude devrais-je dire. Finition impeccable, qualité de l’interne revue à la hausse et prix « abordable » pour peu que l’on ne dépense pas un quart du budget en frais divers. Restera à savoir quels prix seront pratiqués en Europe, pour l’instant je ne l’ai vu qu’en Espagne, bien au dessus de 400€.
Seul bémol à part le réglage du hop up raté, mais qui vient à mon avis de mon modèle, les roulements de l’engrenage moteur montés en force et les trajectoires irrégulières vont m’obliger à réviser la partie canon/hop-up pour corriger le tir.
Si tout va bien, je devrais avoir le modèle King Arms très bientôt, nous vous proposerons un « match » entre KA et LCT dans le numéro 7 (premier numéro papier !) de Red Dot Magazine.
LCT produced a nice replica, as always if I must say. Excellent finish, better internals and not too pricey when you don’t have to add 30€ of the price into shipping and other customs fees… I don’t know hom much the gun will be sold in Europe, but I’ve seen some over 400€ on a Spanish webshop.
To me, the only drawbacks -but I guess I’ve been lucky once again…- are the motor gear and the sketchy BB trajectories. I’ll have to work on the barrel to see if it changes anything. And of course the hop-up unit which should be adapted to the gun…
If everything goes as planned, I should have the King Arms VAL in a few weeks. We will give you a matchup in the next issue of Red Dot Magazine.

-Finition LCT/LCT finish
-Puissance raisonnable en sortie de boite/not overpowered
-Interne qui inspire confiance mais… /the guts look solid but…

…Roulements montés en force sur l’engrenage moteur/…the bearings were sealed to the motor gear
-Trajectoires assez aléatoires/ random BB trajectories
-Réglage du hop-up peu intuitif/ Not very friendly hop-up setting.
BONUS
LCT vs NPO
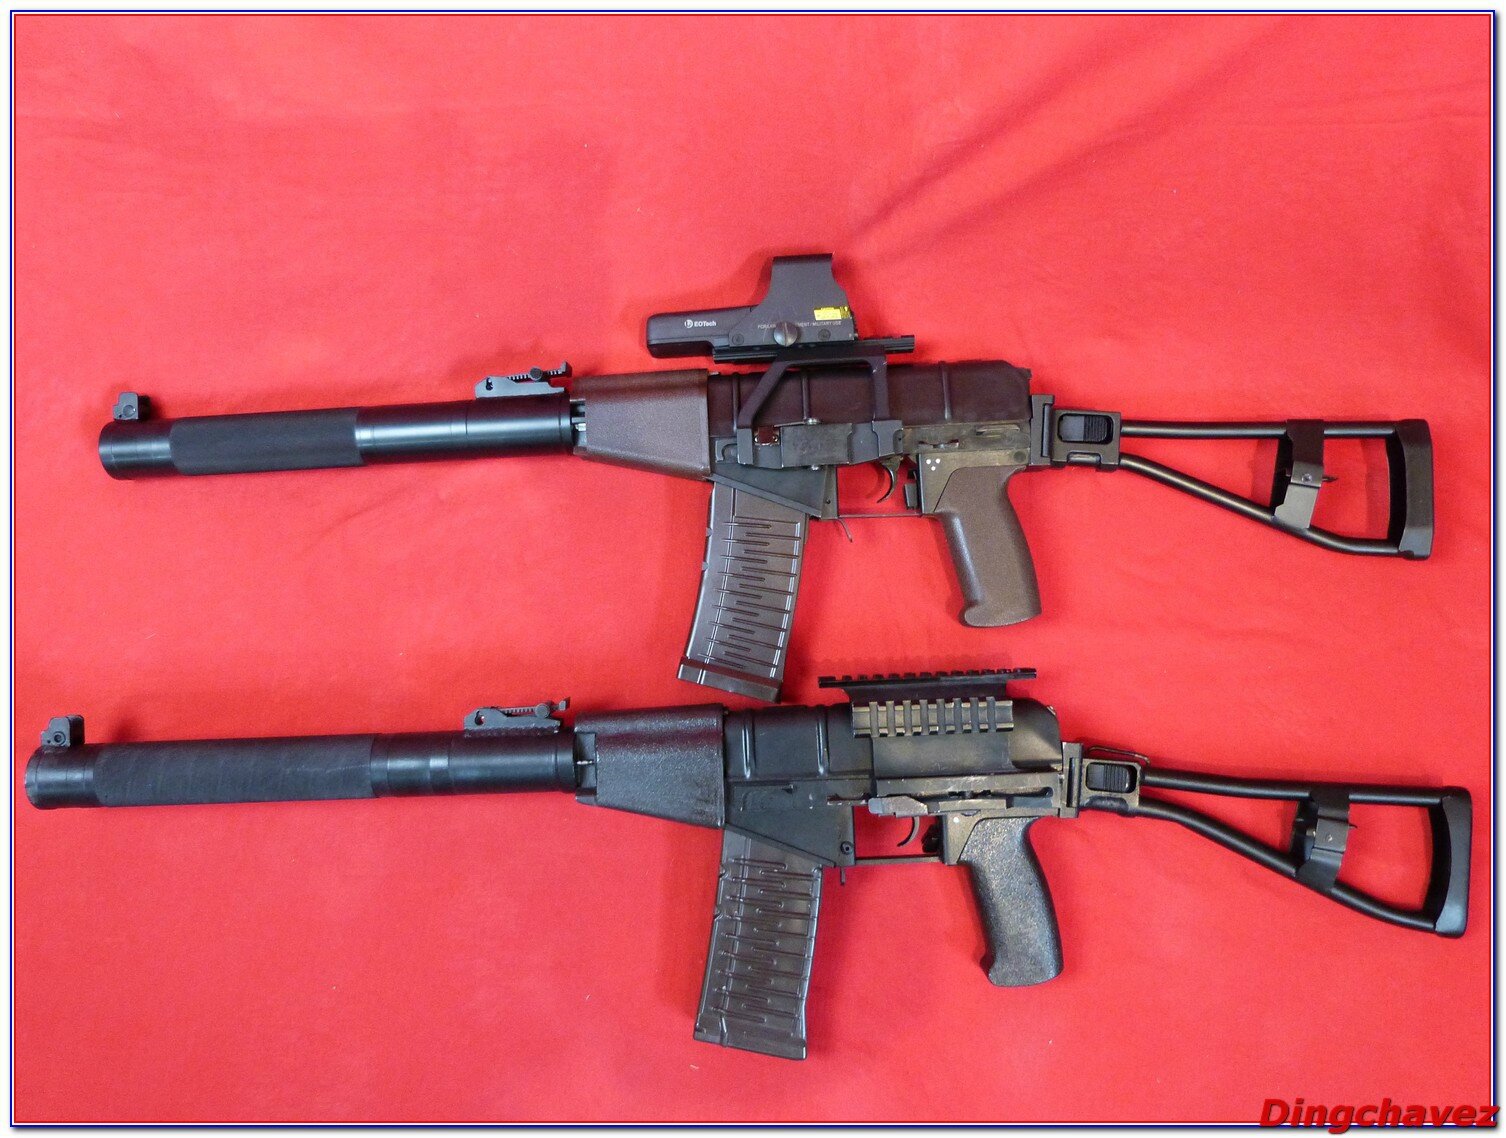
Mon camarade Nonofrag m’a fait le plaisir de me prêter son exemplaire de VAL fabriqué par NPO en Russie. Il s’agit ici d’un kits à monter soi-même dont le prix (près de 900€) est souvent un frein pour beaucoup de joueurs. L’aspect général est beaucoup plus « brut » que le LCT, ce qui lui donne apparemment un look plus proche du modèle réel. Plutôt que de faire de grands discours, je vous laisse constater les différences de finition des deux modèles.
My friend Nonofrag sent his NPO Russia AS-VAL to me. This is a kit to adapt around a V3 gearbox, but the price (around $1000) is often prohibitive for most players. The general look is rawer than LCT, which is apparently closer to the real VAL.
Pictures are better than words, so let’s see the main differences between these two nice replicas.
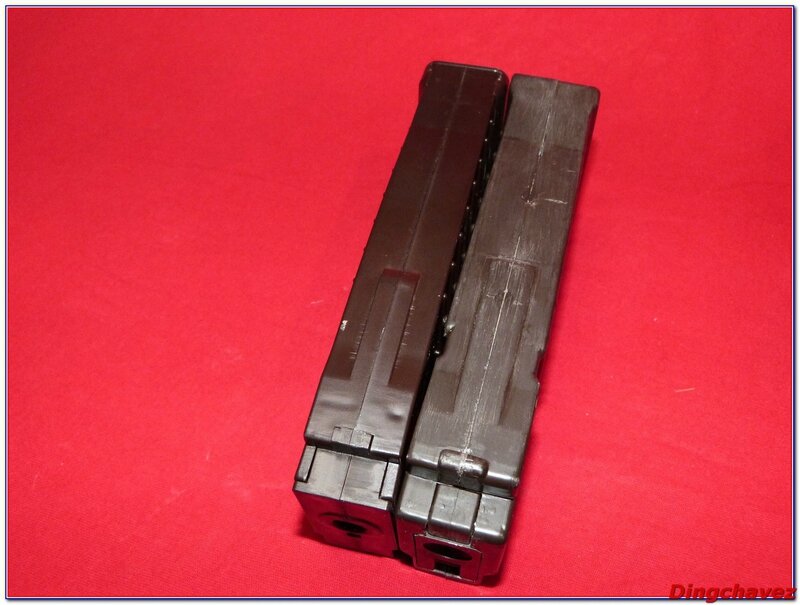
LCT en haut, NPO en bas.
LCT top, NPO bottom

NPO
LCT

NPO

LCT, on voit bien la trace de moulage du garde-main. Notice the molding marks.
NPO
LCT
NPO

LCT
NPO

LCT

NPO

LCT
LCT en haut, NPO en bas
LCT top, NPO bottom
 LCT à droite, NPO à gauche
LCT right, NPO left
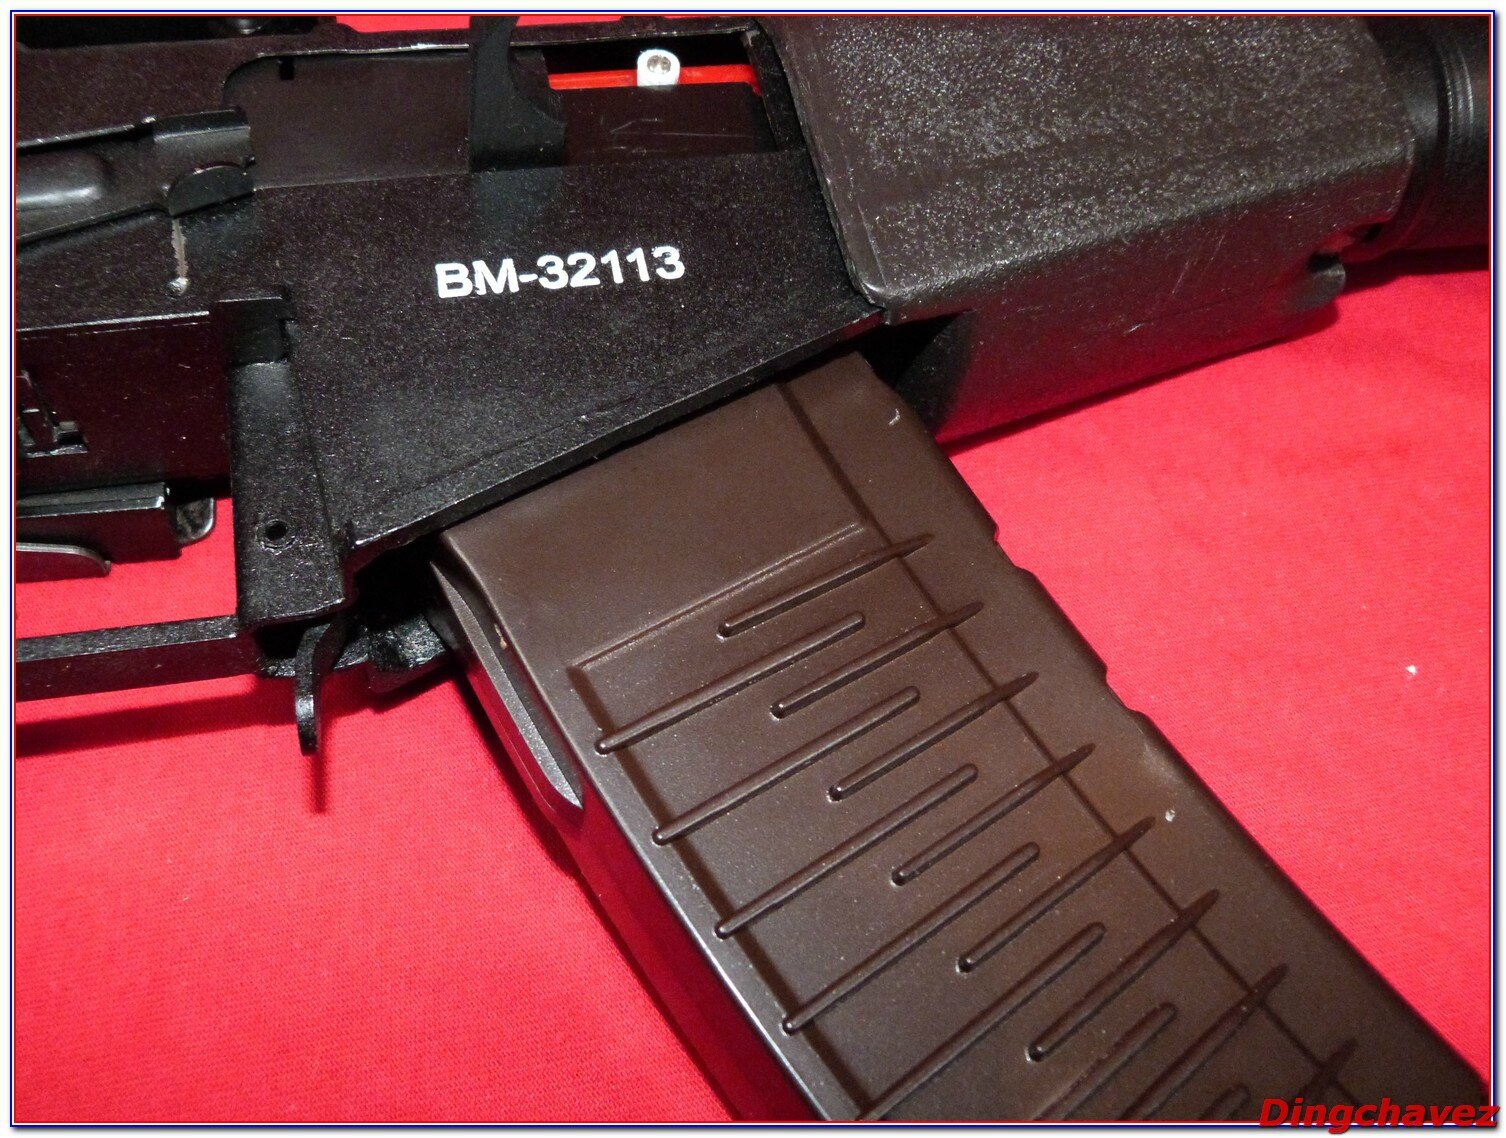
NPO, remarquez les marquages blancs.
NPO, notice the white markings.

LCT, pas de marquages et loquet de verrouillage de chargeur différent.
LCT, no markings and different mag catch design

NPO

LCT

NPO

LCT, là encore on remarque bien les traces de moulages.
LCT, once again molding marks
NPO
LCT
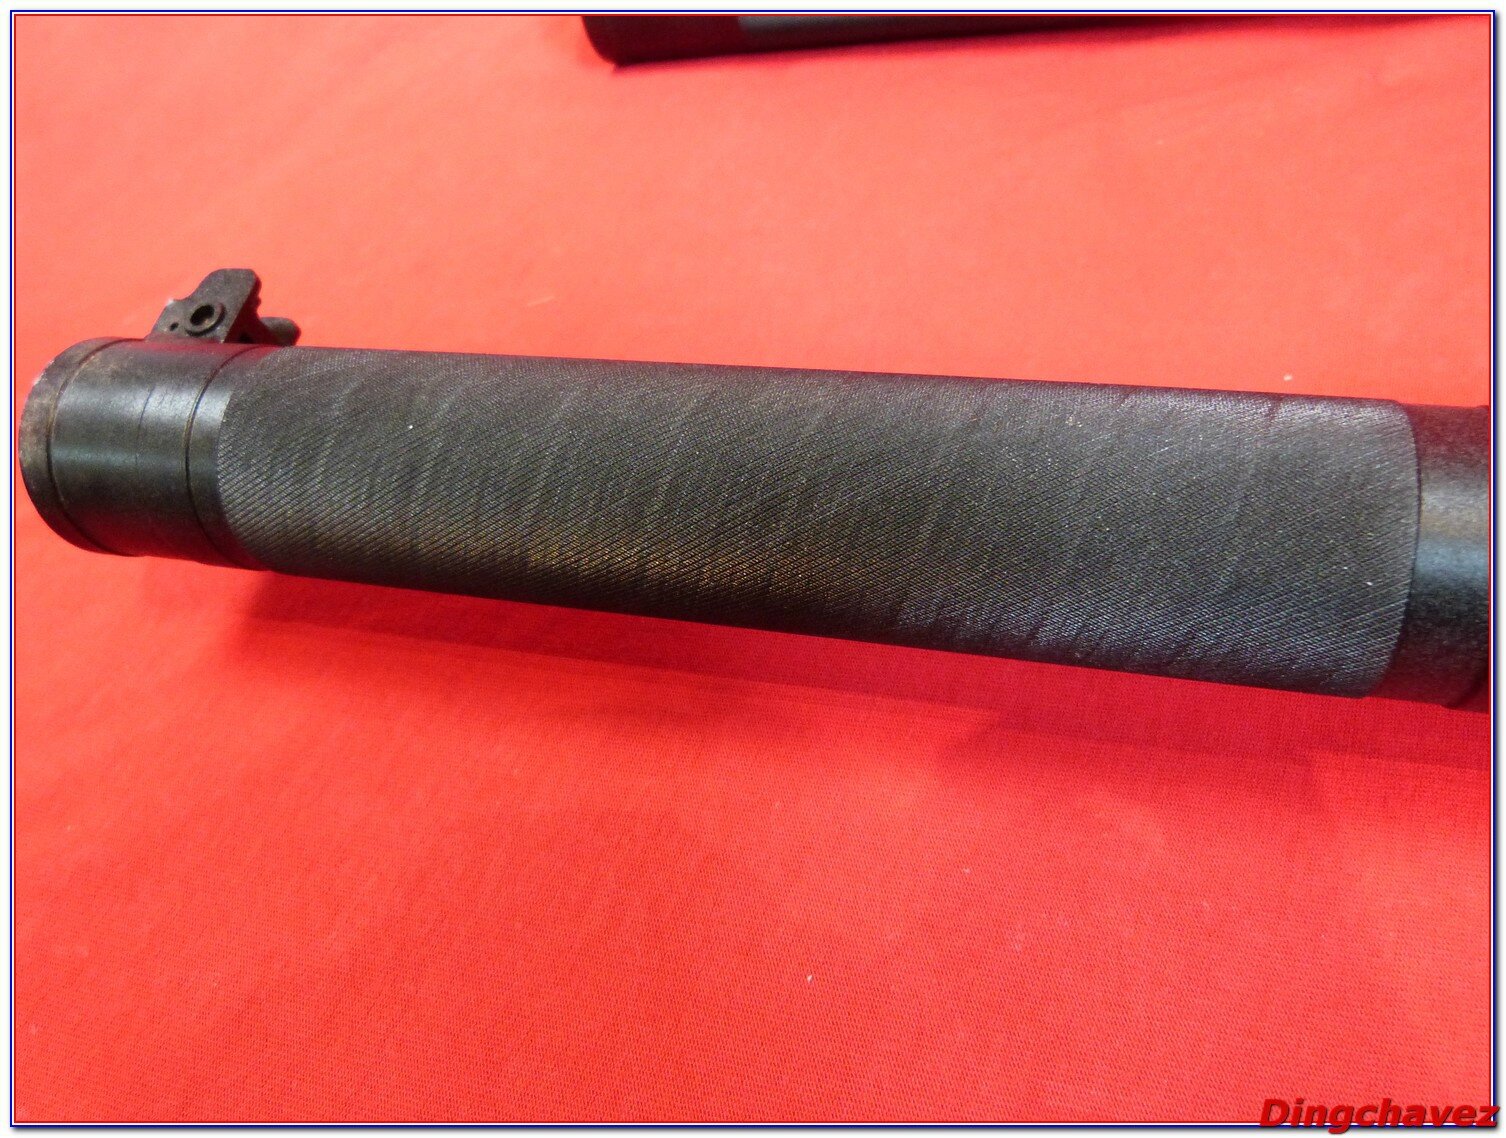
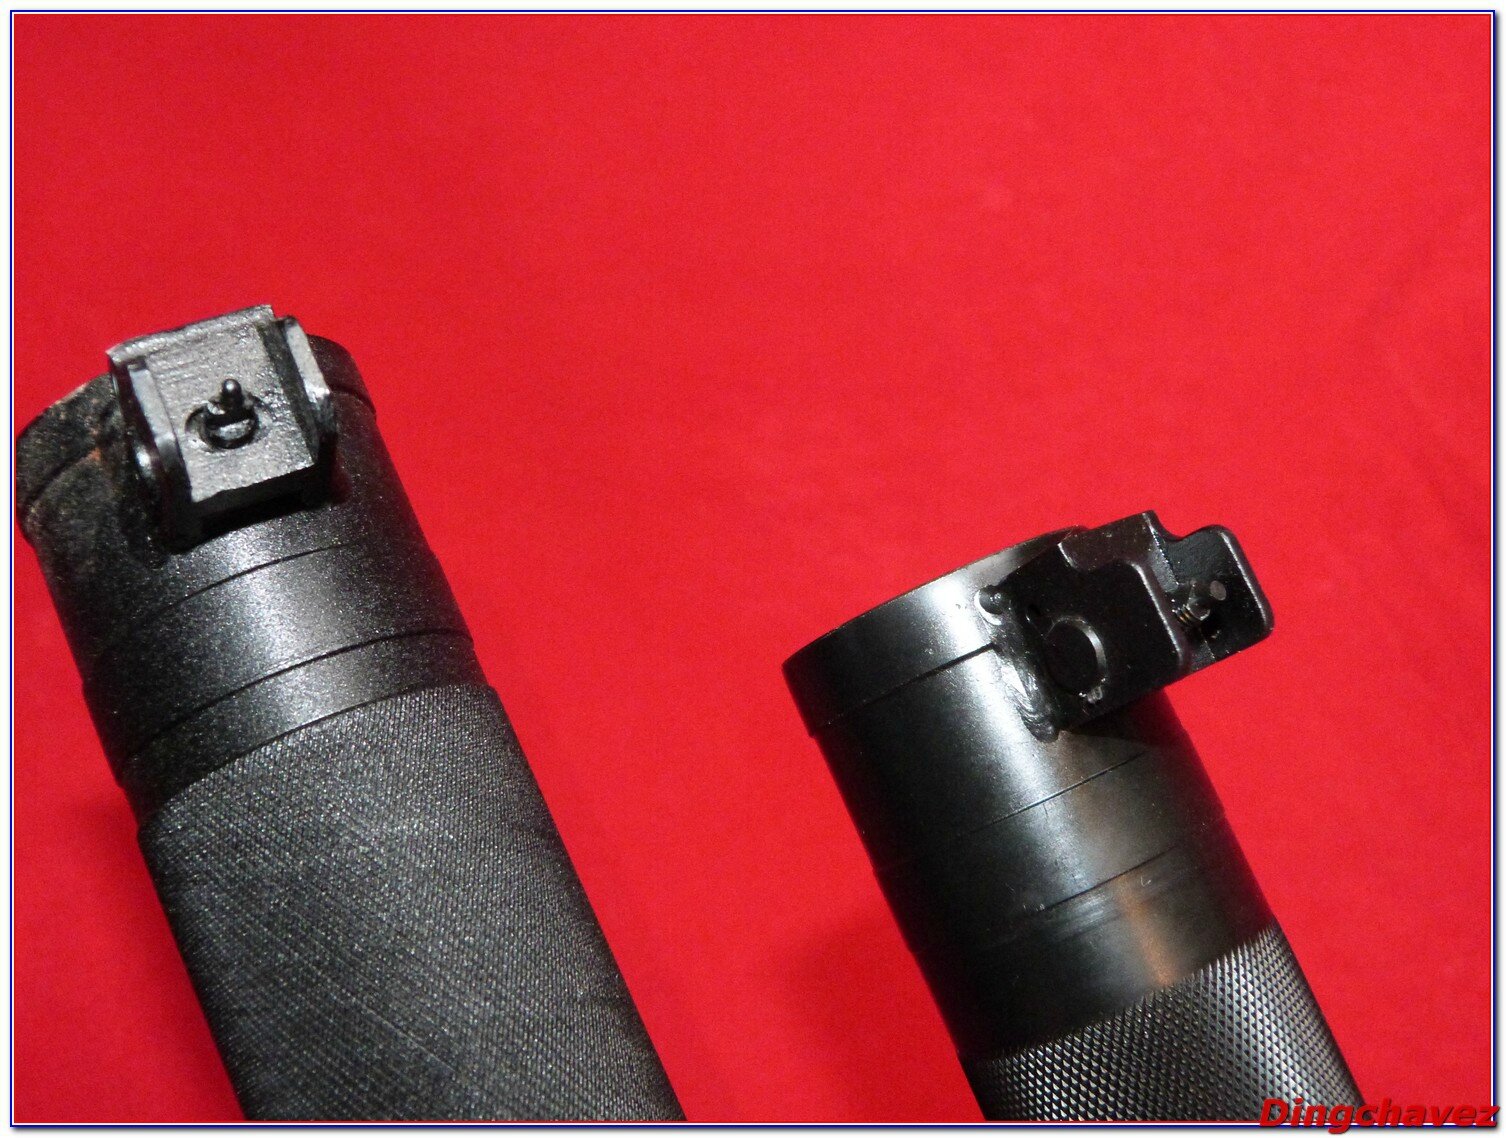
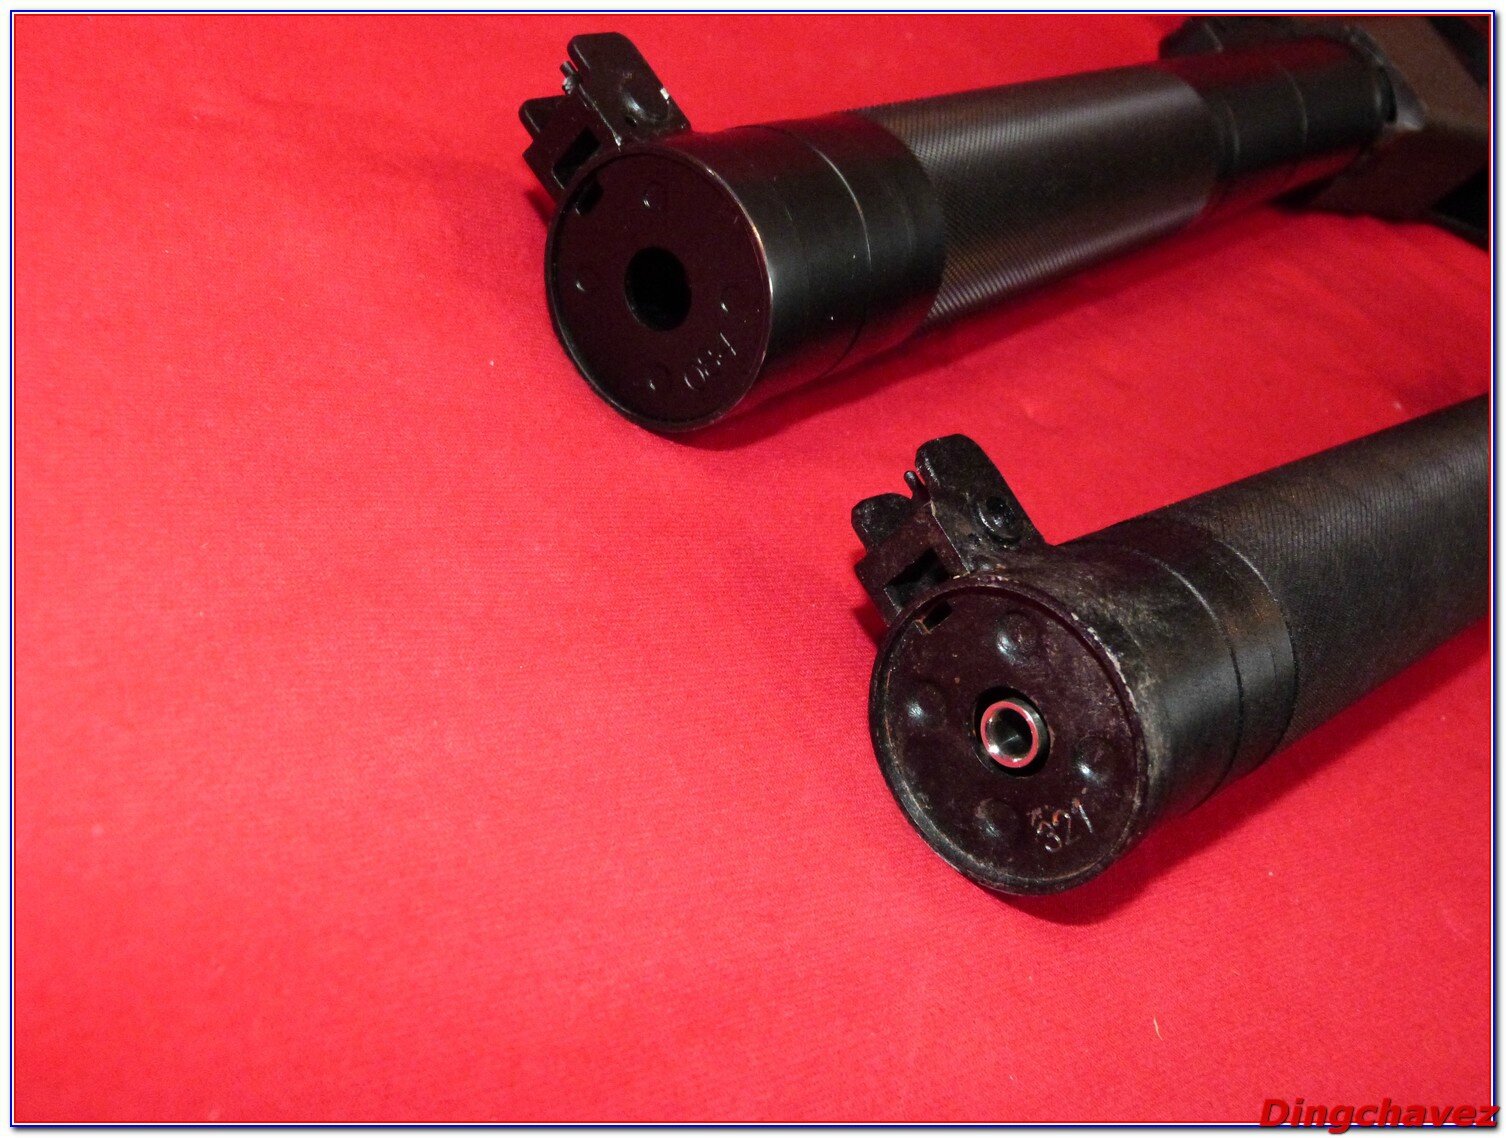
NPO, on voit bien l’aspect granuleux de l’acier.
NPO, we can see the grainy steel.

LCT, plus lisse.
LCT, smoother

LCT

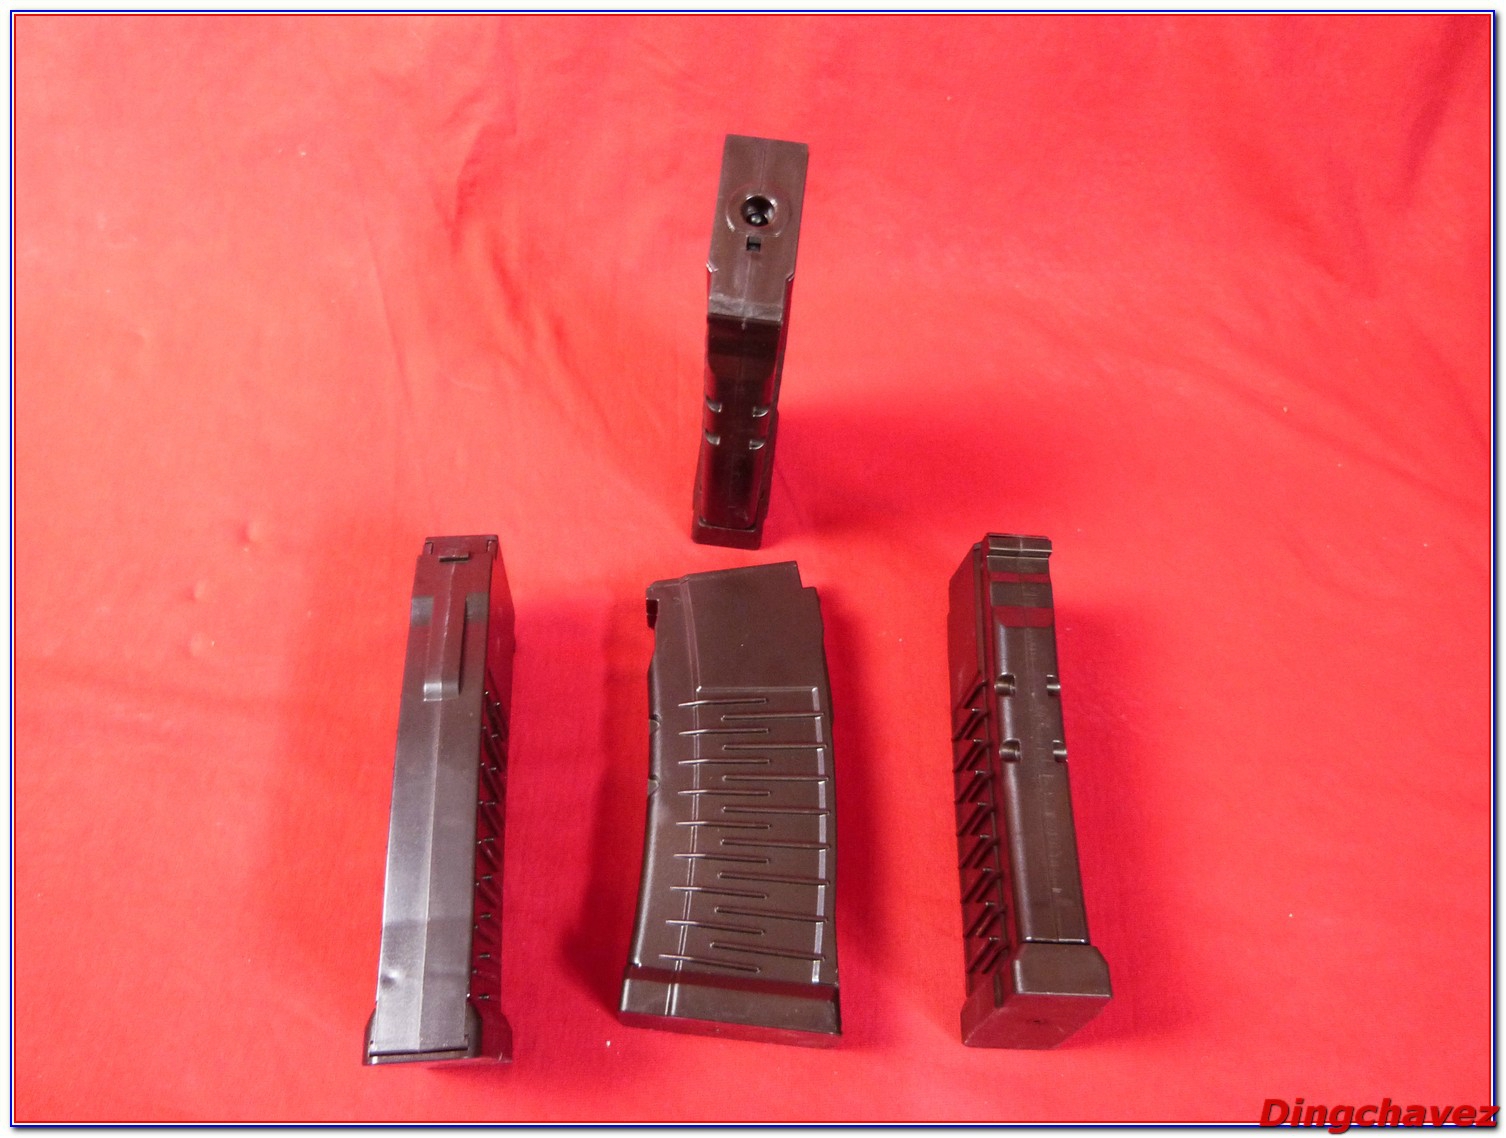
NPO, les chargeurs des deux marques ne sont pas compatibles.
NPO, the mags are not compatible
LCT à gauche
LCT left

LCT à gauche
LCT left
Chargeur NPO sur réplique LCT
NPO mag on LCT replica
Chargeur LCT sur réplique NPO
LCT mag on NPO replica
NPO, les soudures sont rustiques
NPO, with rustic welding
LCT, encore une fois plus lisse
LCT, once again smoother
NPO
LCT

NPO

LCT en haut, NPO en bas
LCT top, NPO bottom


Vous avez aimé cette review ? Vous souhaitez contribuer ? Merci pour votre soutien !
You liked this review ?You want to contribute? Thanks for your support !
Posté le 25 avril 2014 par Dingchavez